Service Overview
1. Overview
After completing the tiling process, GISBox supports publishing the tiled data as services, which also entails distribution functionality. These services can include imagery services (such as WMS, WMTS), terrain services (like WMTS-Terrain), or 3D model services (e.g., 3D Tiles). The generated service addresses can be utilized in GIS engines like Cesium or Cesium for Unreal, and they can also be integrated into platforms for building digital twin projects.
2. Add Service
There are two ways to add services:
One is to stream as a service at the same time as tiling;
The other one is to manually add tile data and then generate the corresponding service.
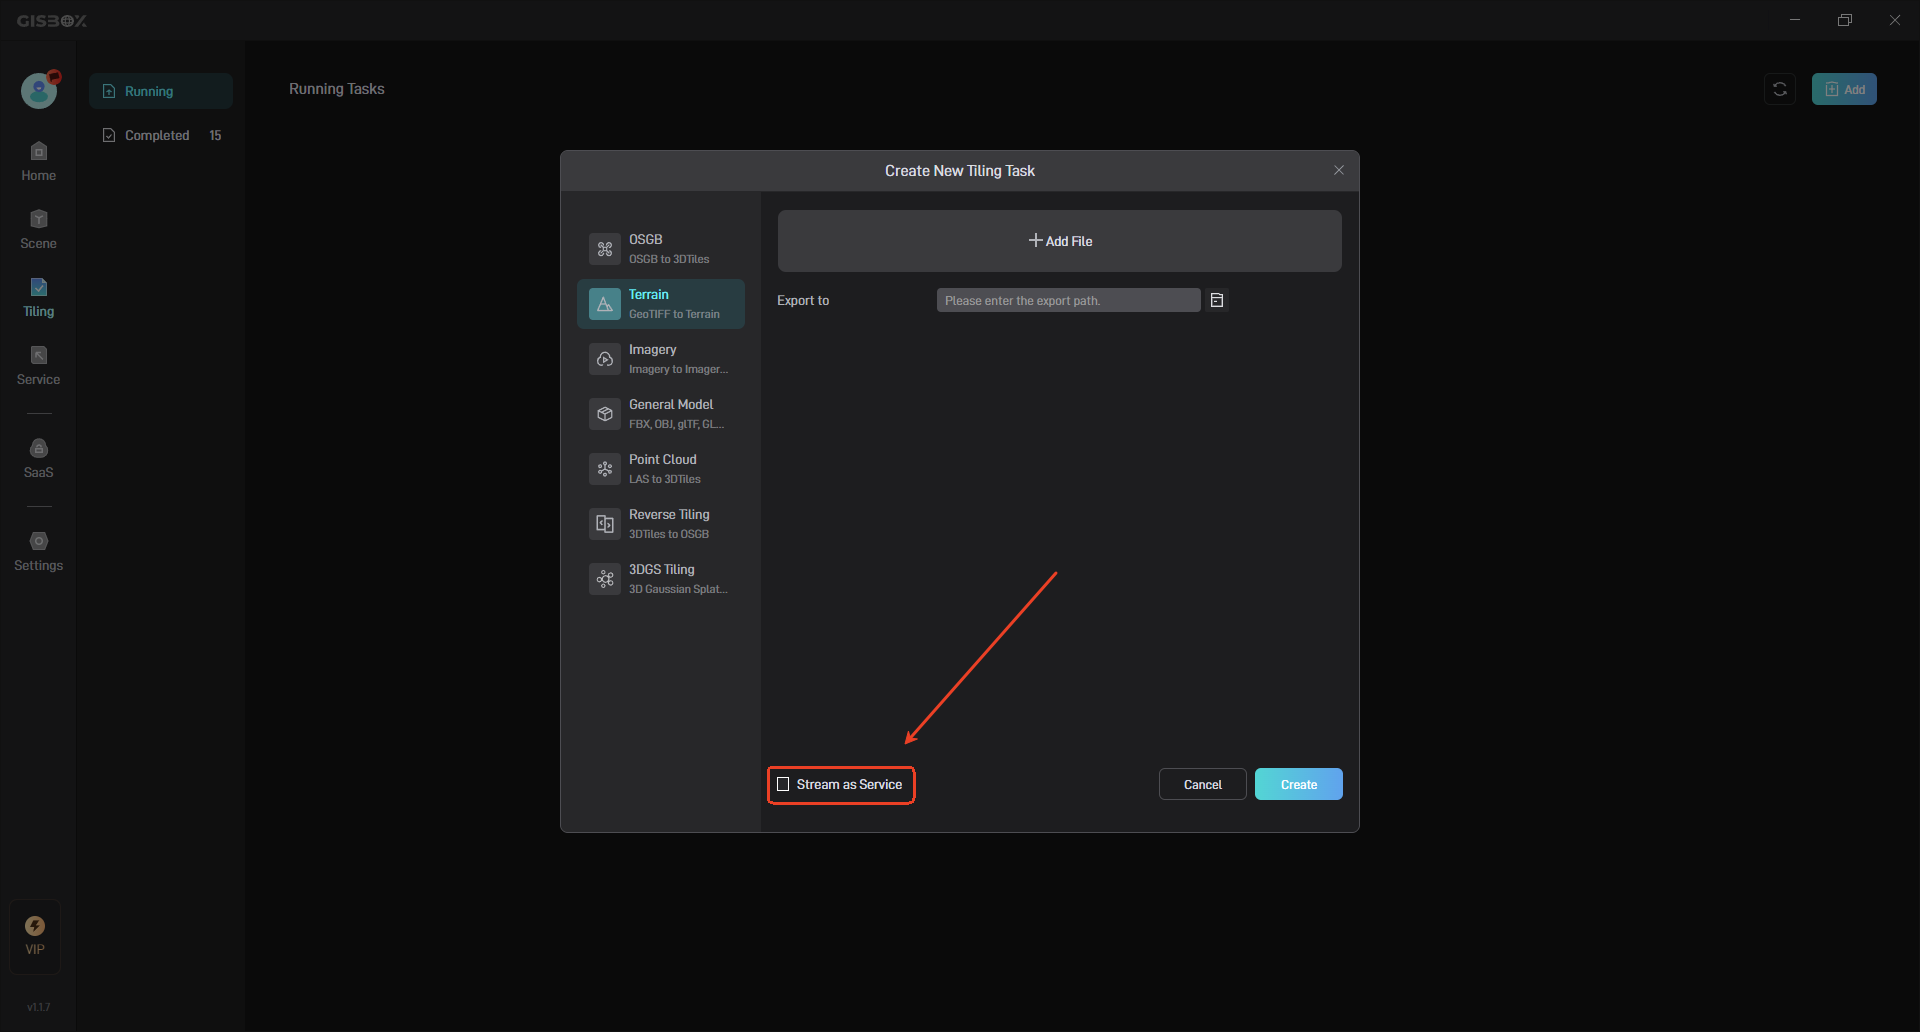
2.1 Stream as Service
When tiling a file, you can publish it as a service at the same time. Here we use “Imagery Tiling” for demonstration:
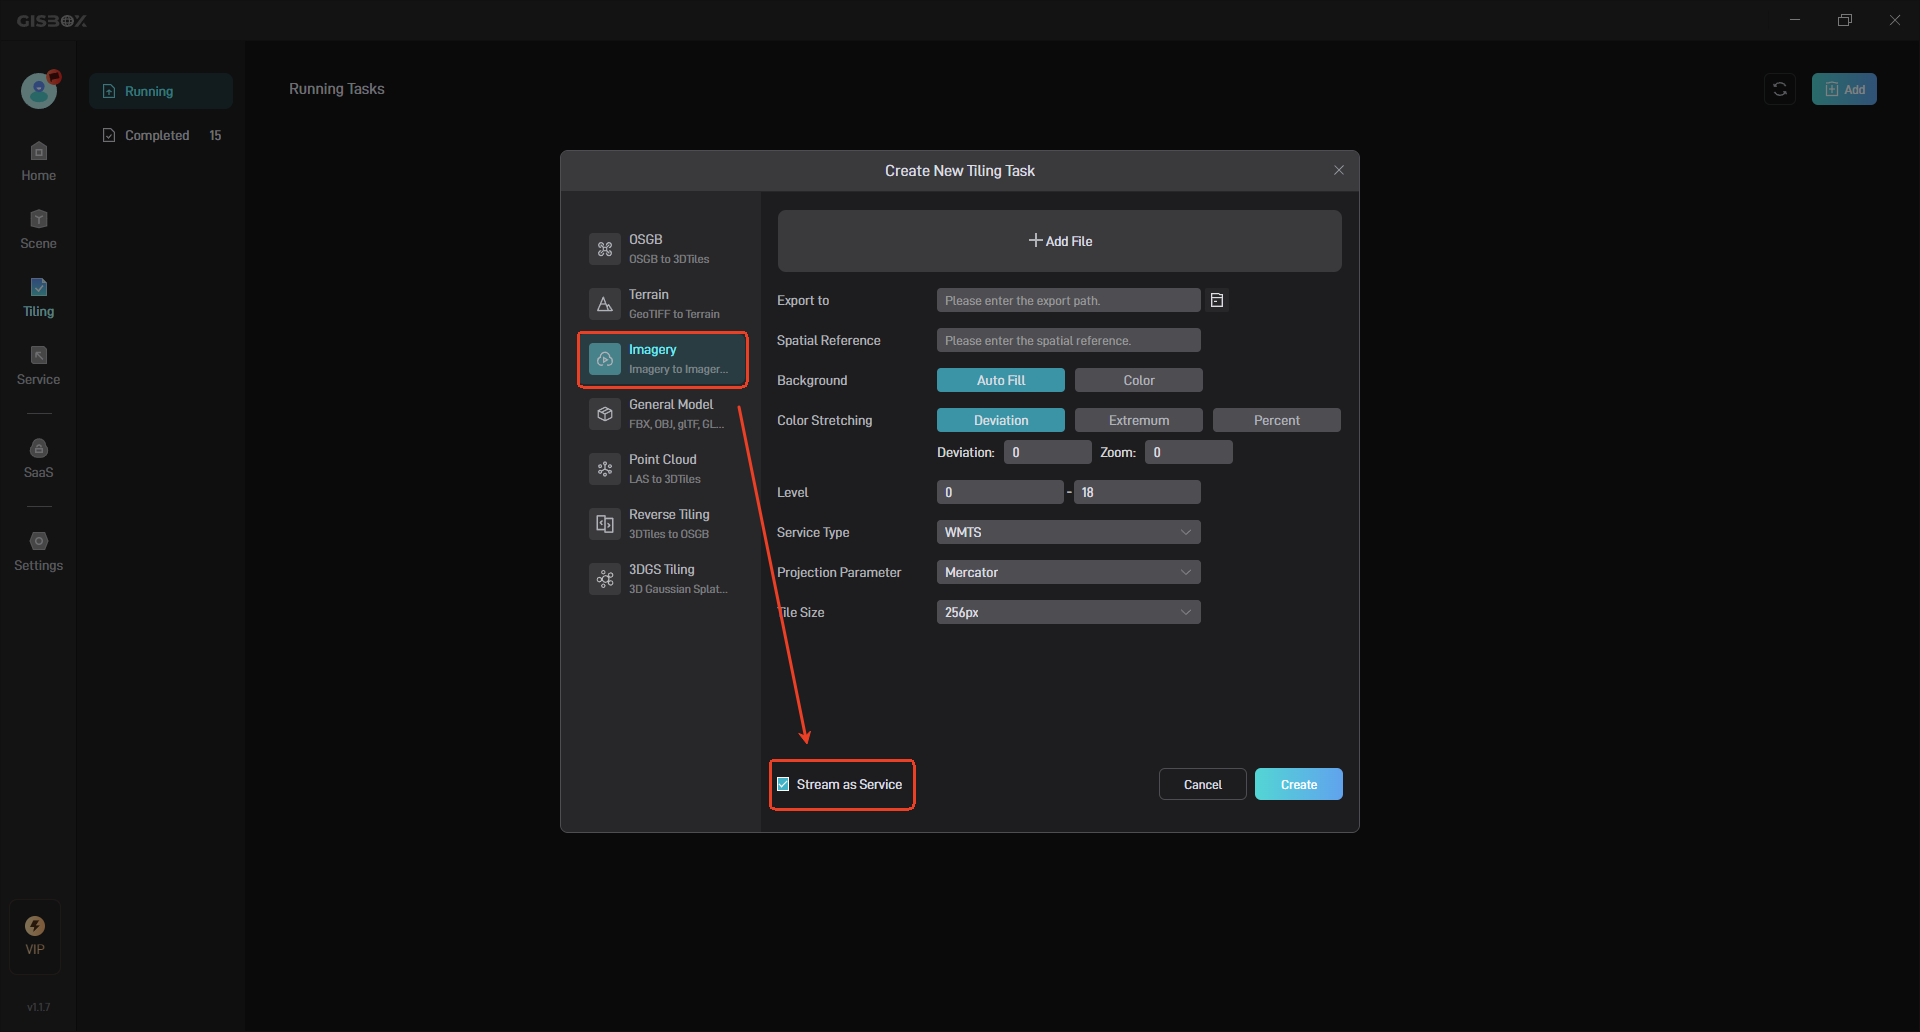
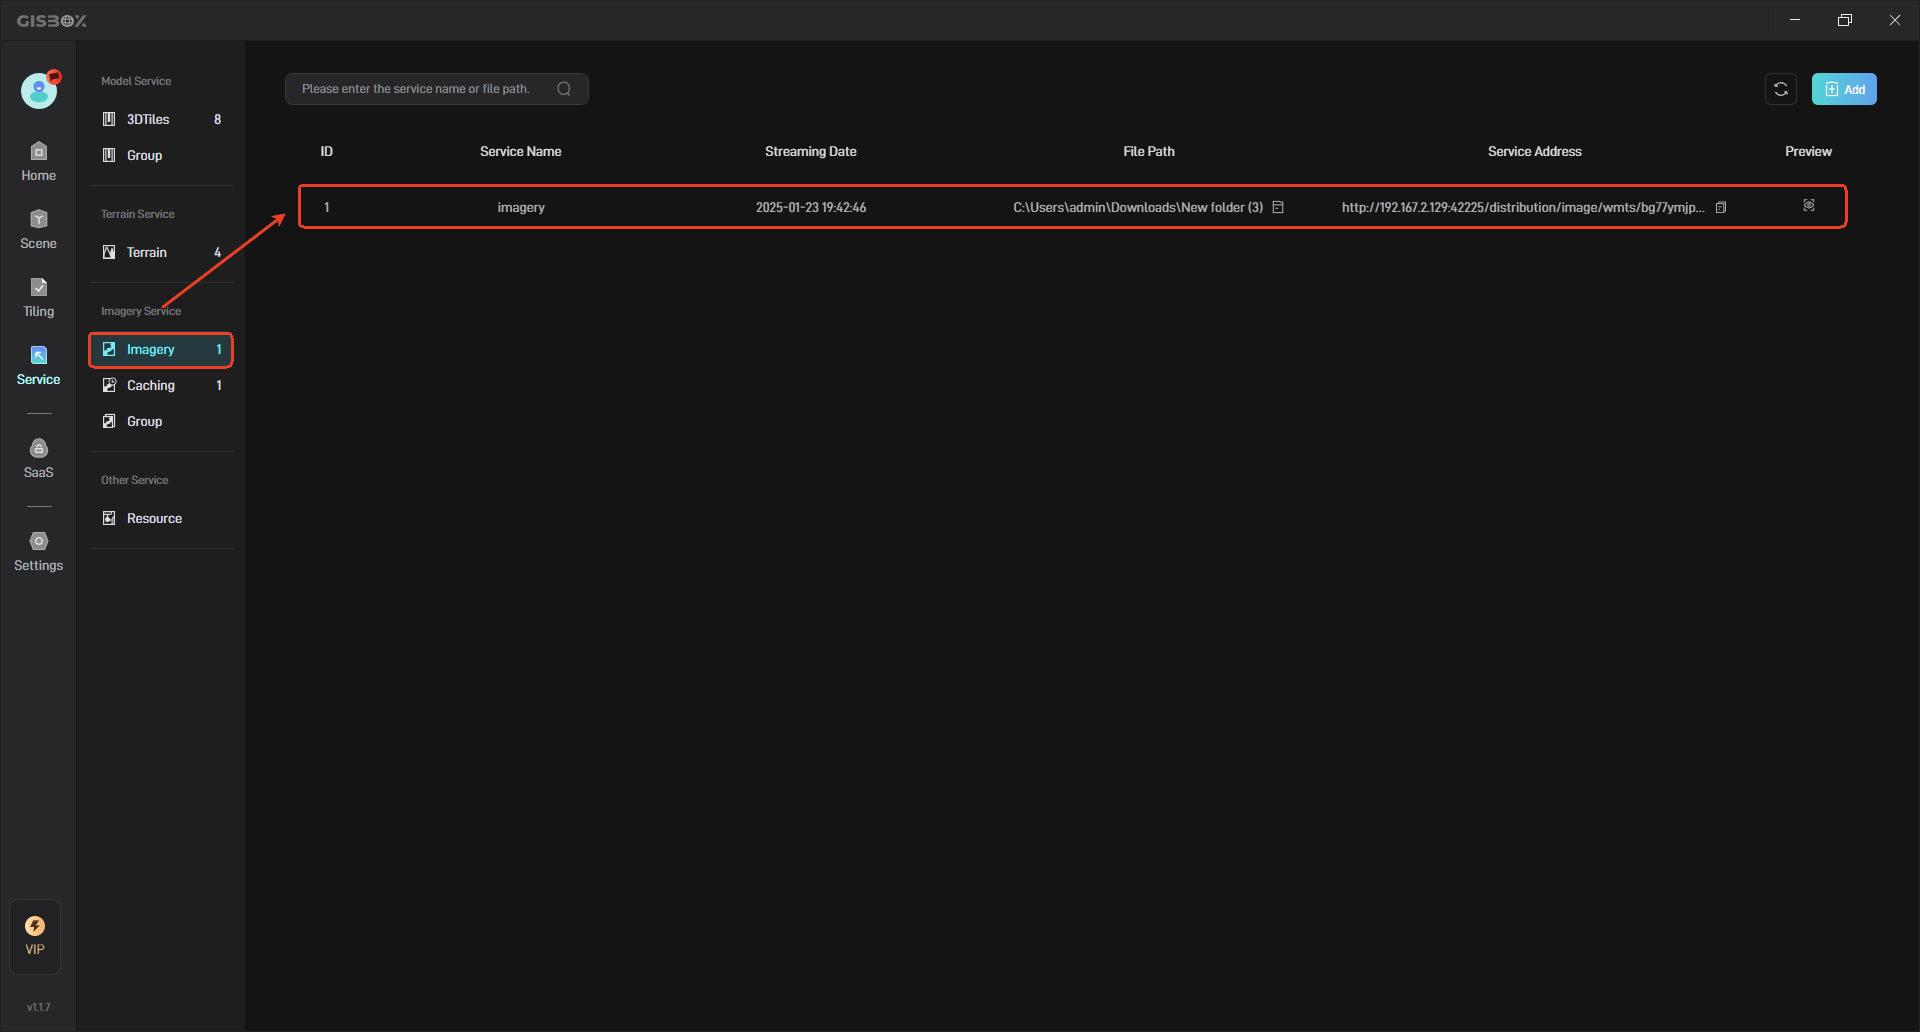
Click “Imagery” in the Service to see the automatically generated image service, as shown below:
2.2 Add Manually
When tiling a file, if the “Stream as a Service” setting is not checked, you need to add the distribution manually.
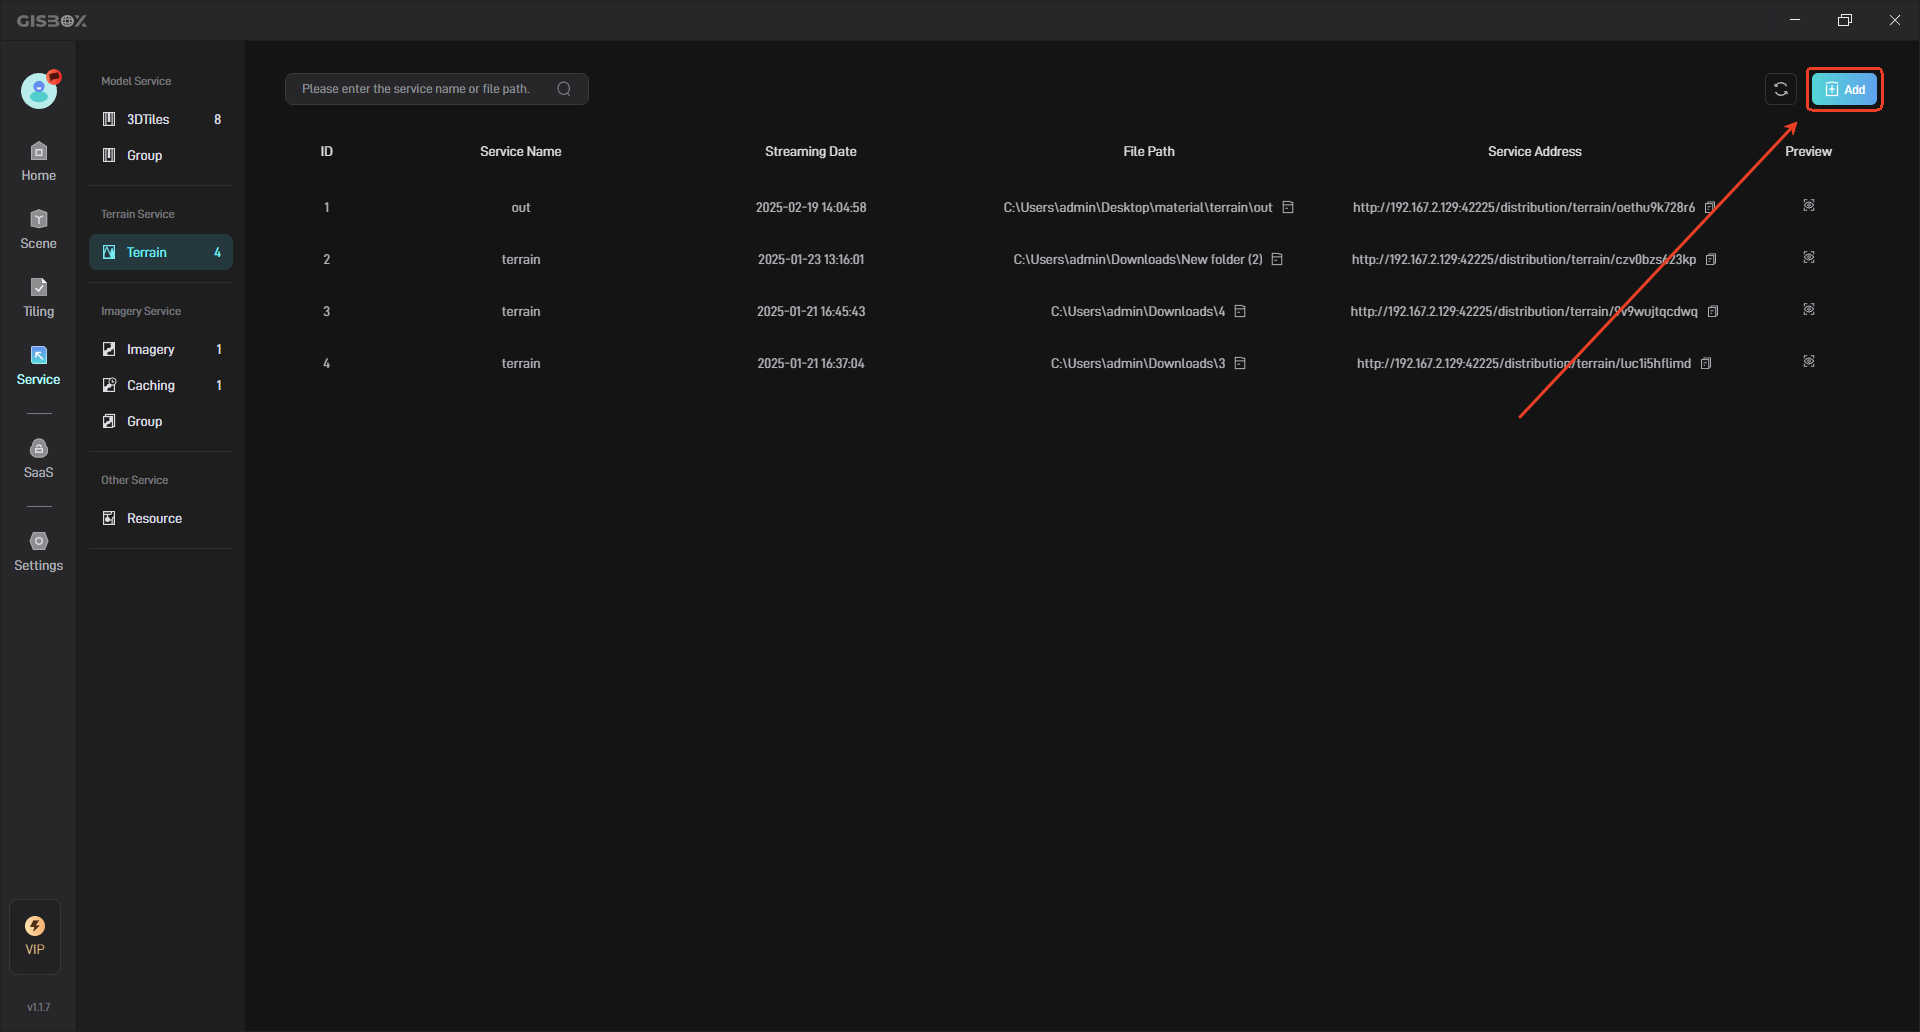
Click to switch to the service interface, and select the data type on the left. Here, we will use “Terrain” as an example for demonstration, as shown in the figure below:

Then click the “Add” button on the right, as shown below:
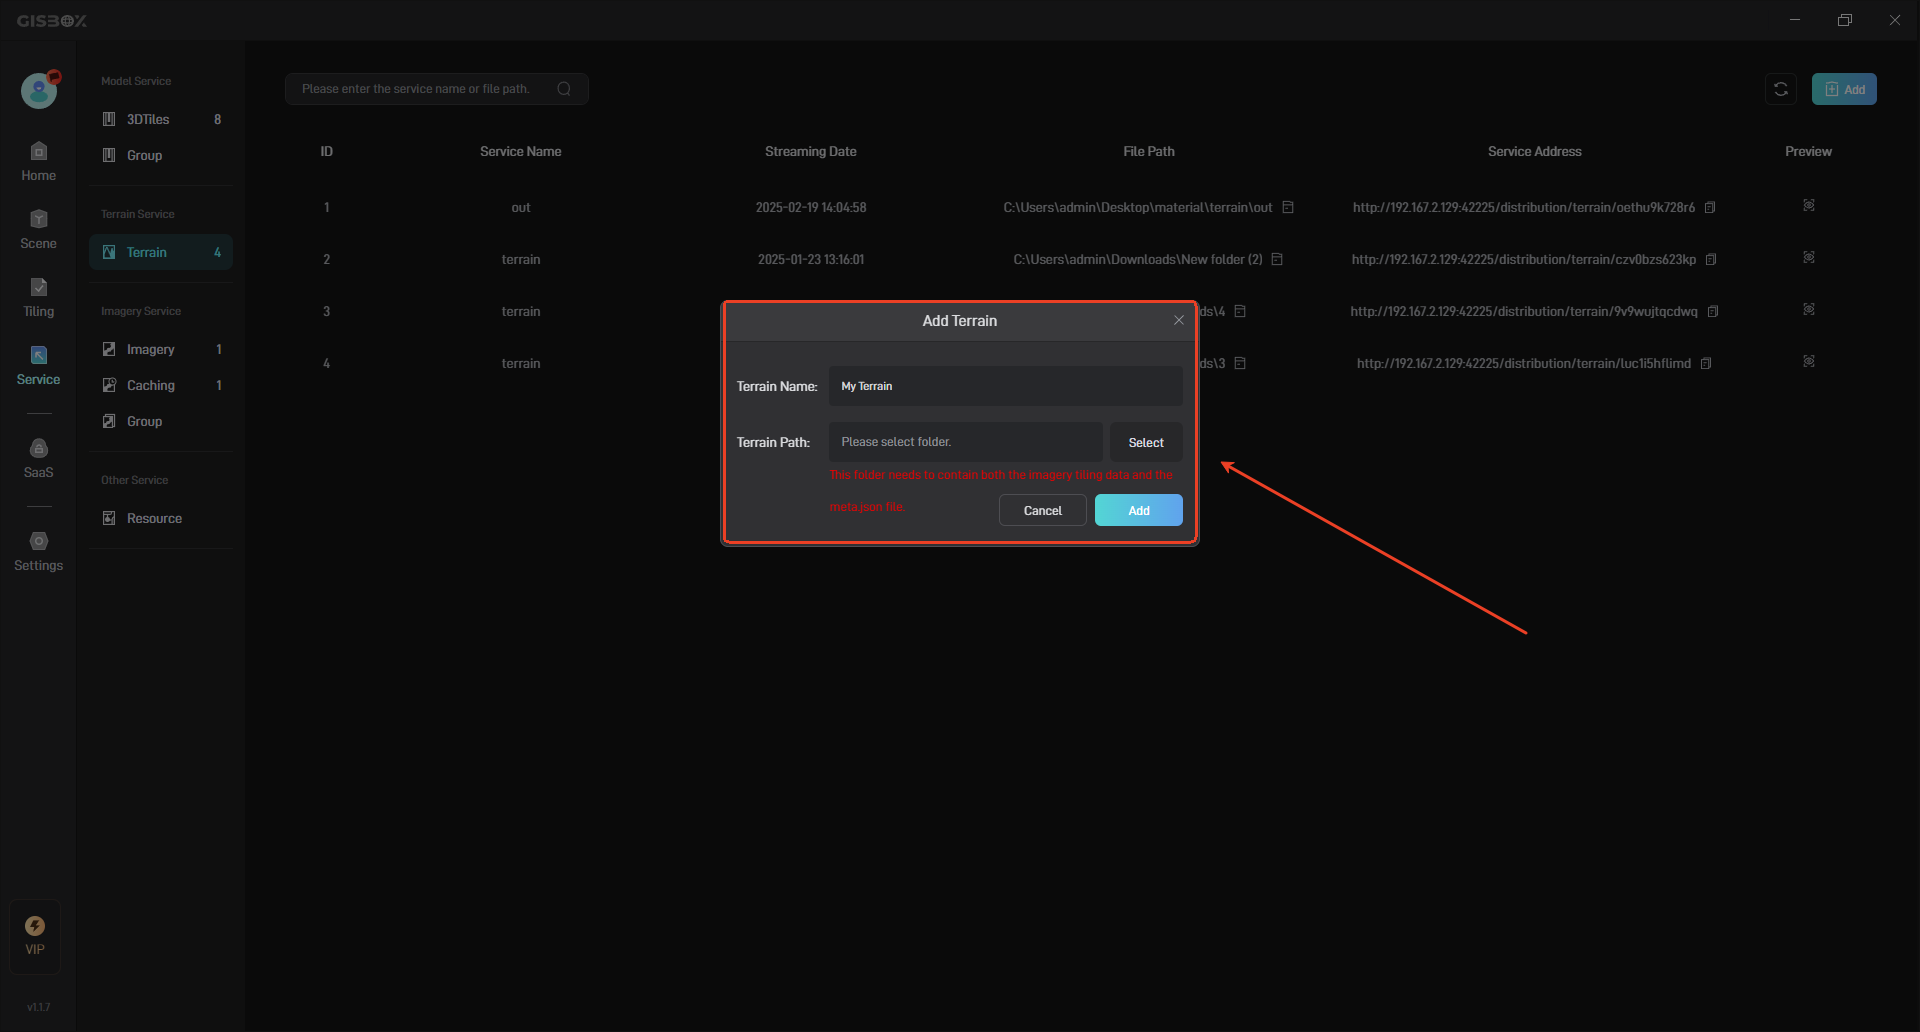
In the pop-up “Add Terrain”, select the local terrain path, as shown in the following figure:
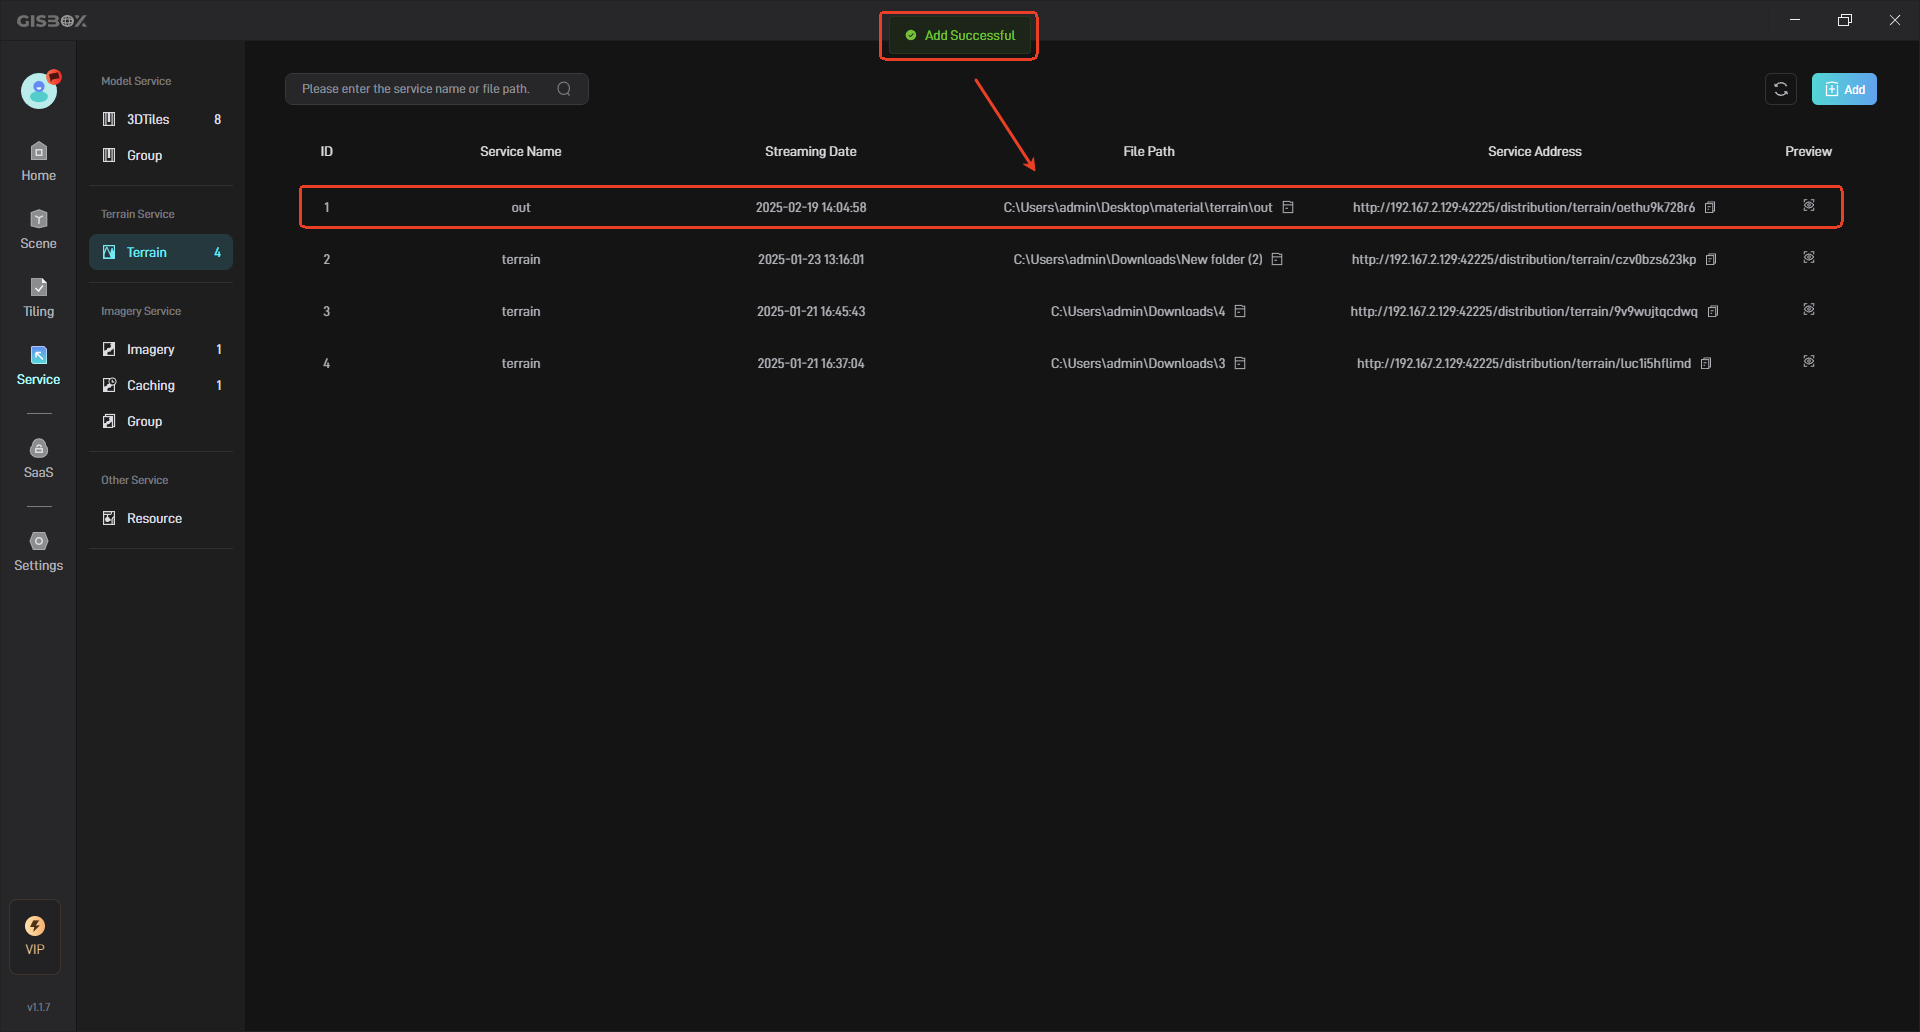
Click the “Add” button to complete the addition, and a regular terrain service is generated.
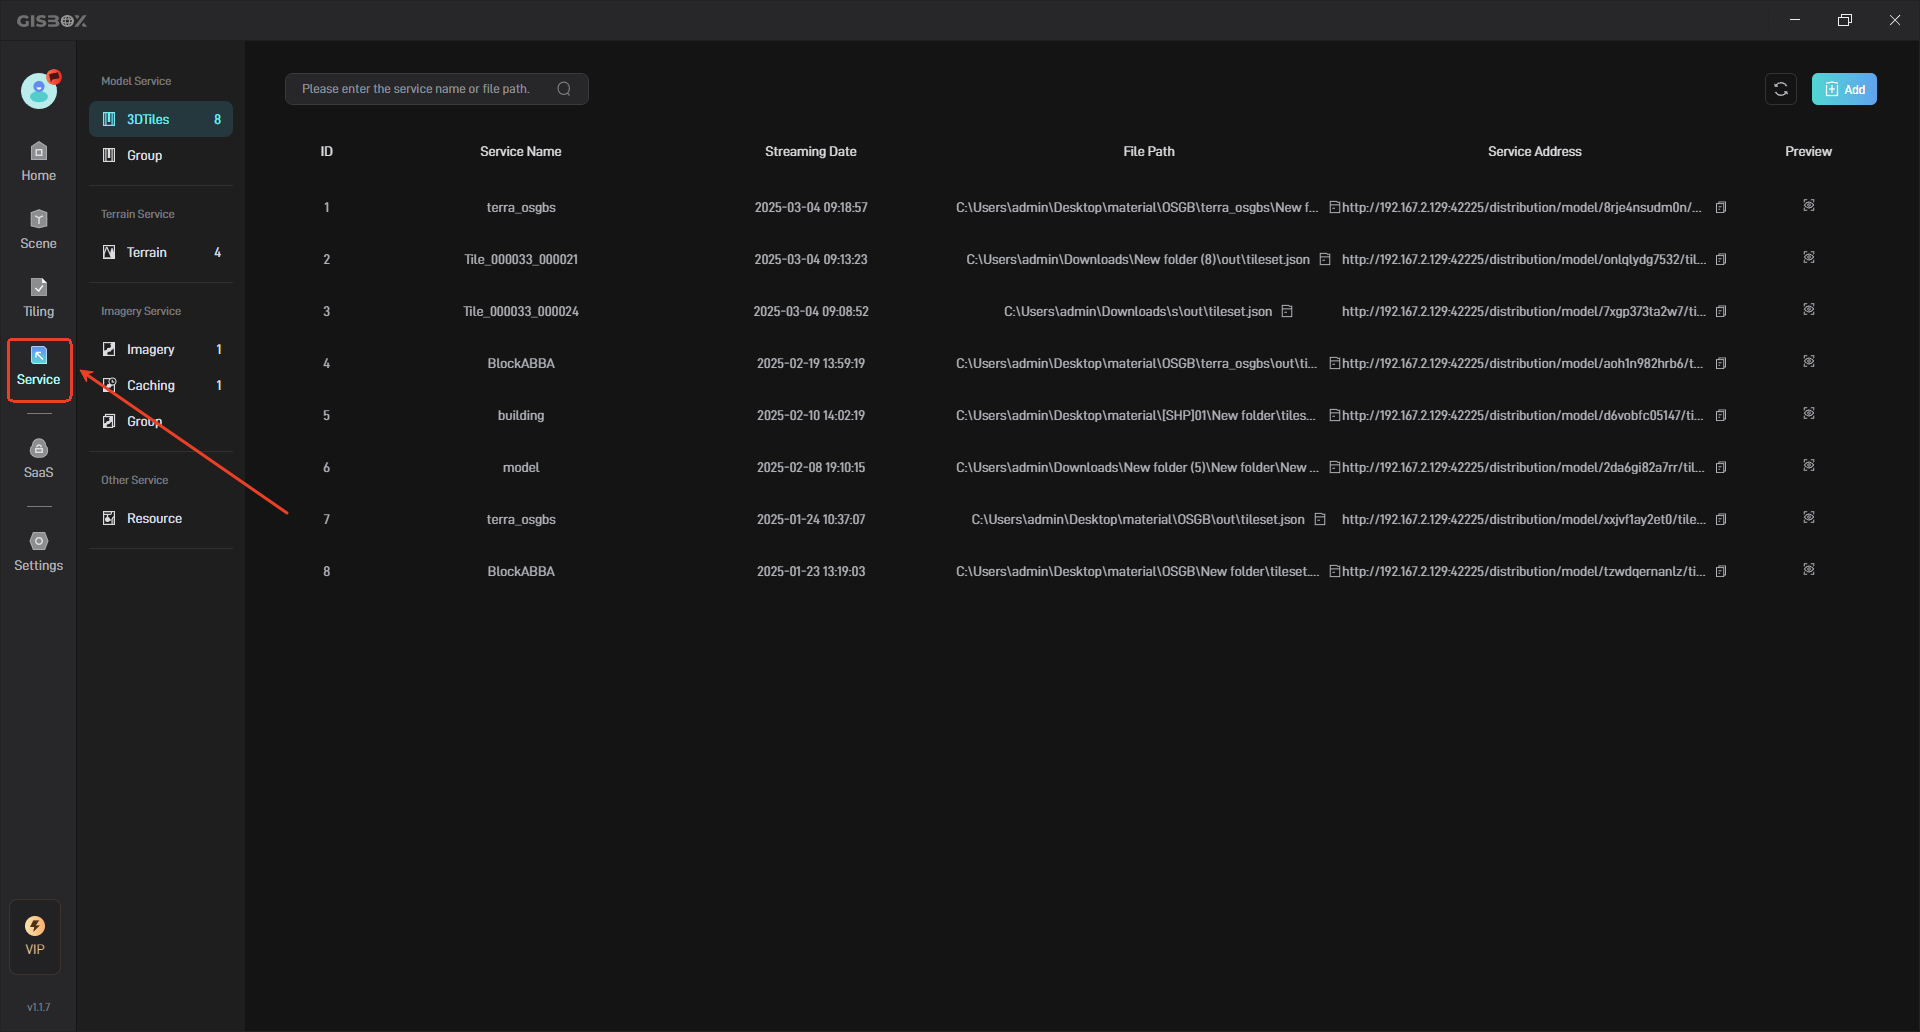
3. Manage Service
3.1 Rename Service
Move the mouse to the model service that needs to be renamed, right click, and then click “Edit” to rename the model service.

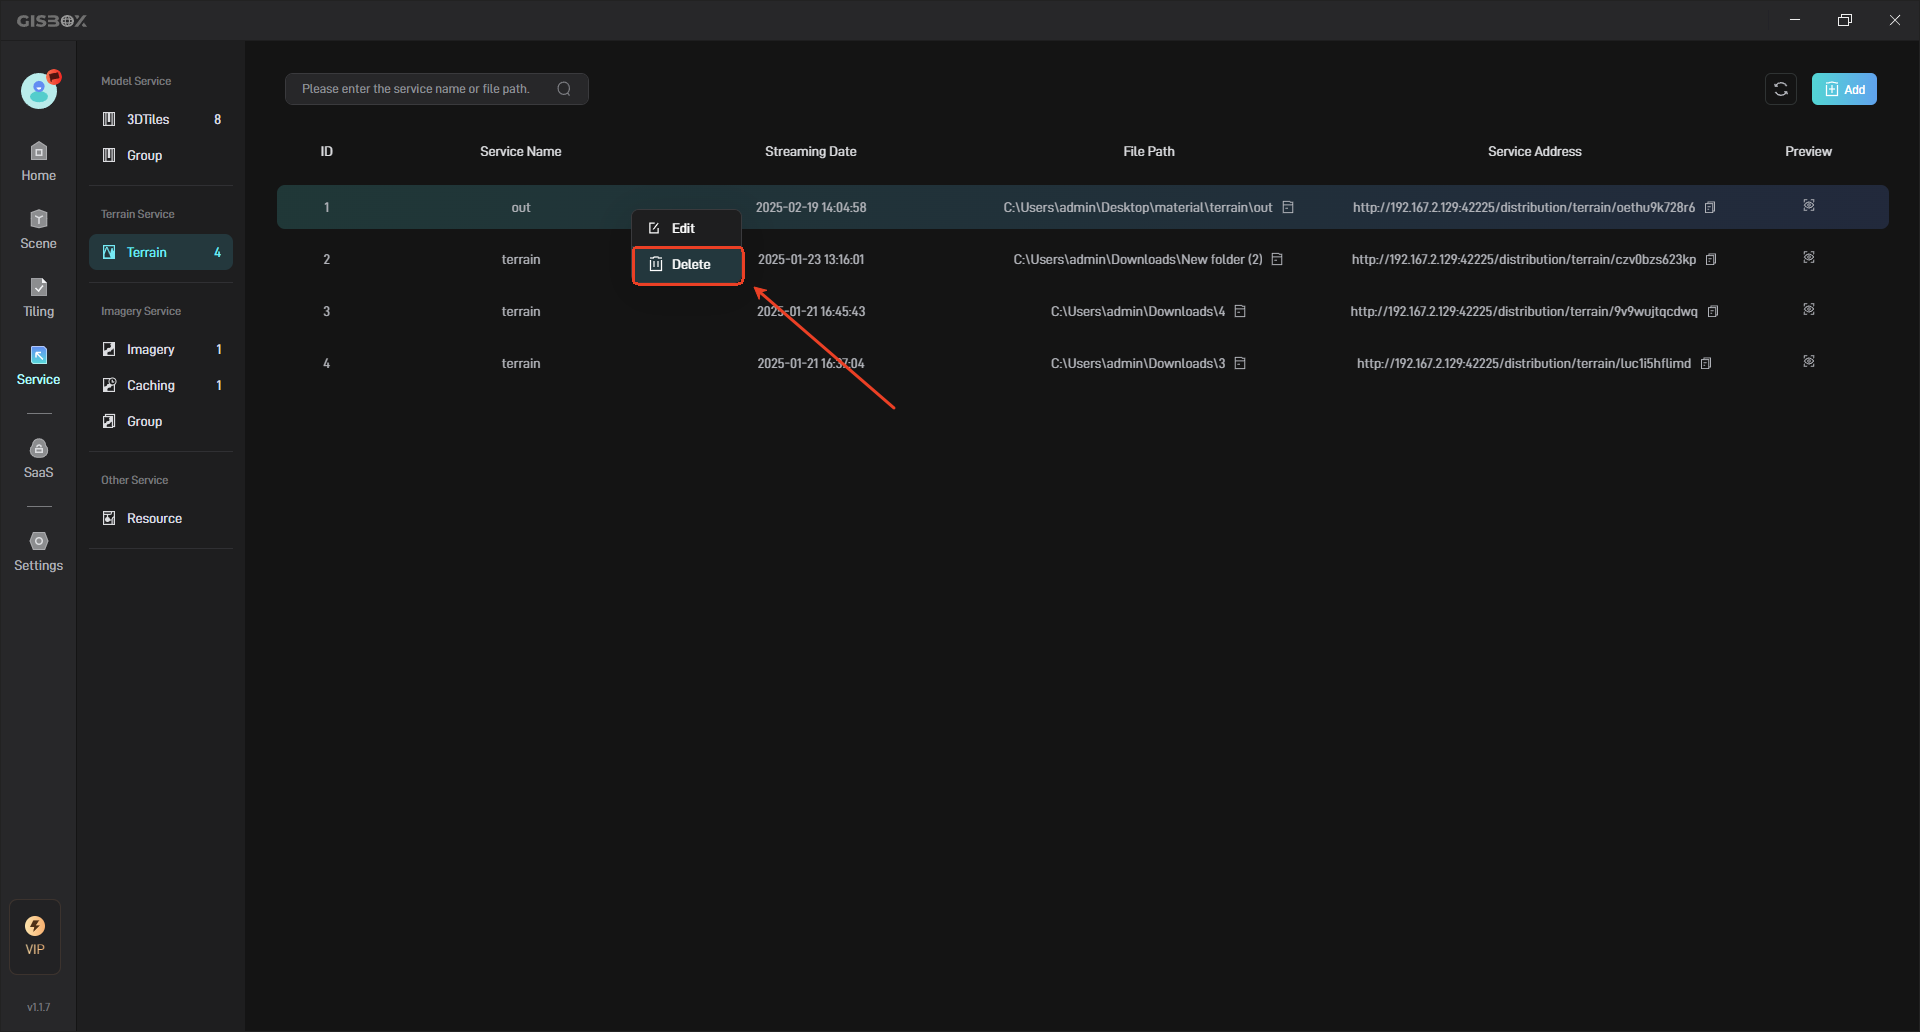
3.2 Delete Service
Check the service you want to delete, and then click the “Delete” button on the left to delete the selected service.
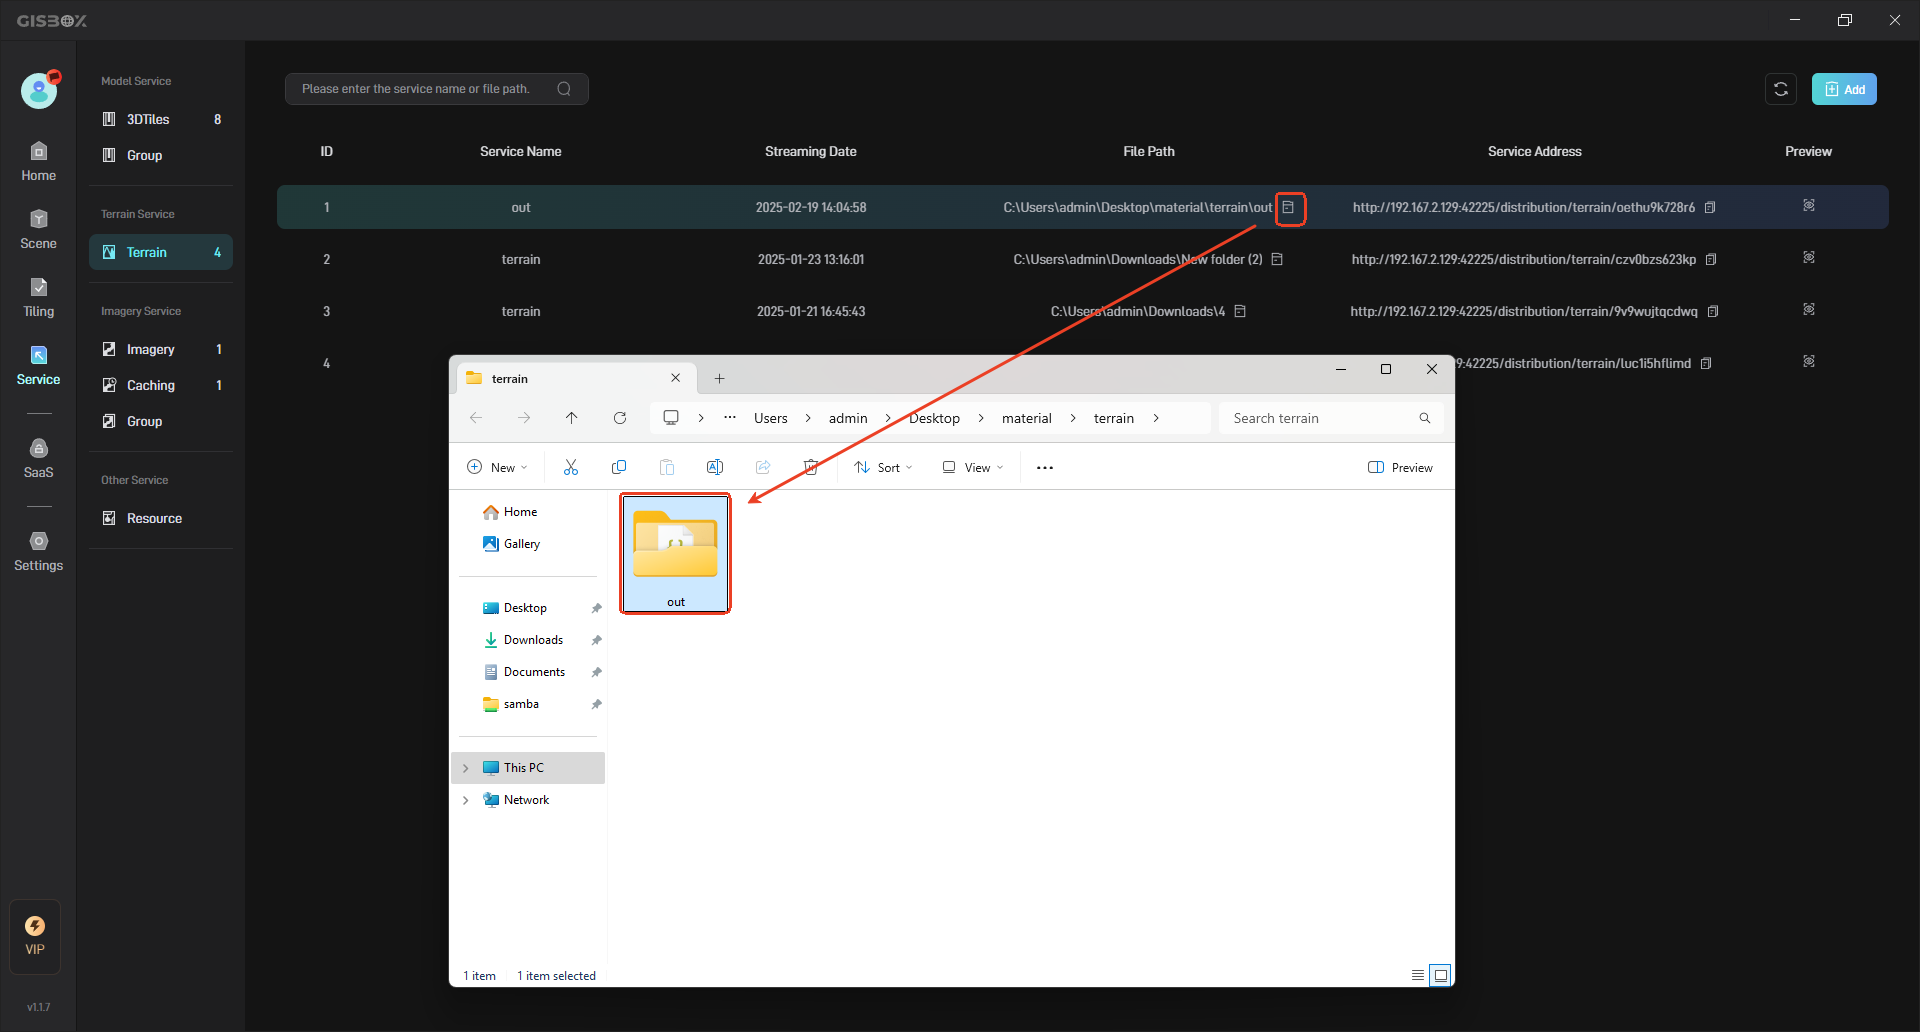
3.3 Open Folder
Click the “Folder” button to view the local path of the slice, as shown below:
3.4 Copy
Click the “Copy” button to copy the service address, as shown below:

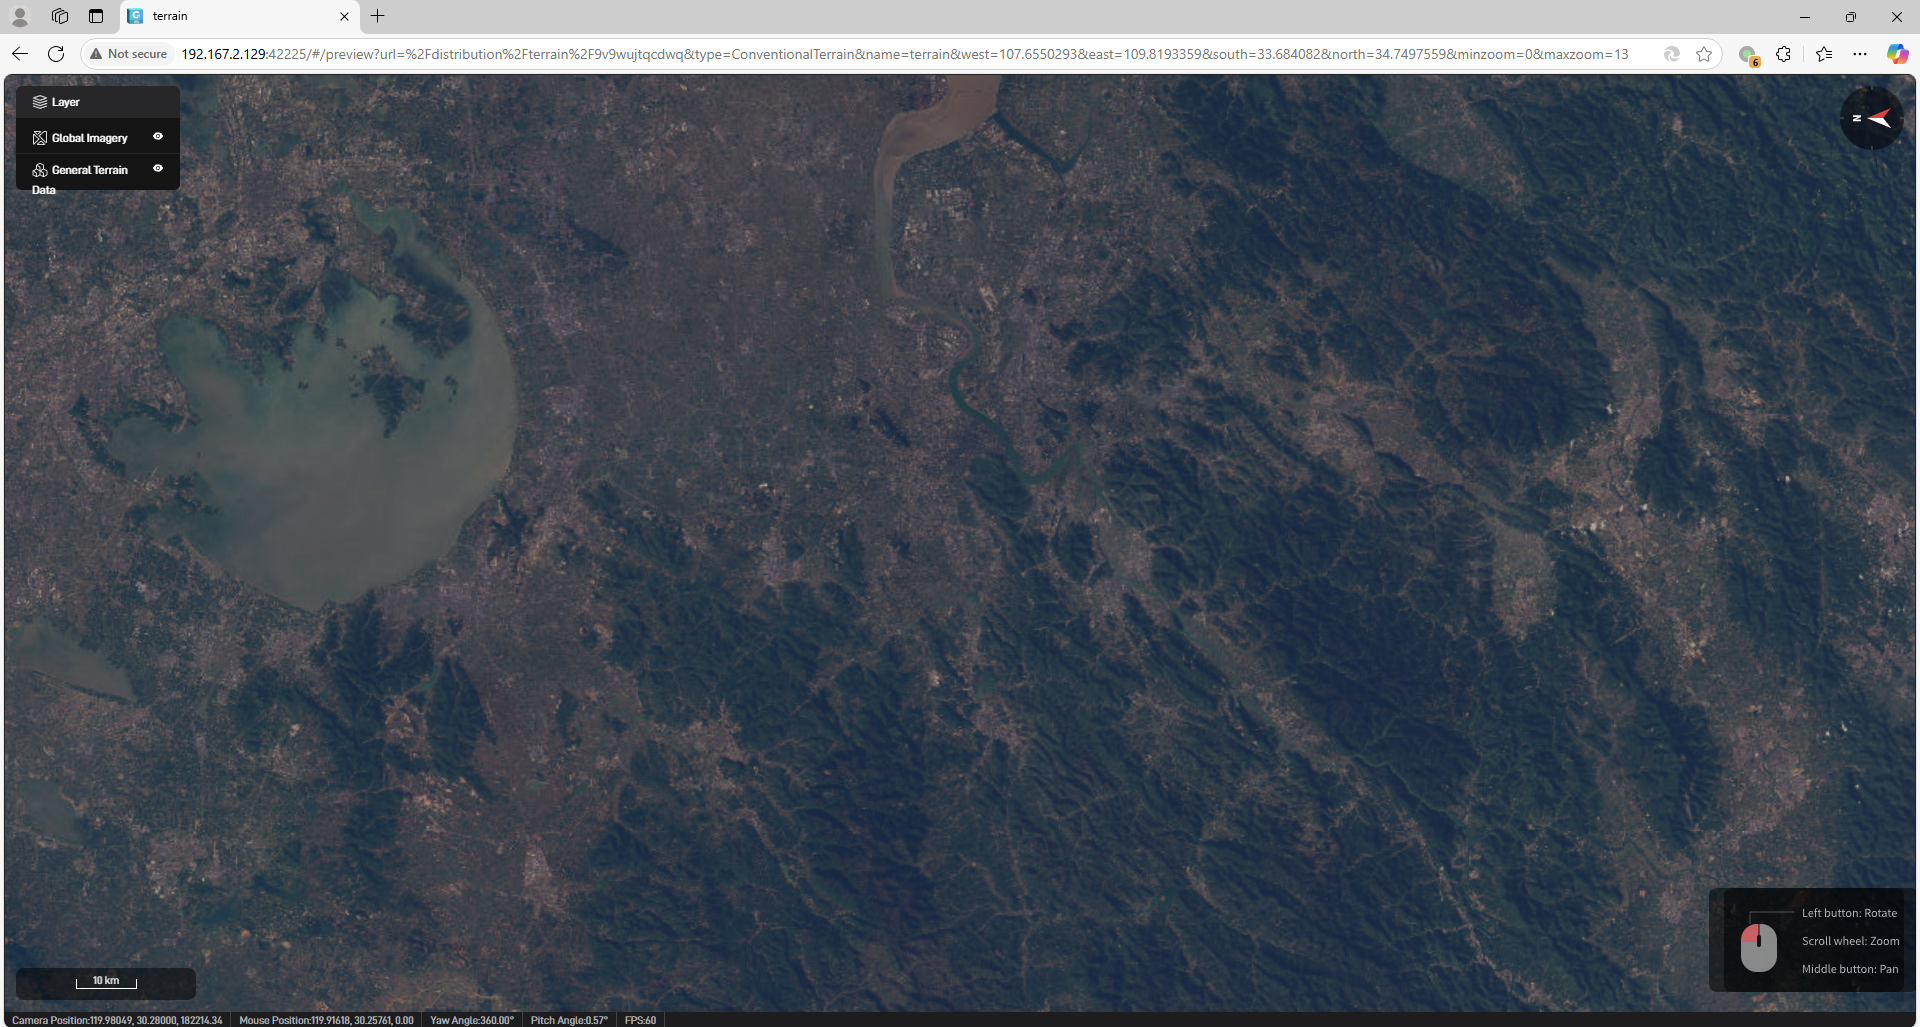
2.4 Preview
Click the “Preview” button to open and view it in the browser, as shown below: