How to convert GeoTIFF format to Cesium’s ImageryProvider for loading? (Imagery Tiling)
In GISBox, we provide you with a one-stop conversion method for various GIS file formats. You only need to import local GIS files and tile them, and then distribute them to major GIS platforms or digital twin project building platforms.
Next, we will take the conversion of GeoTIFF format into Cesium’s ImageryProvider as an example to introduce the steps for setting up “imagery tiling”.
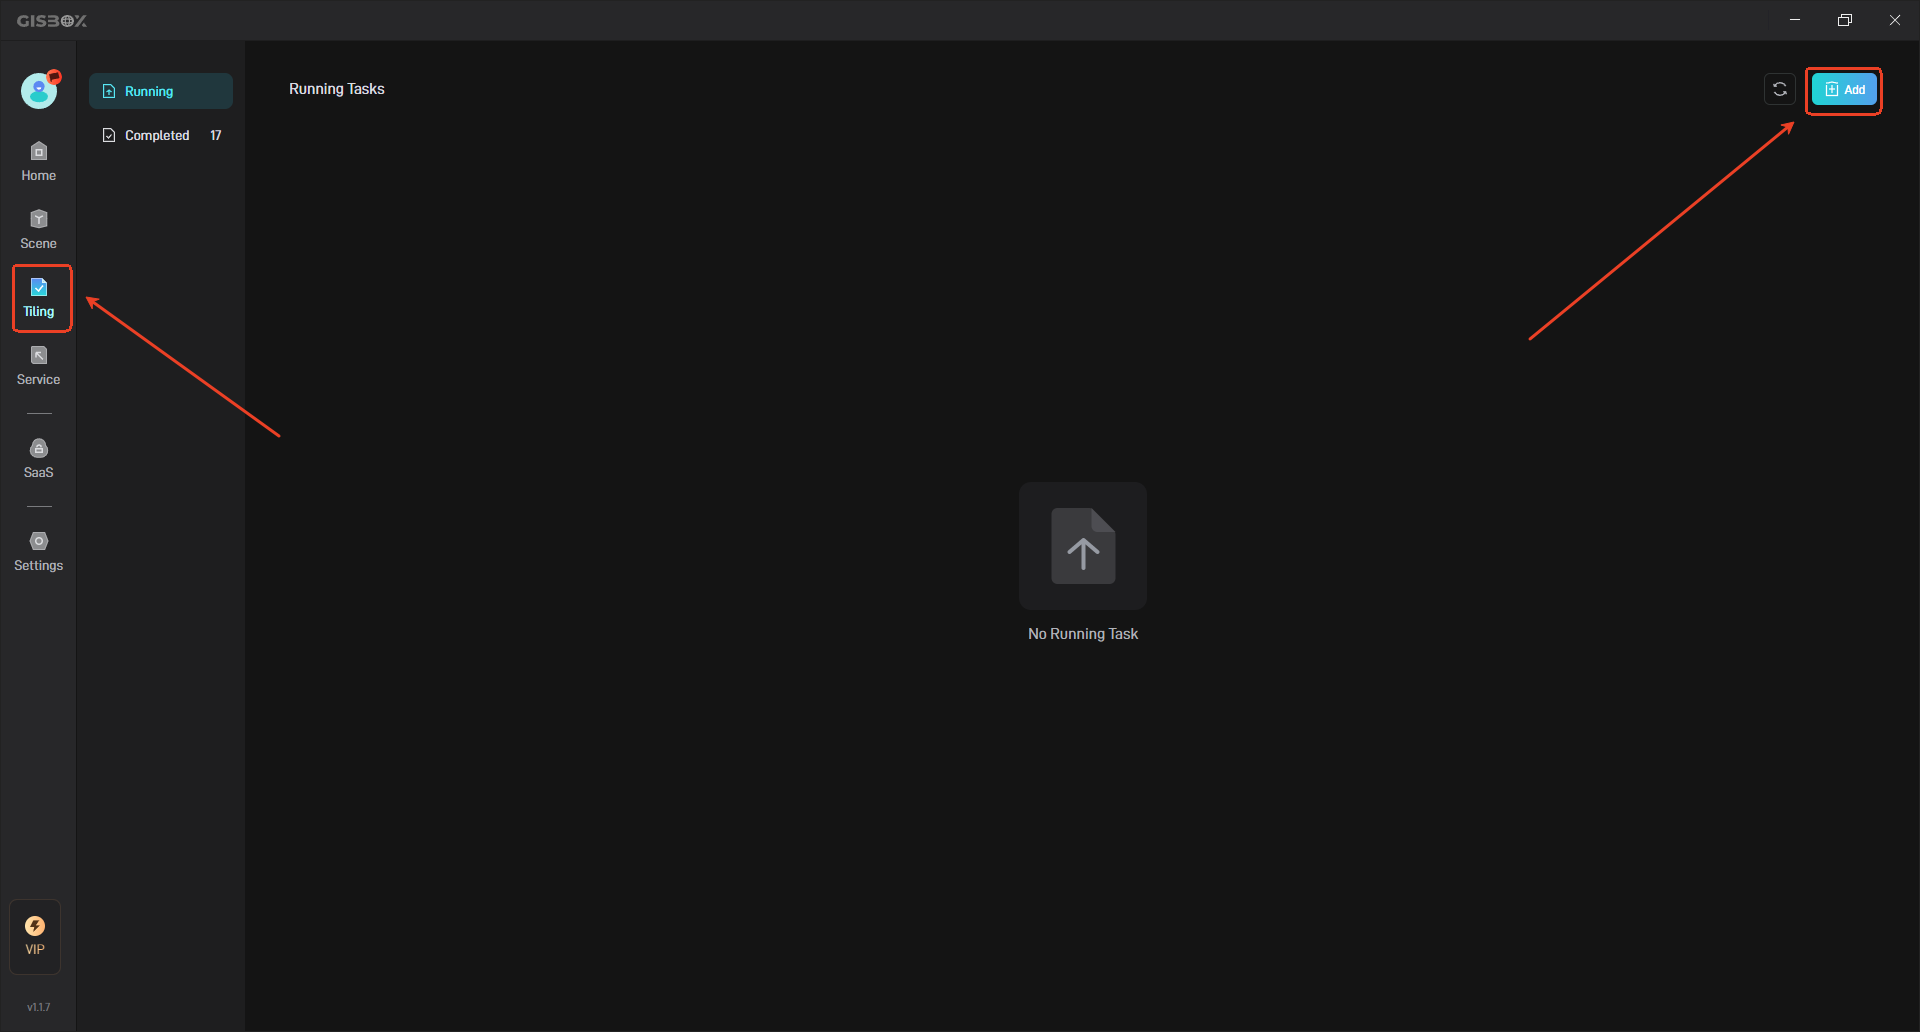
1. Create a new tiling task
Click the “Add” button in the “Tiling” option on the left to open the settings for creating a new tiling task.
Switch to “Imagery Tiling”, as shown below:
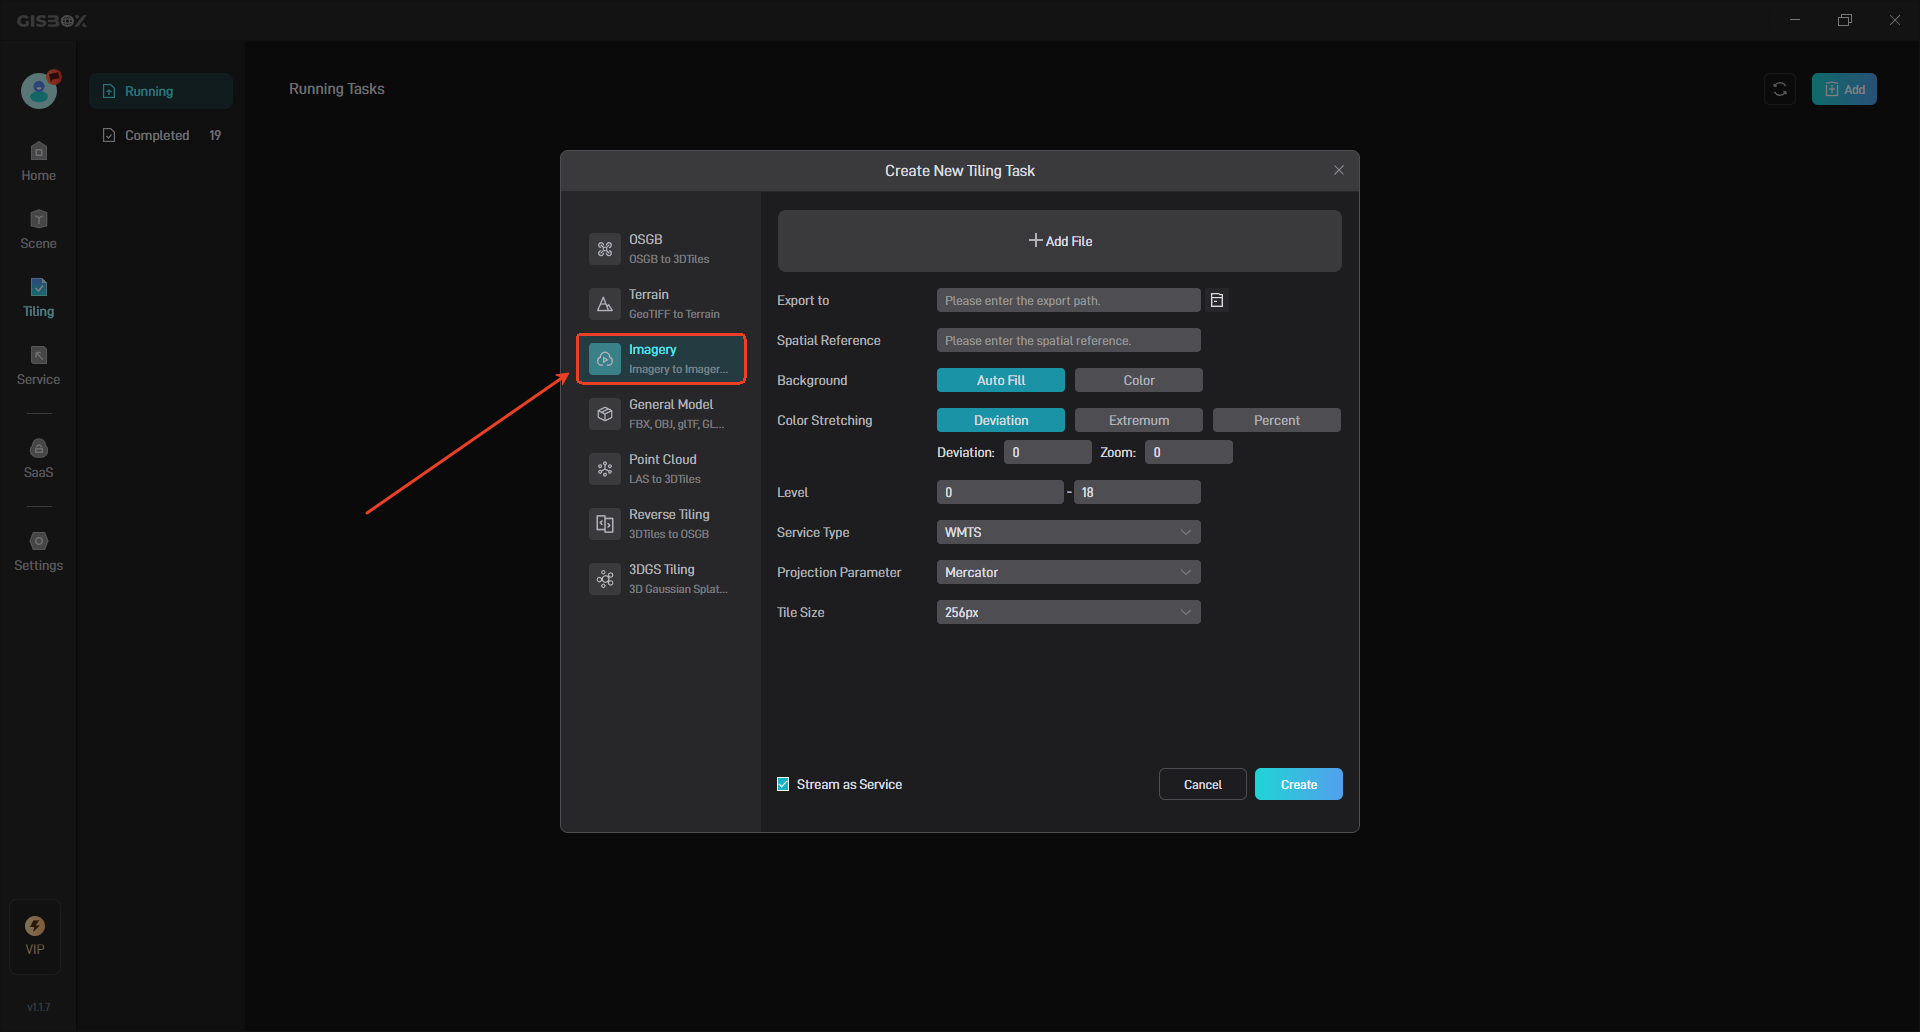
2. Tiling Task Settings
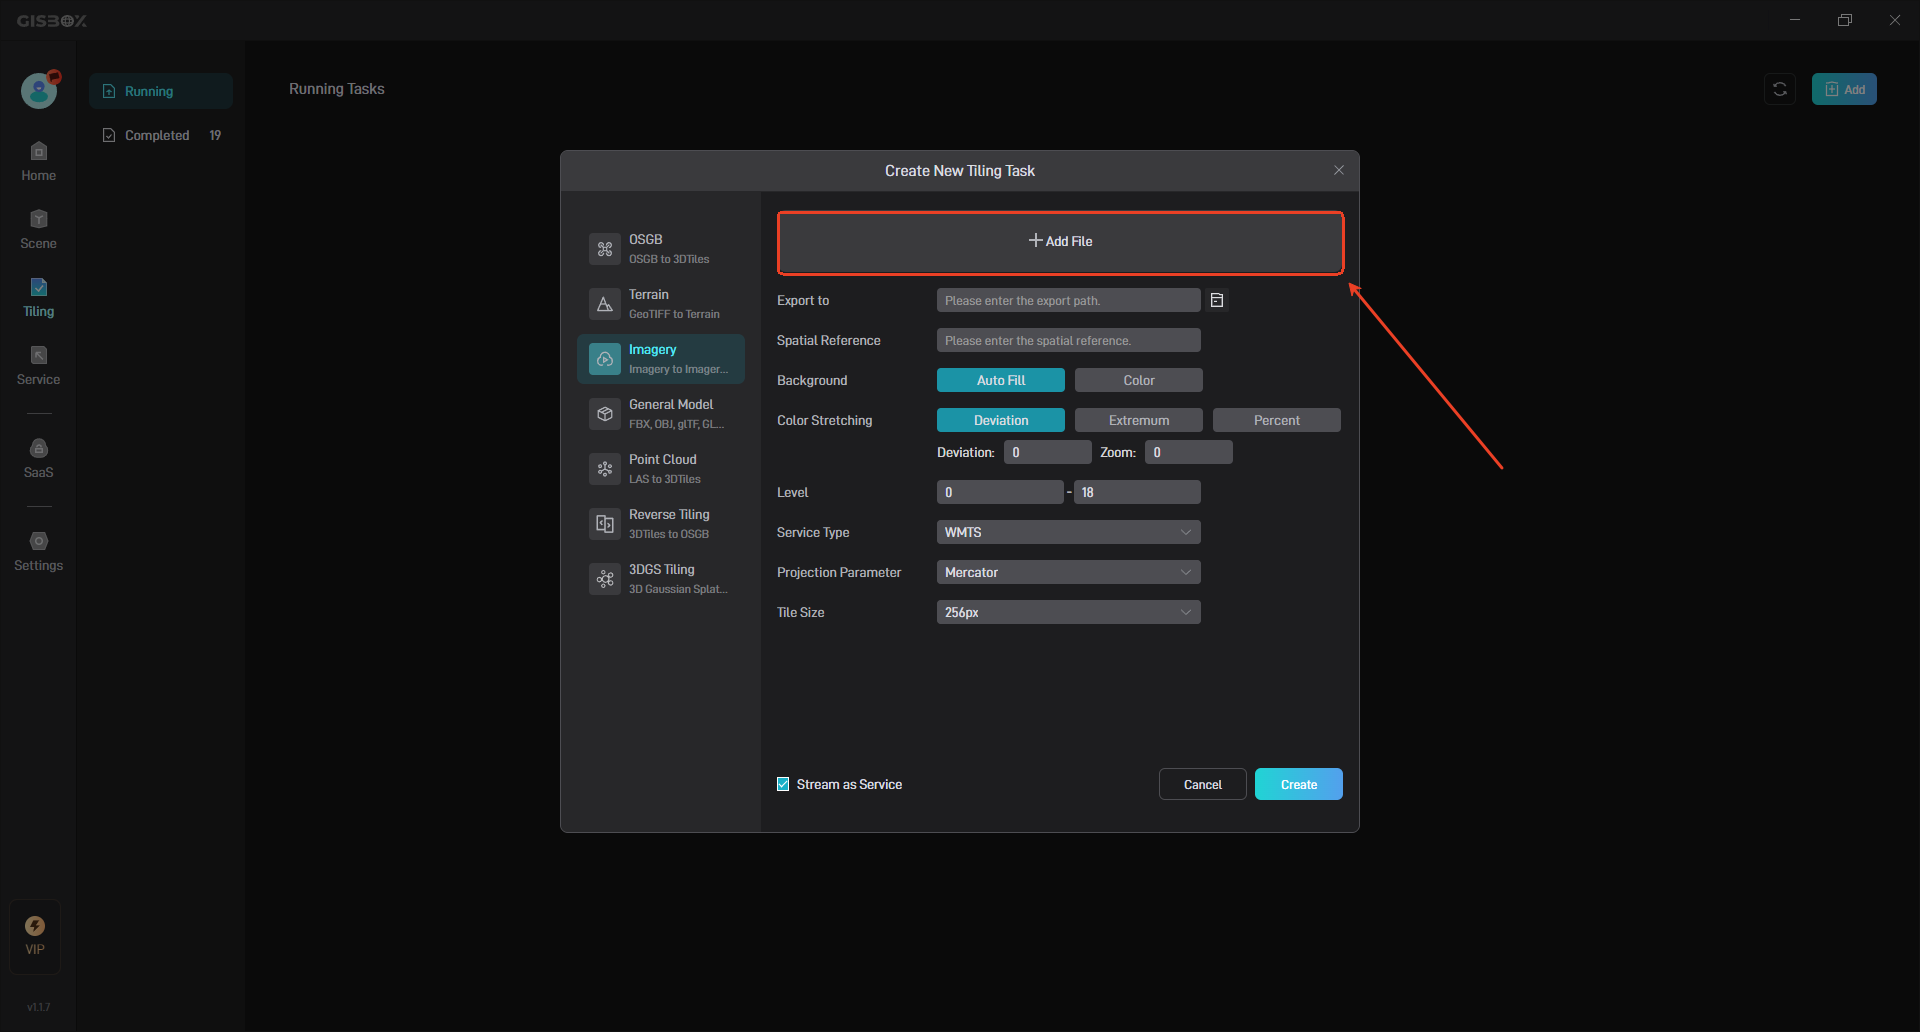
2.1 Add File
Click the “Add File” button above to add local files, as shown below:
2.2 Basic Parameters
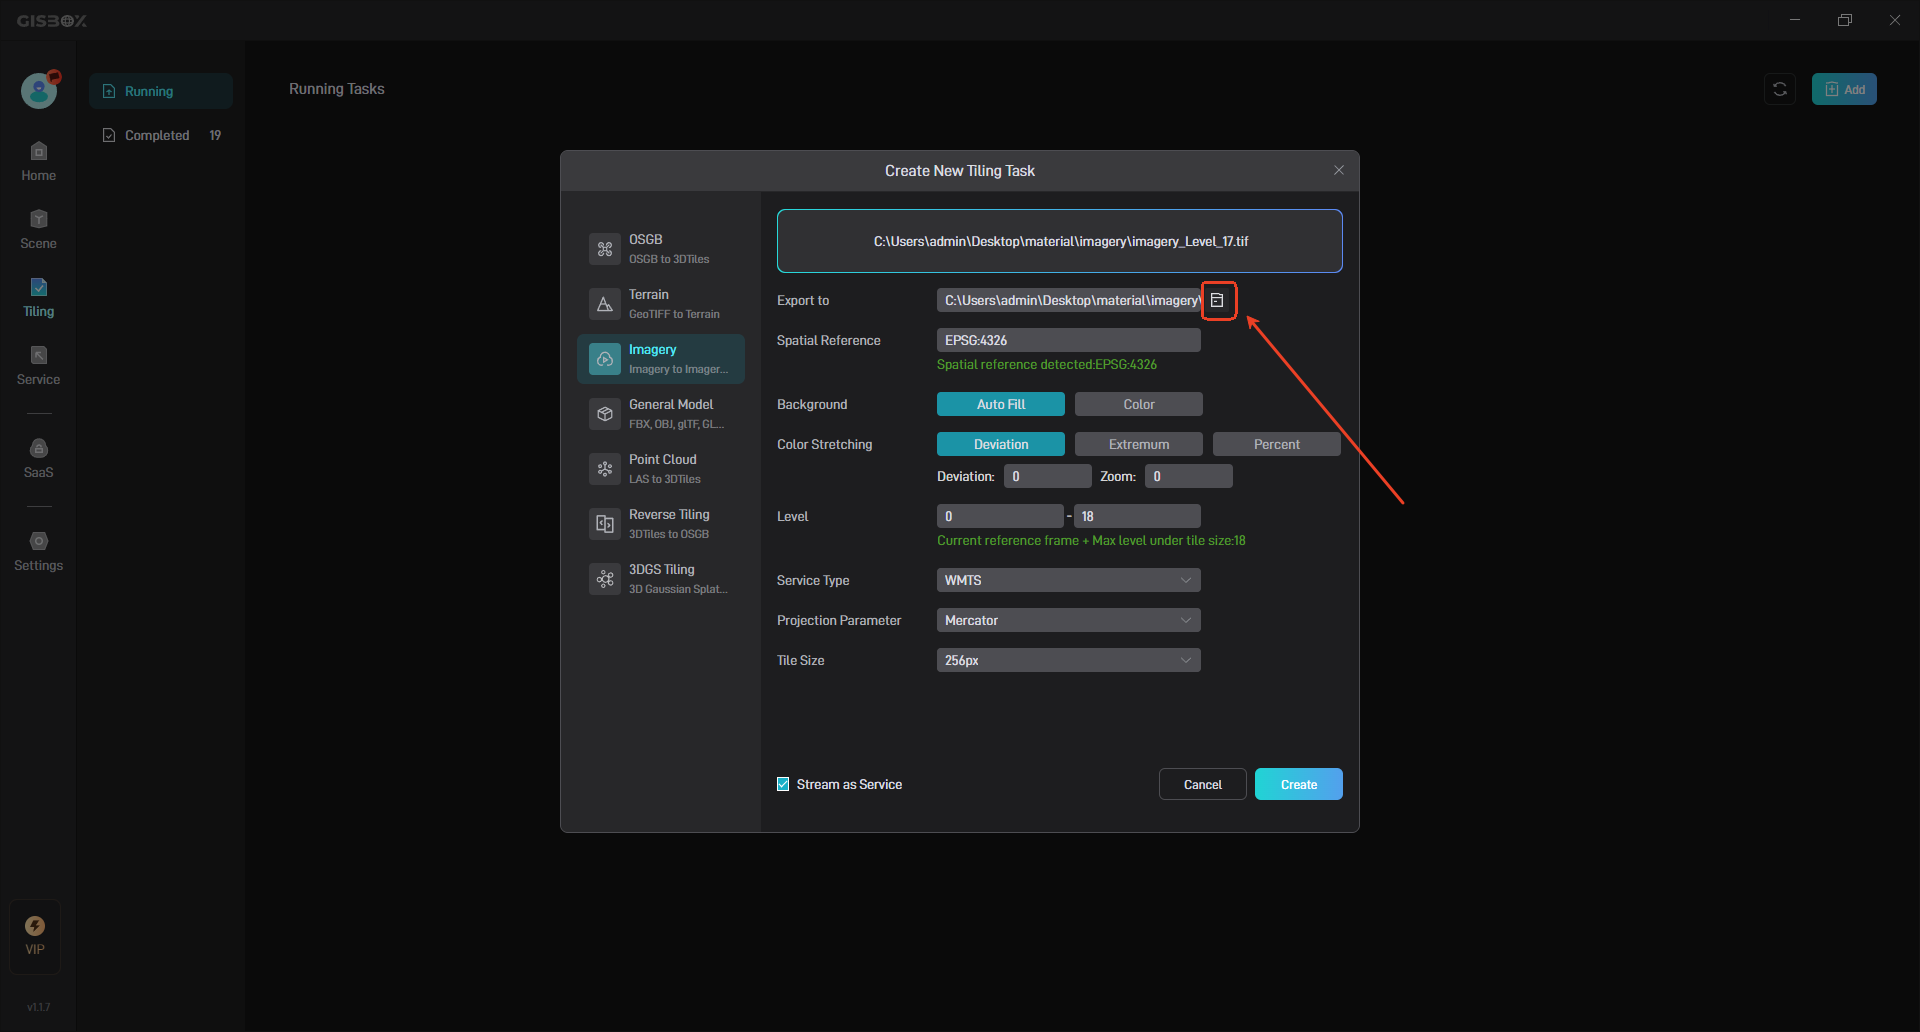
2.2.1 Export Path
Click the folder icon on the right to set the path for file export. There is no special requirement for the export path, and it is usually saved in an empty folder, as shown in the following figure:
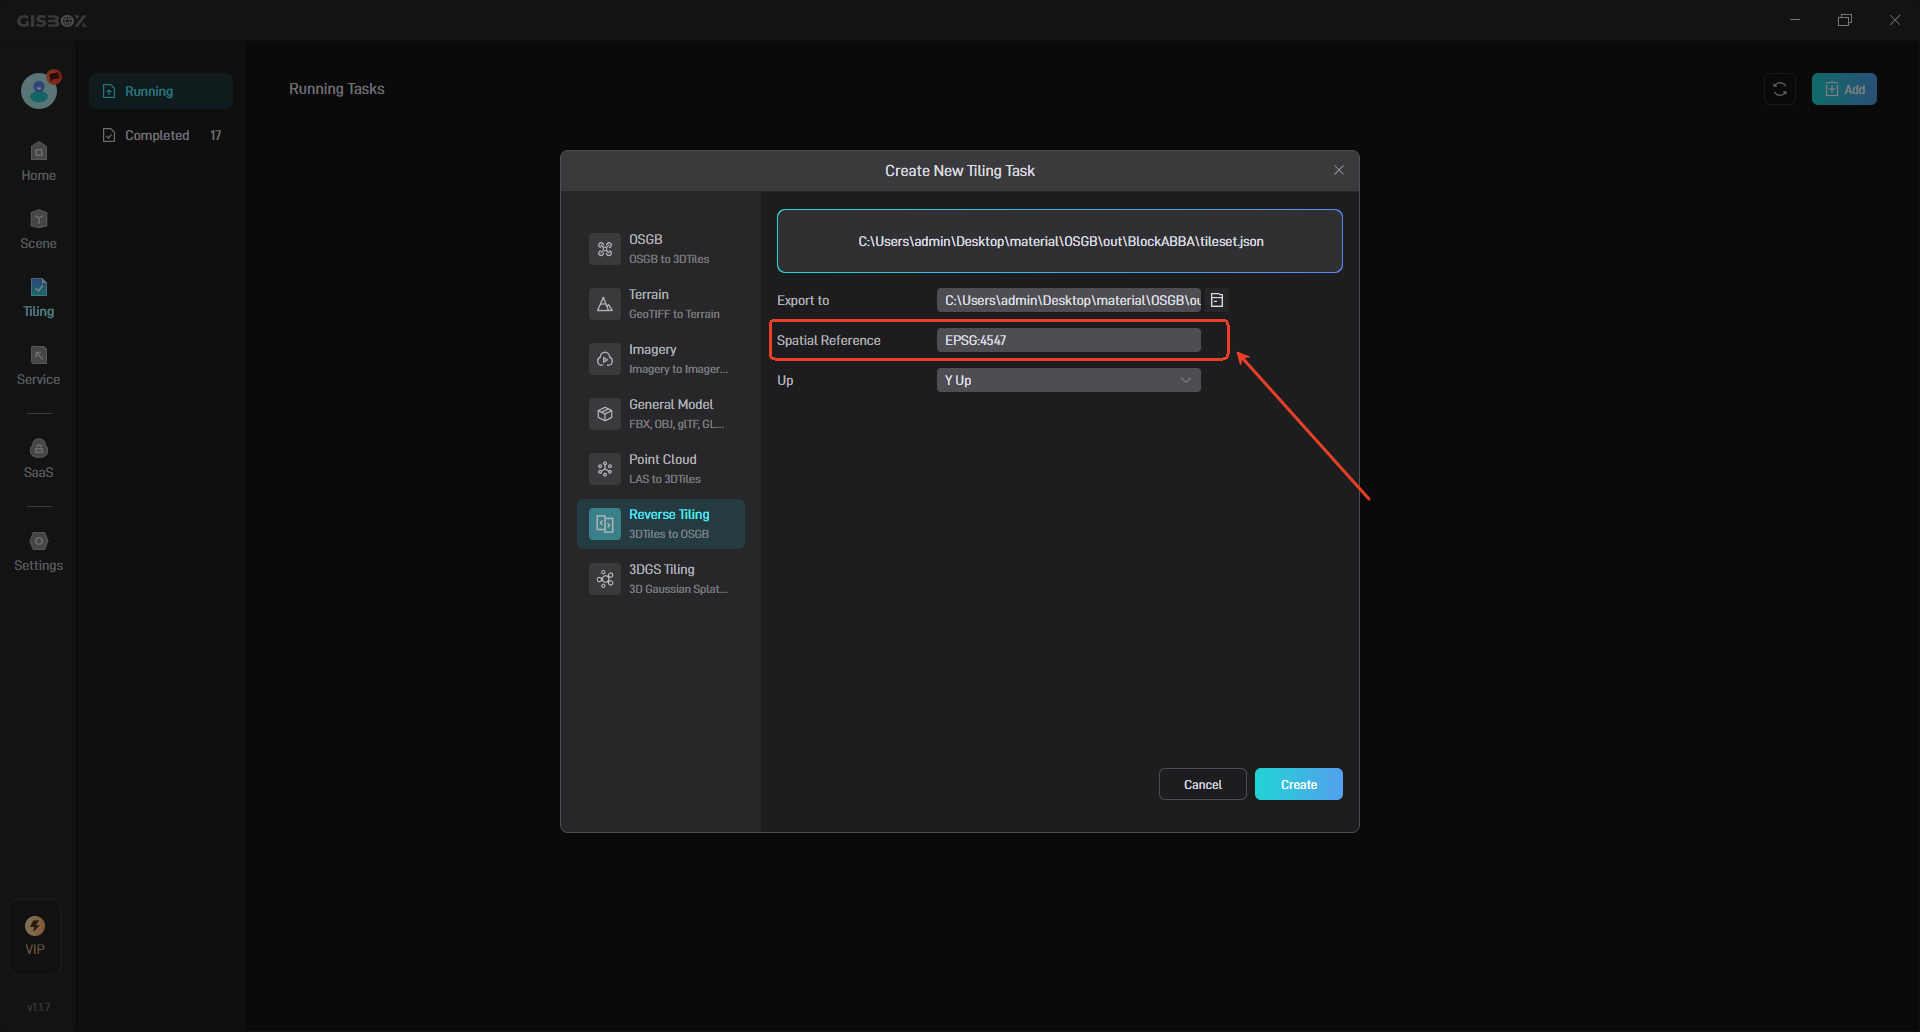
2.2.2 Spatial reference
“Spatial reference” usually consists of two main parts: projection and datum. The projection determines how to convert the spherical earth surface into a flat map, while the datum defines the shape of the ellipsoid used to measure the location. GISBox will automatically identify the corresponding spatial reference based on the tilt file, as shown in the following figure:
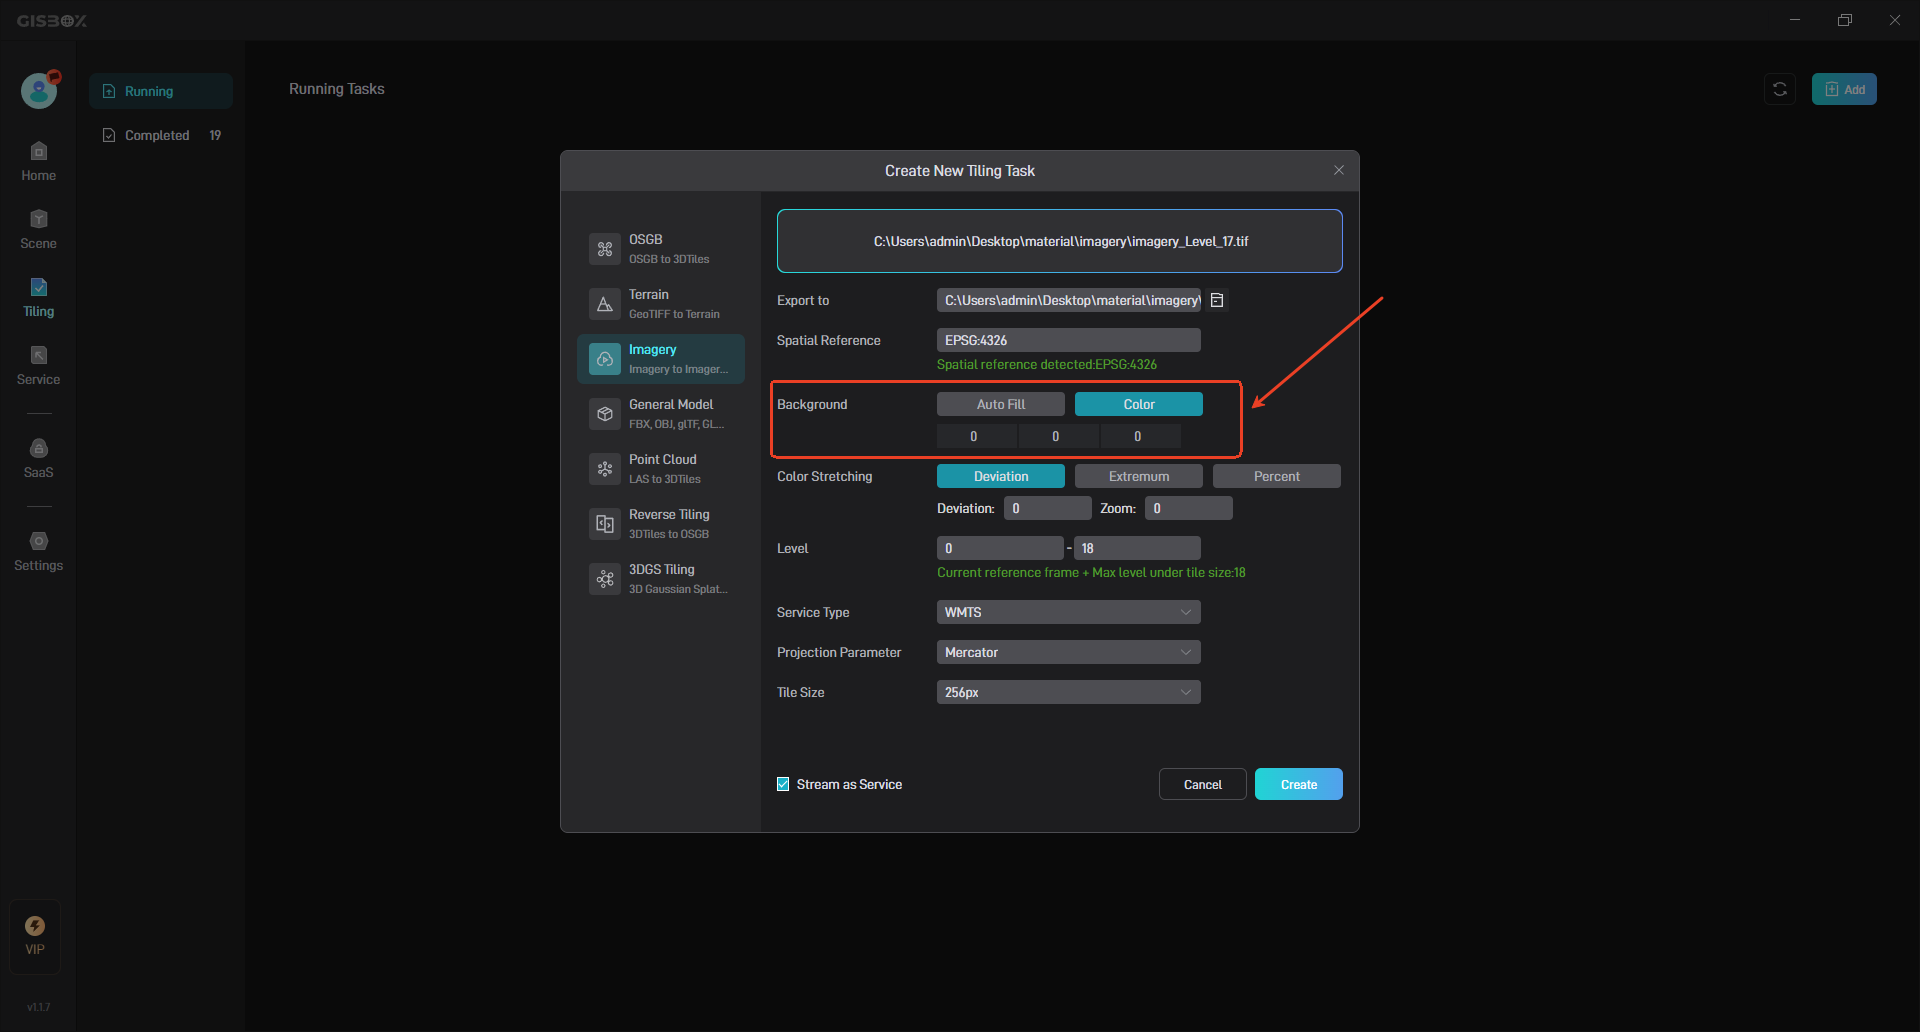
2.2.3 Background Transparent
To set the background transparency, you can choose “Auto Fill” or “Color”.
| Configuration Item | Description |
|---|---|
| Auto Fill | The software will automatically set the background to be transparent. |
| Color | Select a transparent color. The default RGB value is “0”. You can also customize the specific value. The minimum value is** “0”** and the maximum value is “255”. |
Change the background transparency settings as shown below:
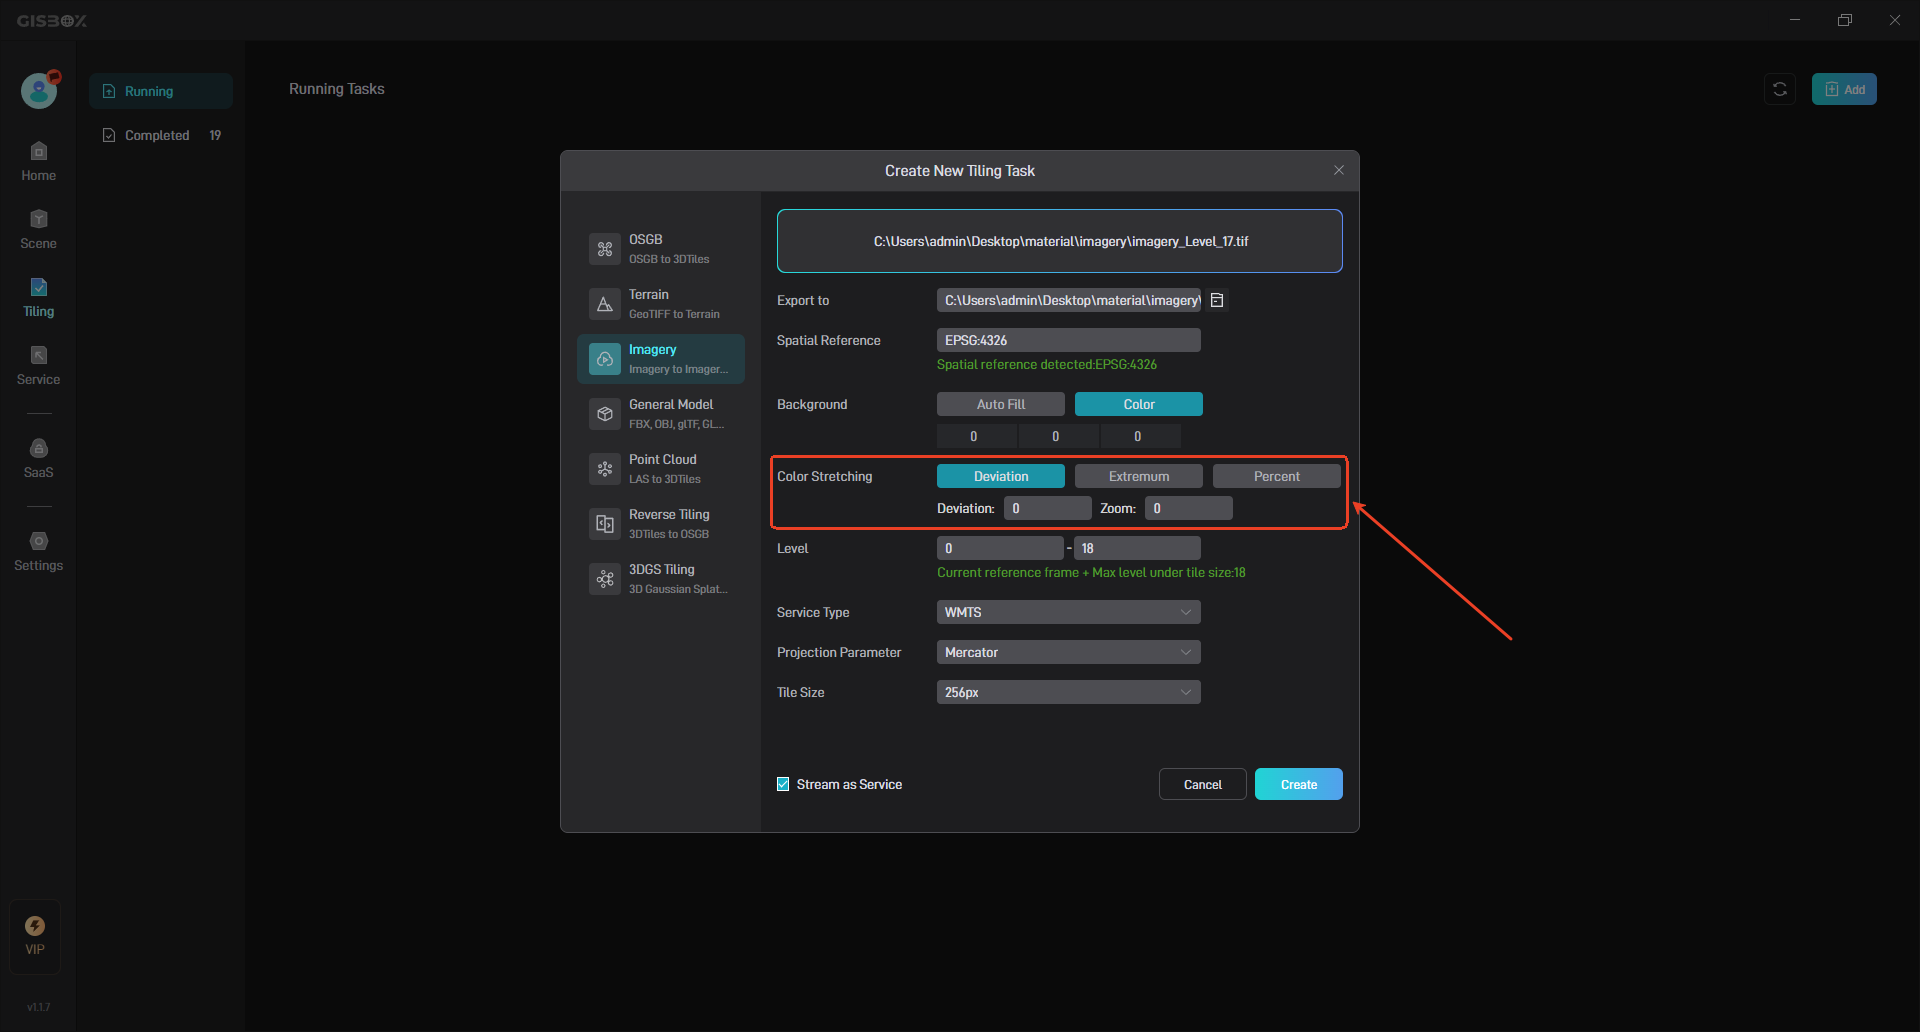
2.2.4 Color Strenching
The “Color Stretching” setting is an important tool for adjusting the display effect of raster datasets. It can help users optimize the visual performance of images, making features more obvious or colors more natural. It includes three color stretching methods: “Deviation”, “Extremum” and “Percent”.
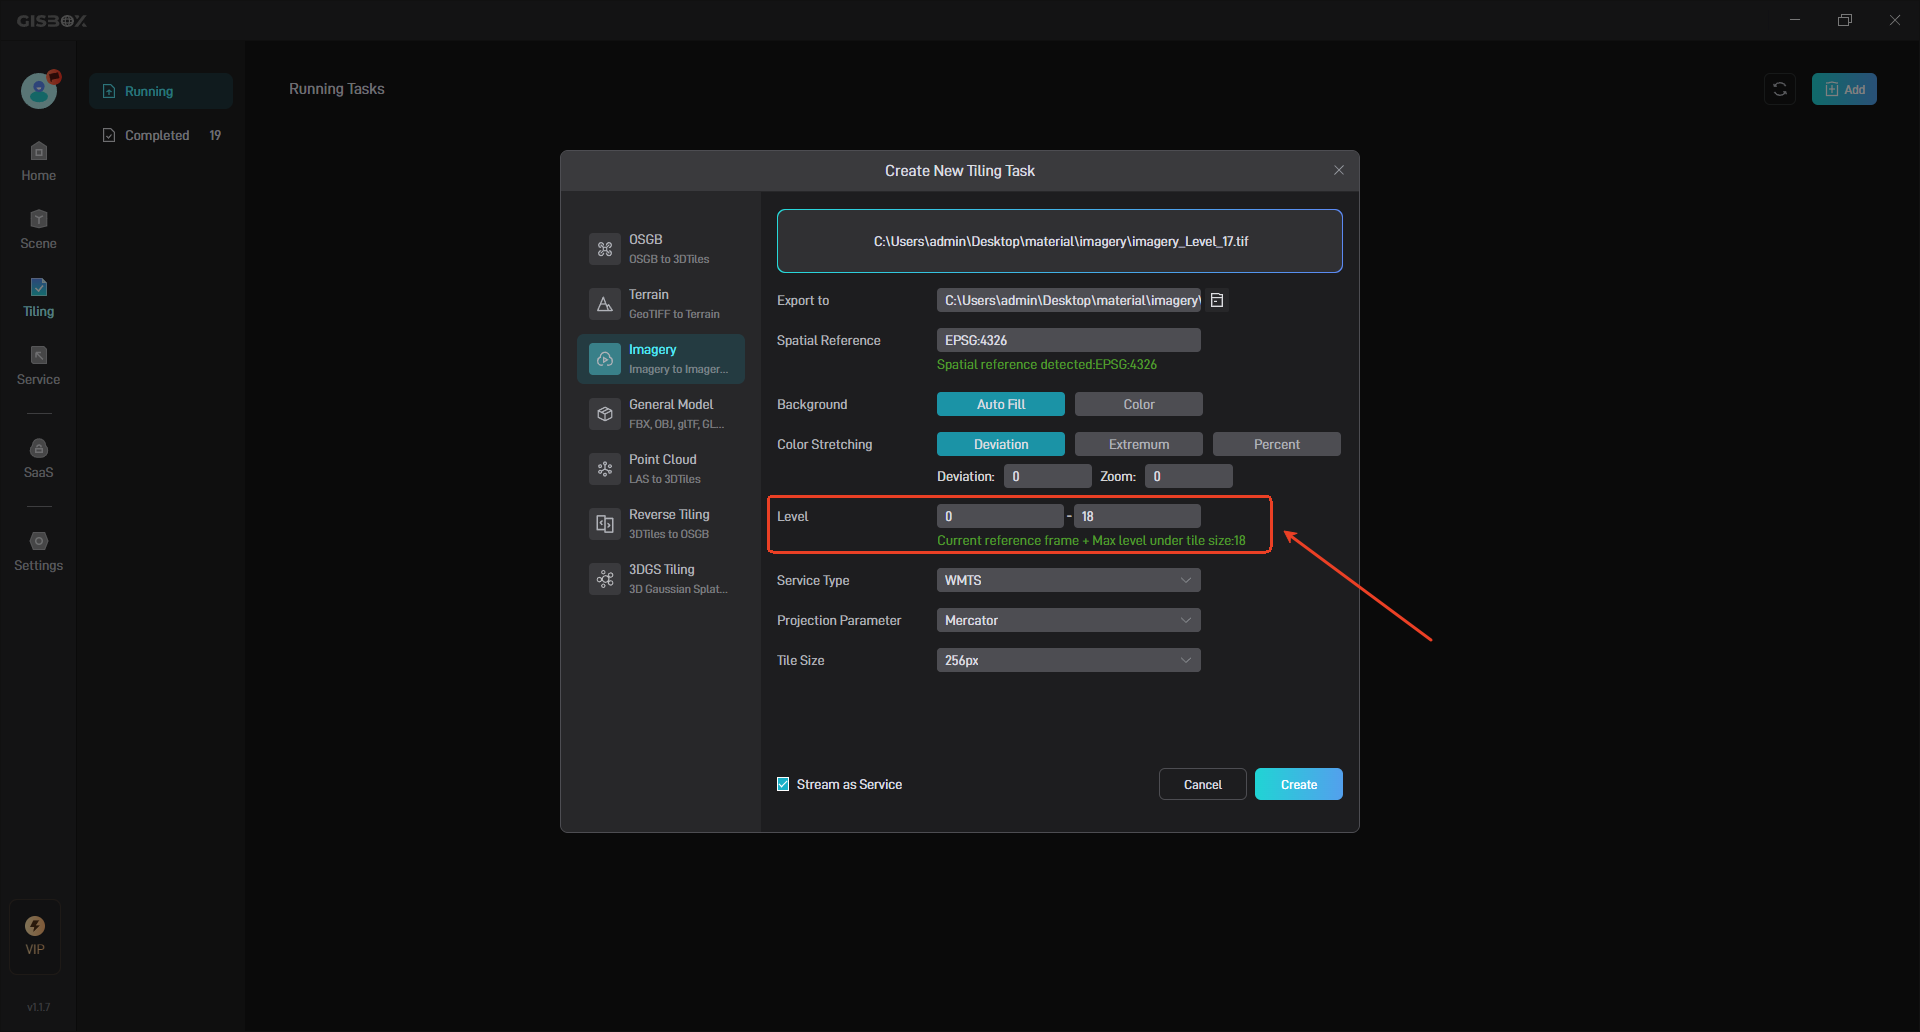
2.2.5 Level Settings
Customize the range of levels. Different levels will affect the conversion speed. The lowest level is “0” and the highest level is “25”. The larger the level, the longer the conversion time will be. Properly reducing the level size can speed up the tiling speed. The default value is “0-18” and it is recommended to set it to “0-10” to increase the conversion speed.
2.2.6 Service Type
In the field of Geographic Information Systems (GIS) and Web Map Services, service types refer to different ways of providing map data and related functions over the network. GISBox imagery tiles support two service types, “WMTS” and “TMS”, as shown in the following figure:

| Configuration Item | Description |
|---|---|
| WMTS | WMTS is a service type defined by the Open Geospatial Consortium (OGC). It focuses on providing pre-rendered map tiles through the HTTP protocol and is suitable for application scenarios that require a large number of static map tiles. |
| TMS | TMS is a type of map service specified by the Open Source Geospatial Information Foundation (OSGEO). It also provides map tile services. For ease of processing, tiles are usually stored in squares with a pixel size of 256 or 512. |
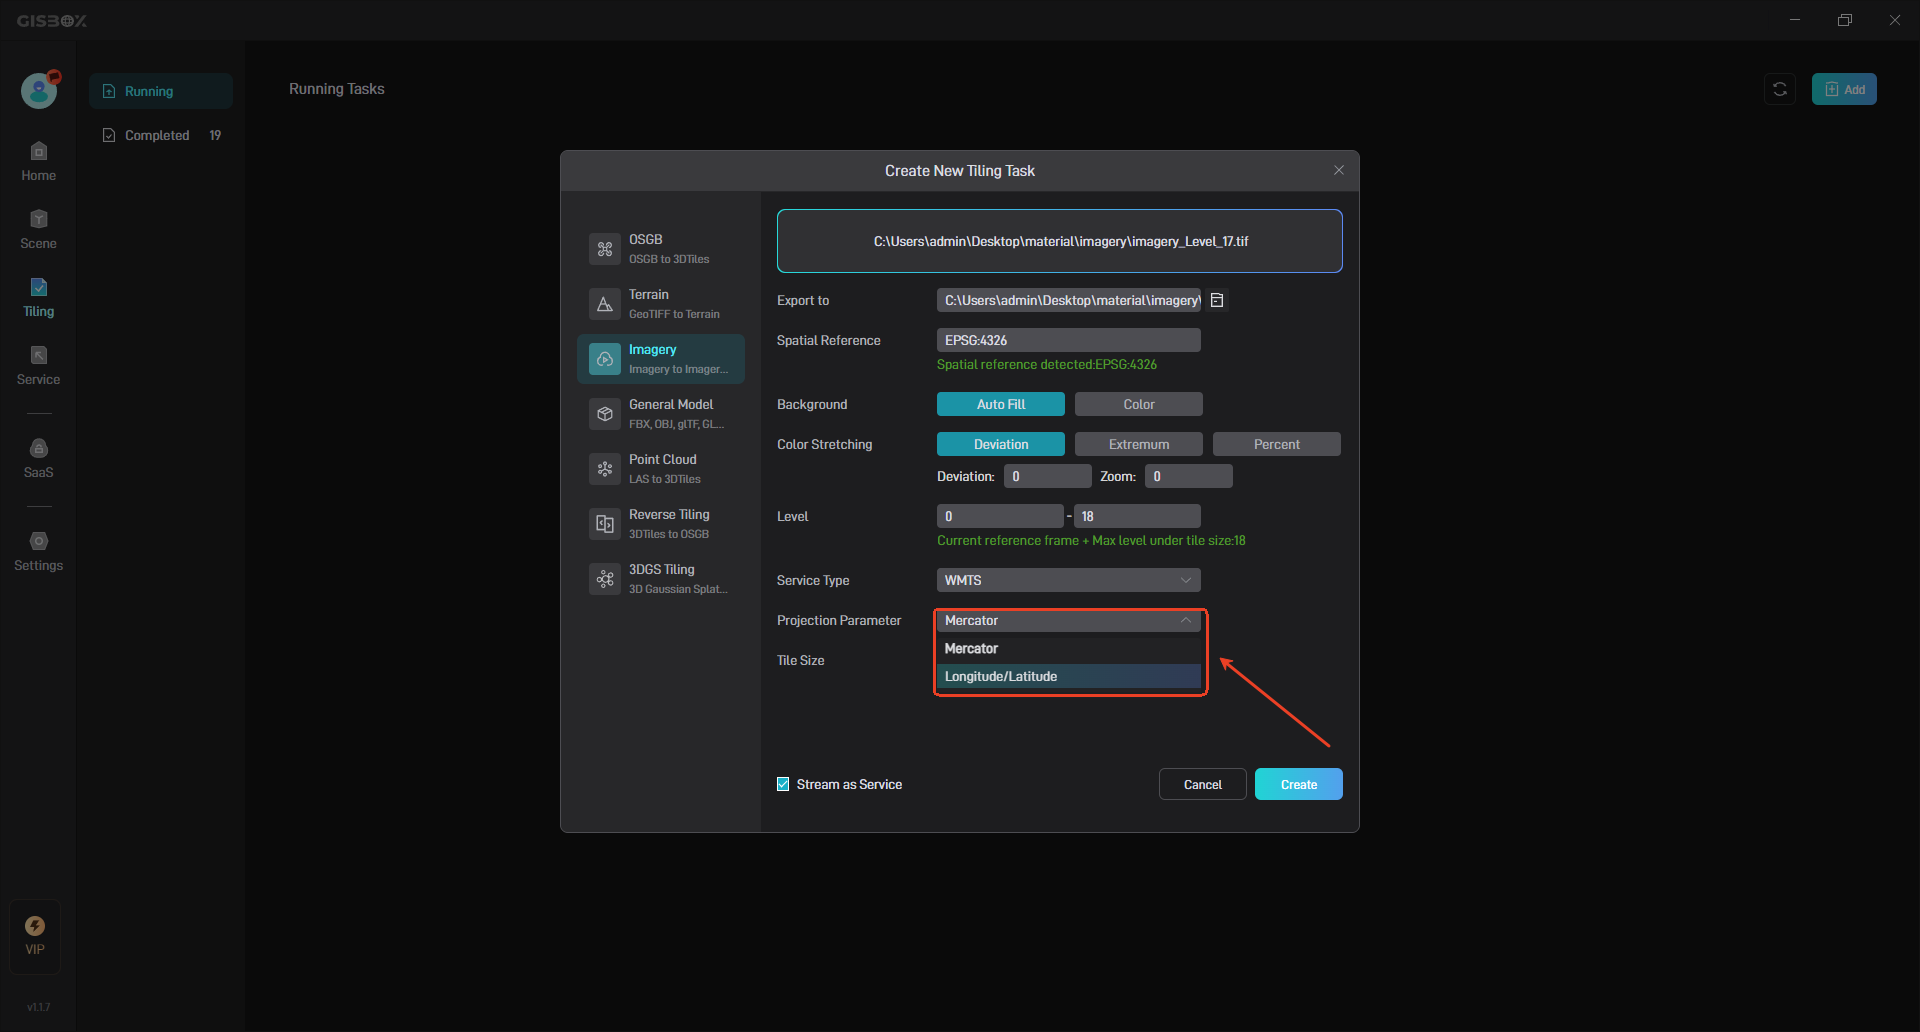
2.2.7 Projection Parameters
GISBox imagery tiles support two types of projections, namely “Mercator” and “Latitude/Longitude”, as shown in the following figure:
| Configuration Item | Description |
|---|---|
| Mercator | Mercator projection is a widely used map projection method. It converts the longitude and latitude coordinates of the earth’s surface into a rectangular coordinate system on a plane. It is widely used in nautical charts, world maps and other fields because of its intuitiveness, readability and simple calculation. |
| Latitude/Longitude | In a broad sense, when we talk about map projections, longitude and latitude themselves can also be considered a “projection”, that is, the original location information (longitude and latitude) of points on the earth’s surface is directly mapped onto a two-dimensional plane. |
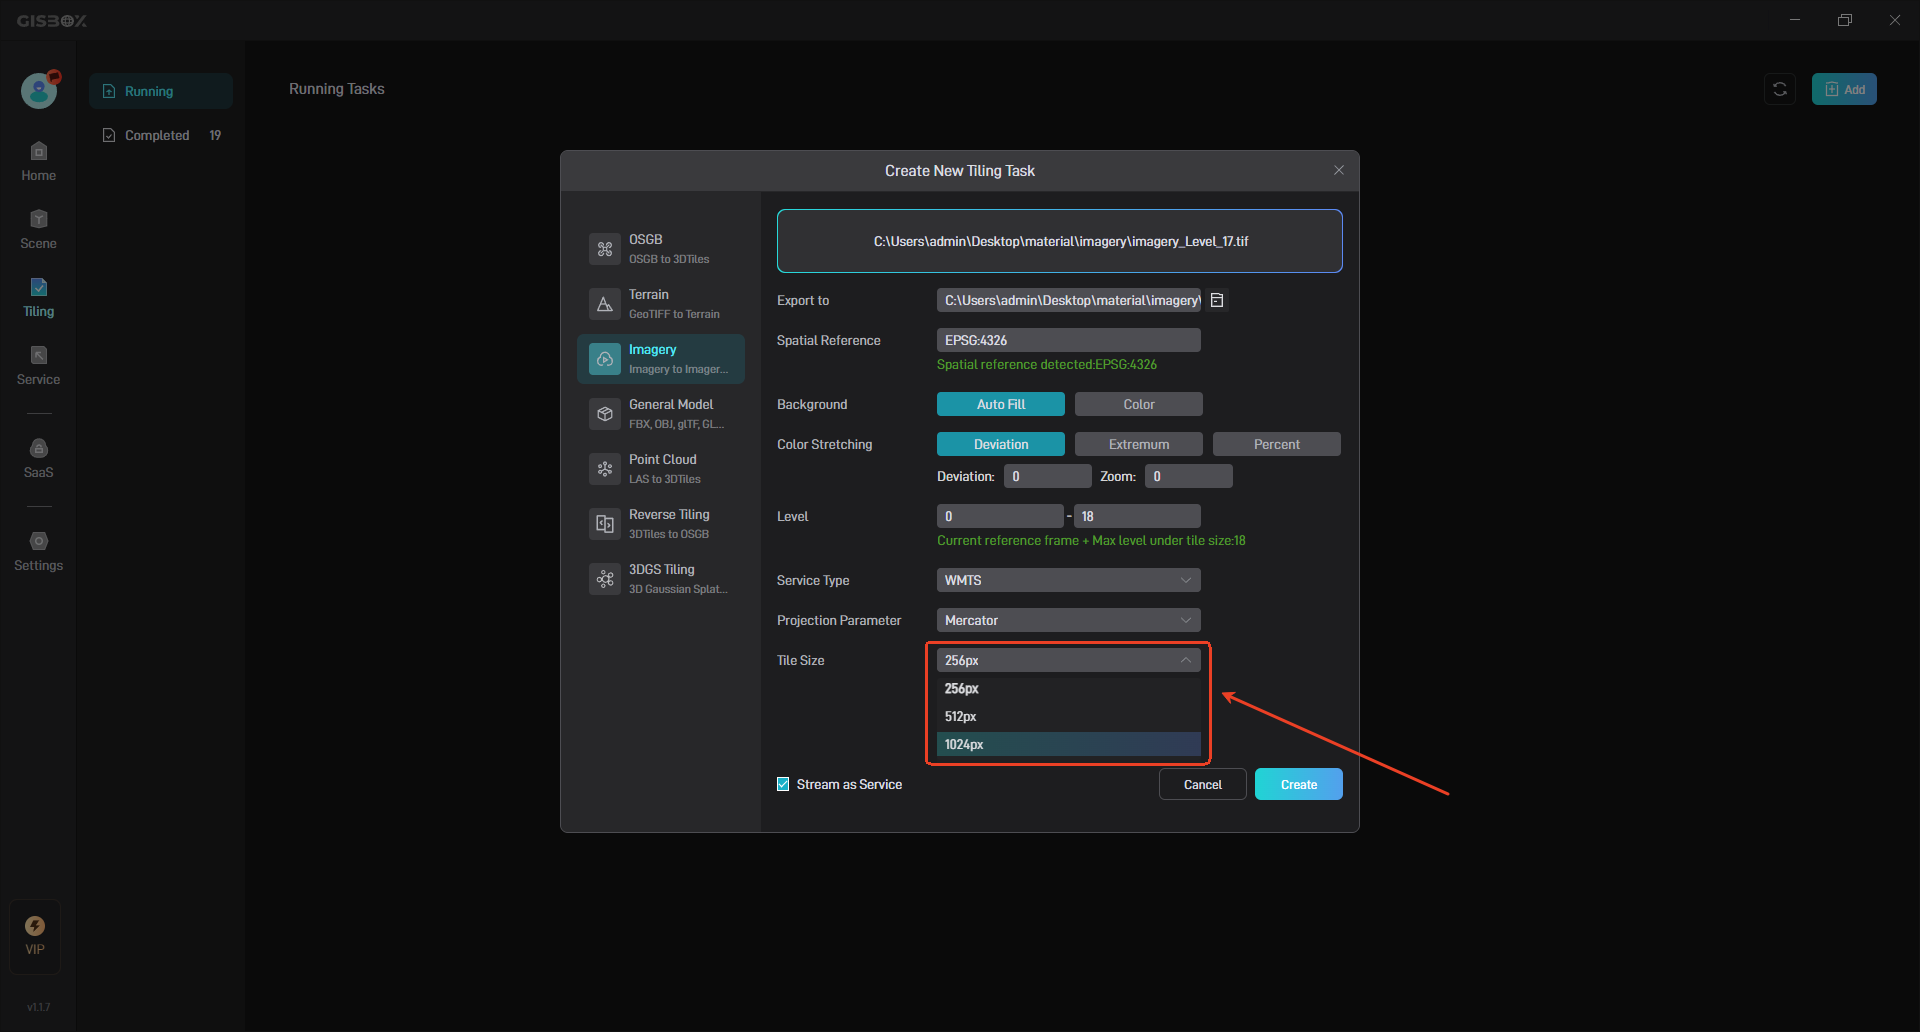
2.2.8 Tile Size
According to conventional tradition, the tile size is “256”, but in fact the tile size can be set to “non-256”, such as “512”, “1024”, the purpose of which is to reduce the number of tile requests on large screens, as shown in the following figure:
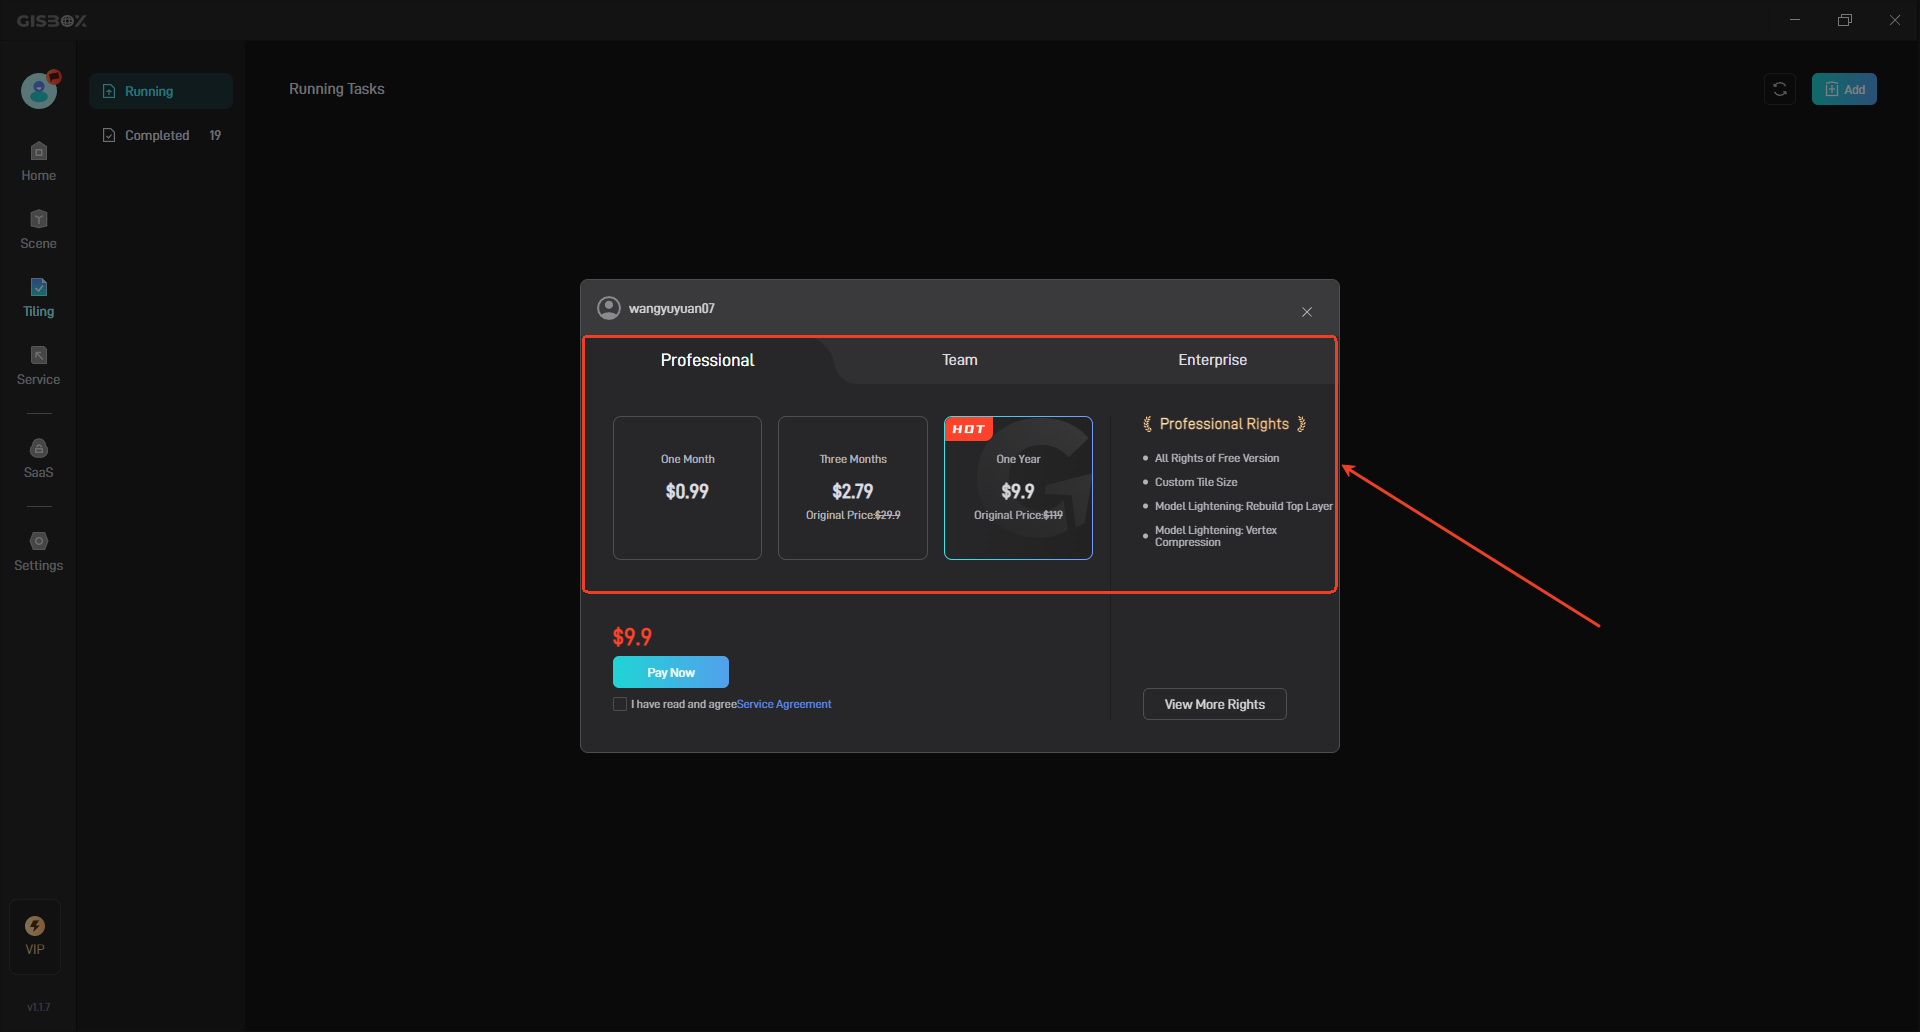
If you need to set the tile size to “512” or “1024”, you can purchase the corresponding package, which provides functions such as “custom tile size” and “model lightening”, and provides two billing features, namely “monthly billing” and “yearly billing”, as shown in the following figure:
3. Streaming Settings
When “Stream as Service” is enabled, the created tiling task will automatically add a corresponding type of service in the “Service” section.
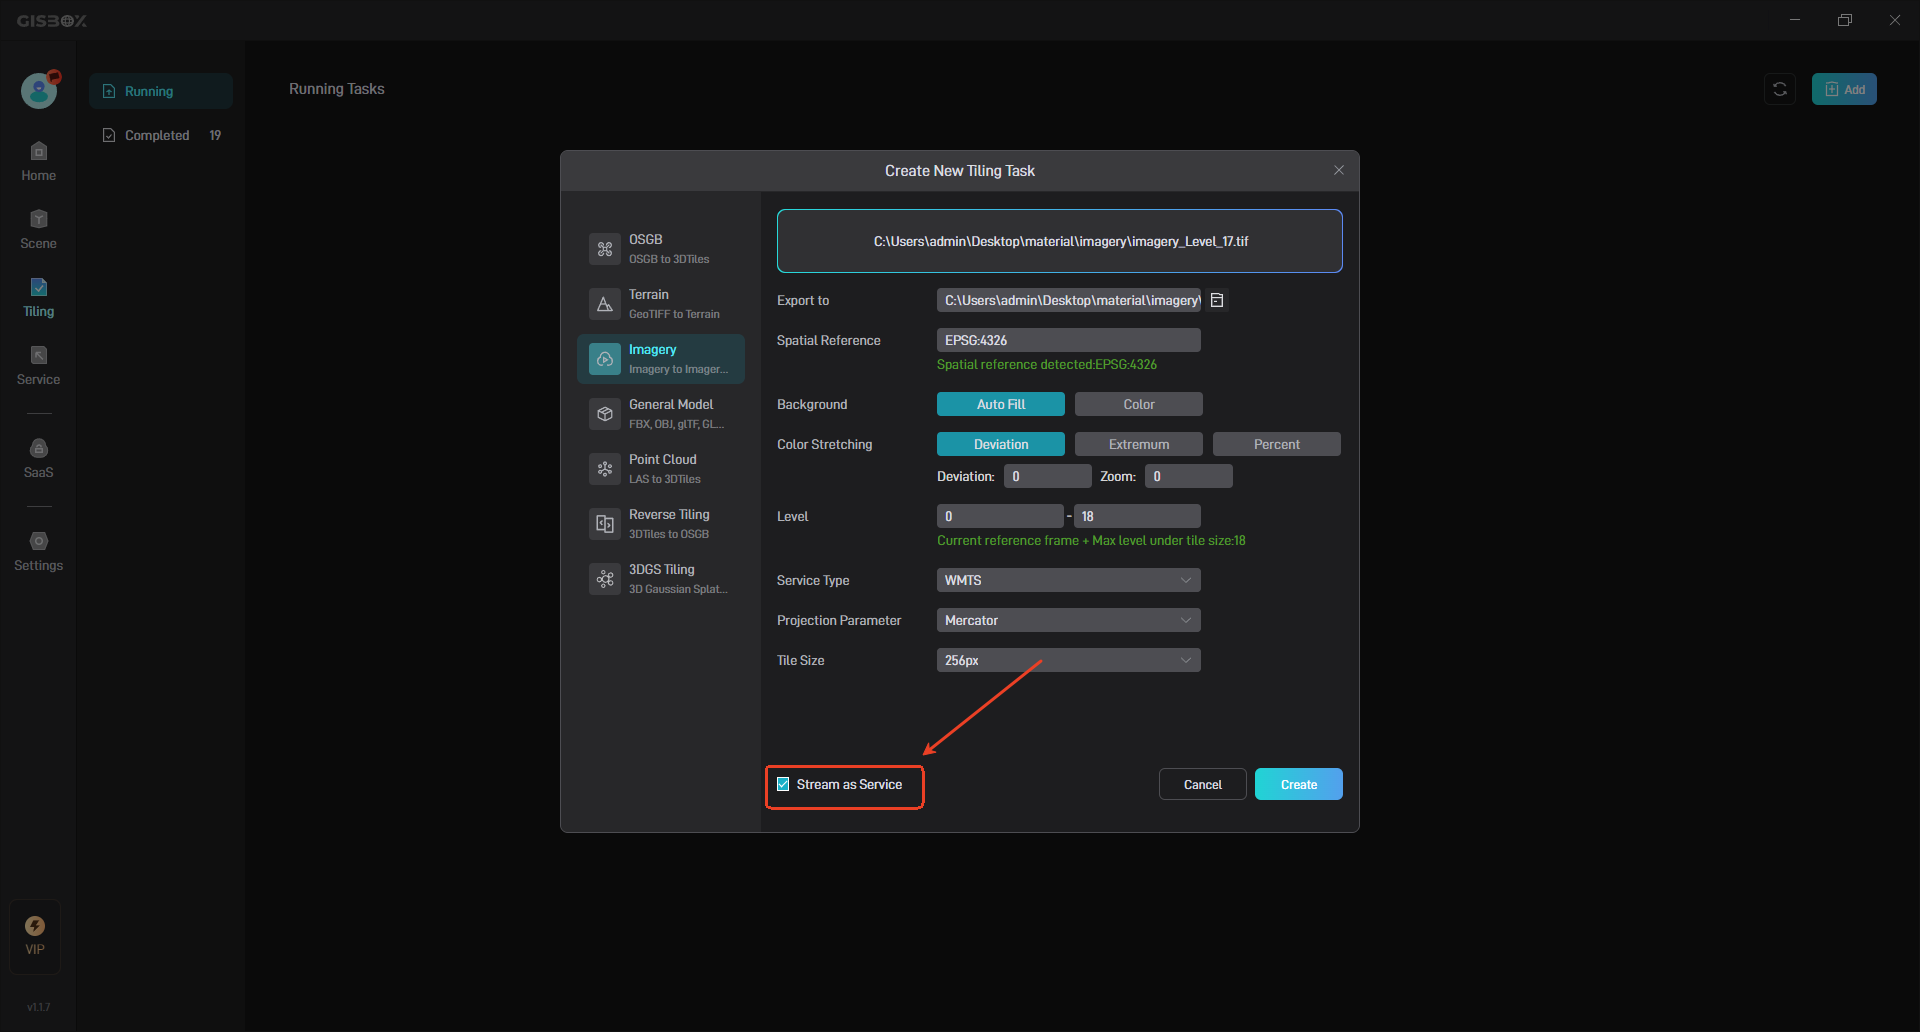
3.1 Stream as Service Simultaneously
When “Stream as Service” is enabled, a corresponding type of service will be added in “Service” after tiling is completed. You can click the “Jump to service list” button to jump directly to the service list, as shown in the following figure:
3.2 Stream as Service Separately
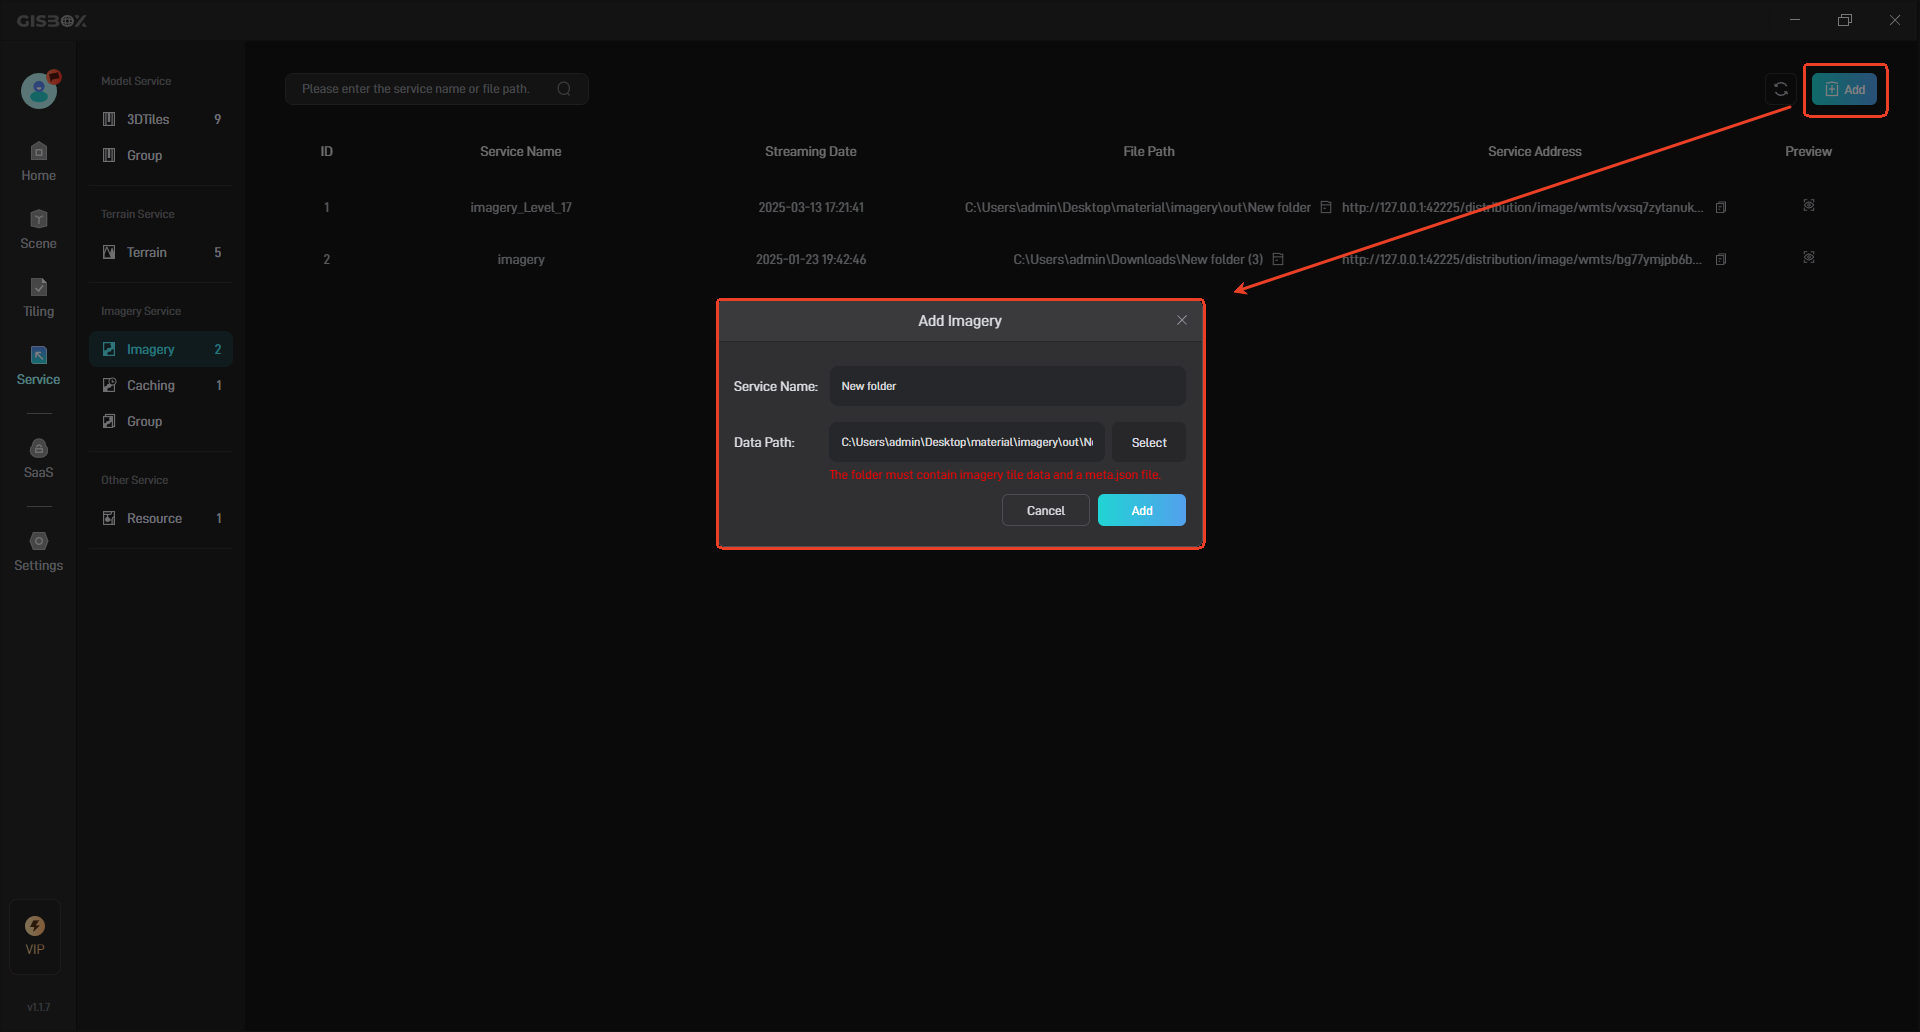
When “Stream as Service” is disabled, no corresponding type of service will be added in “Service” after tiling is successful, and it will need to be added manually.
4. Edit Files
4.1 Jump to Service List
After the tiling task is processed, click the “Jump to Service List” button on the right to view the corresponding service.
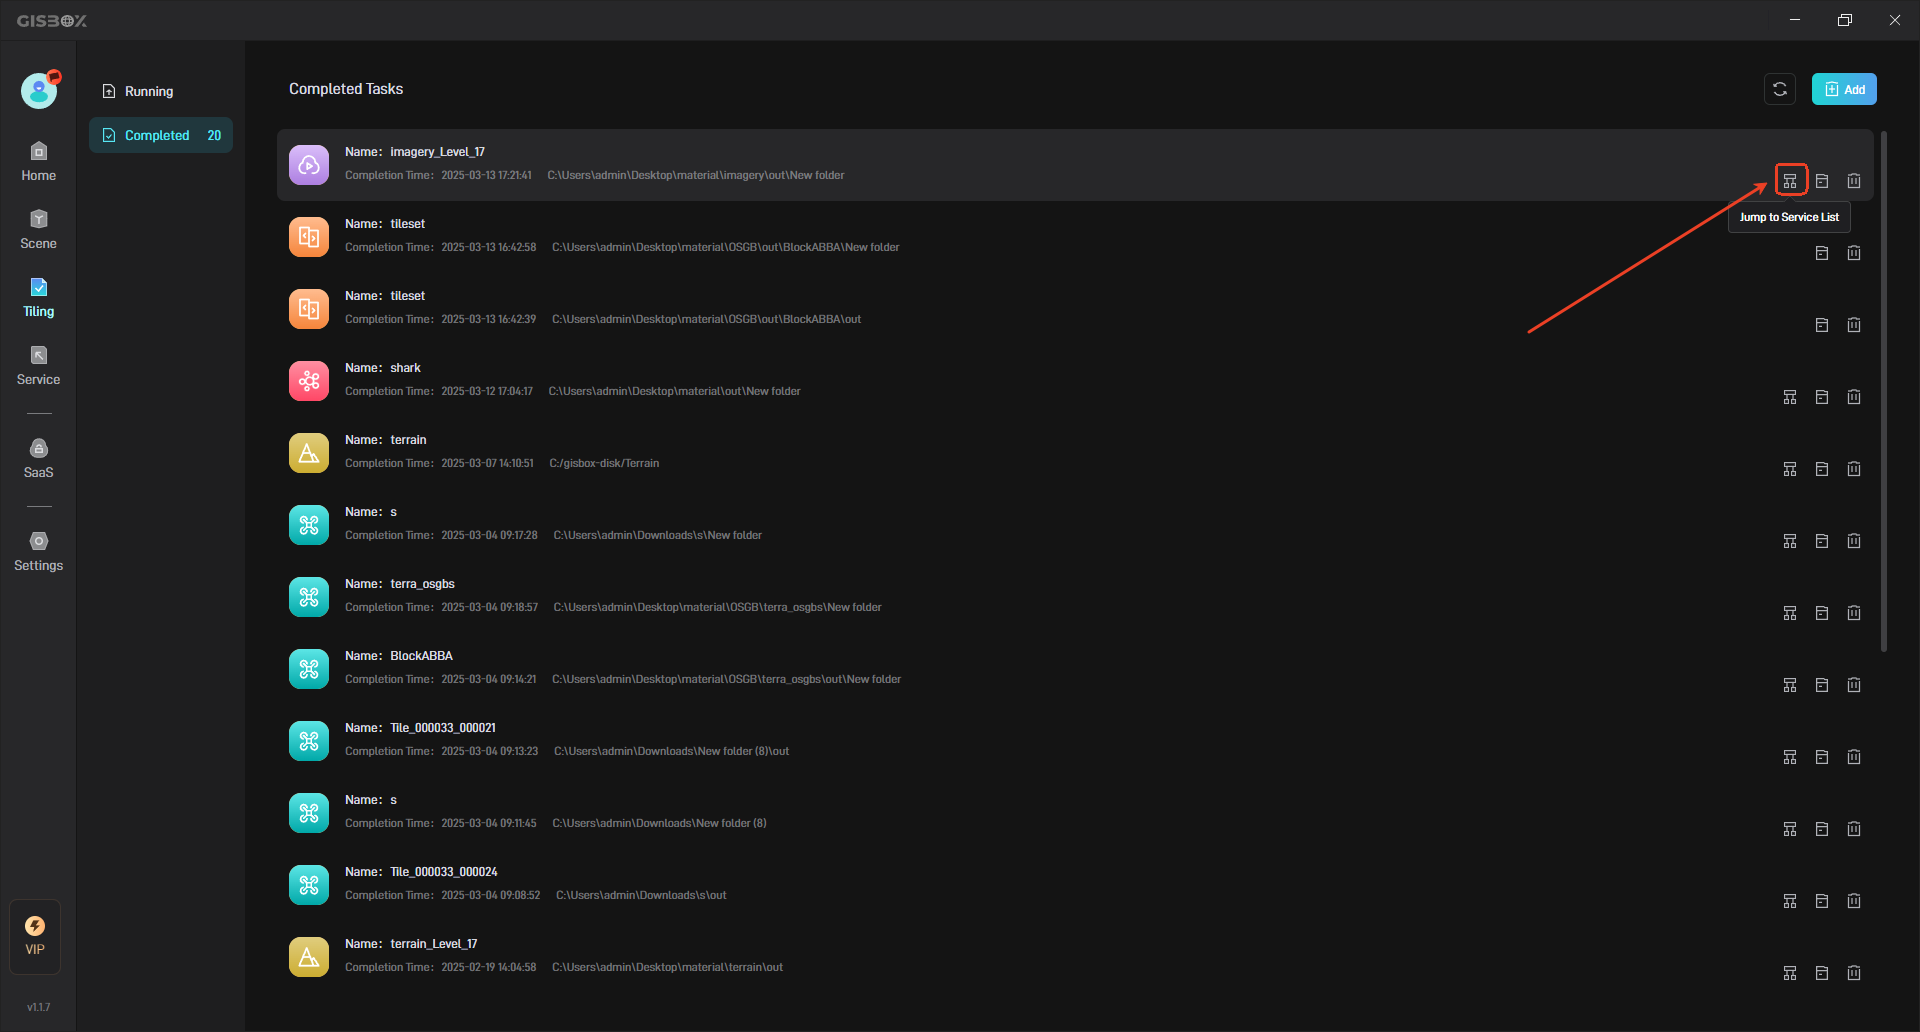
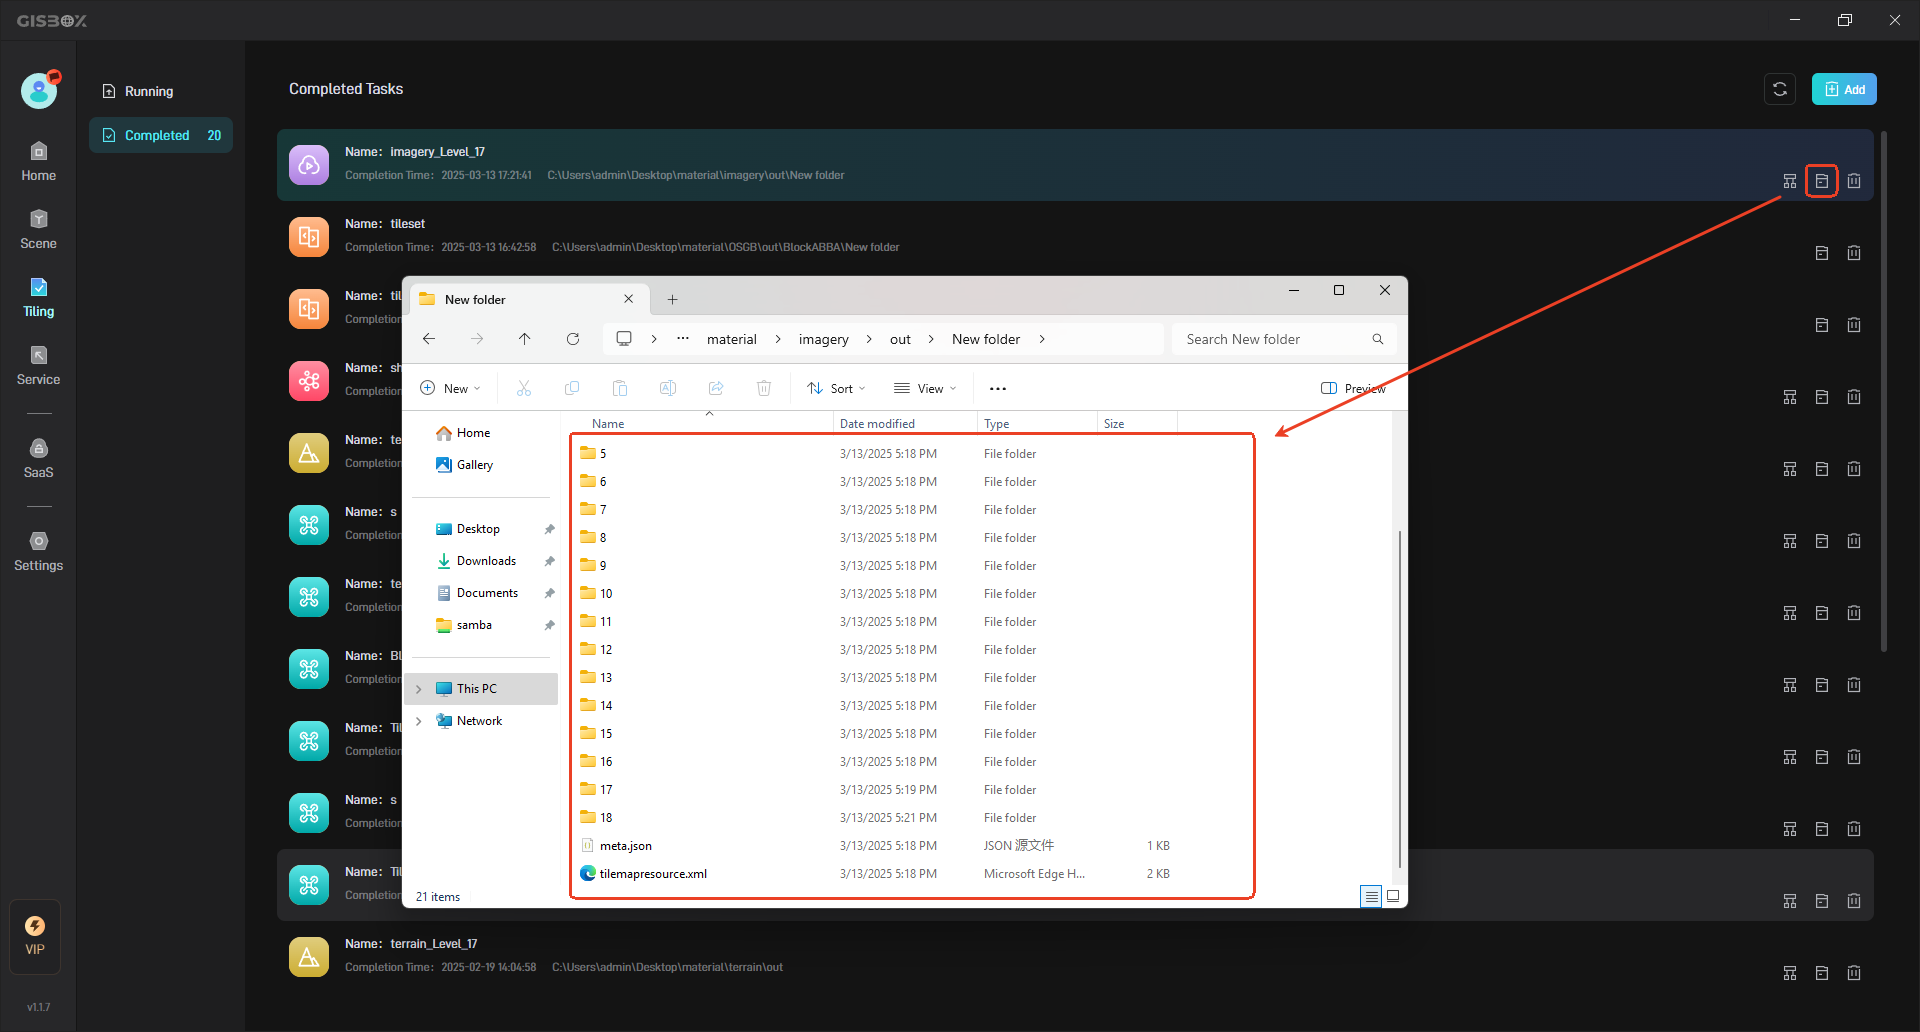
4.2 View Files
After the tiling task is completed, click the “Open Folder” button on the right to view the converted 3DTiles files.
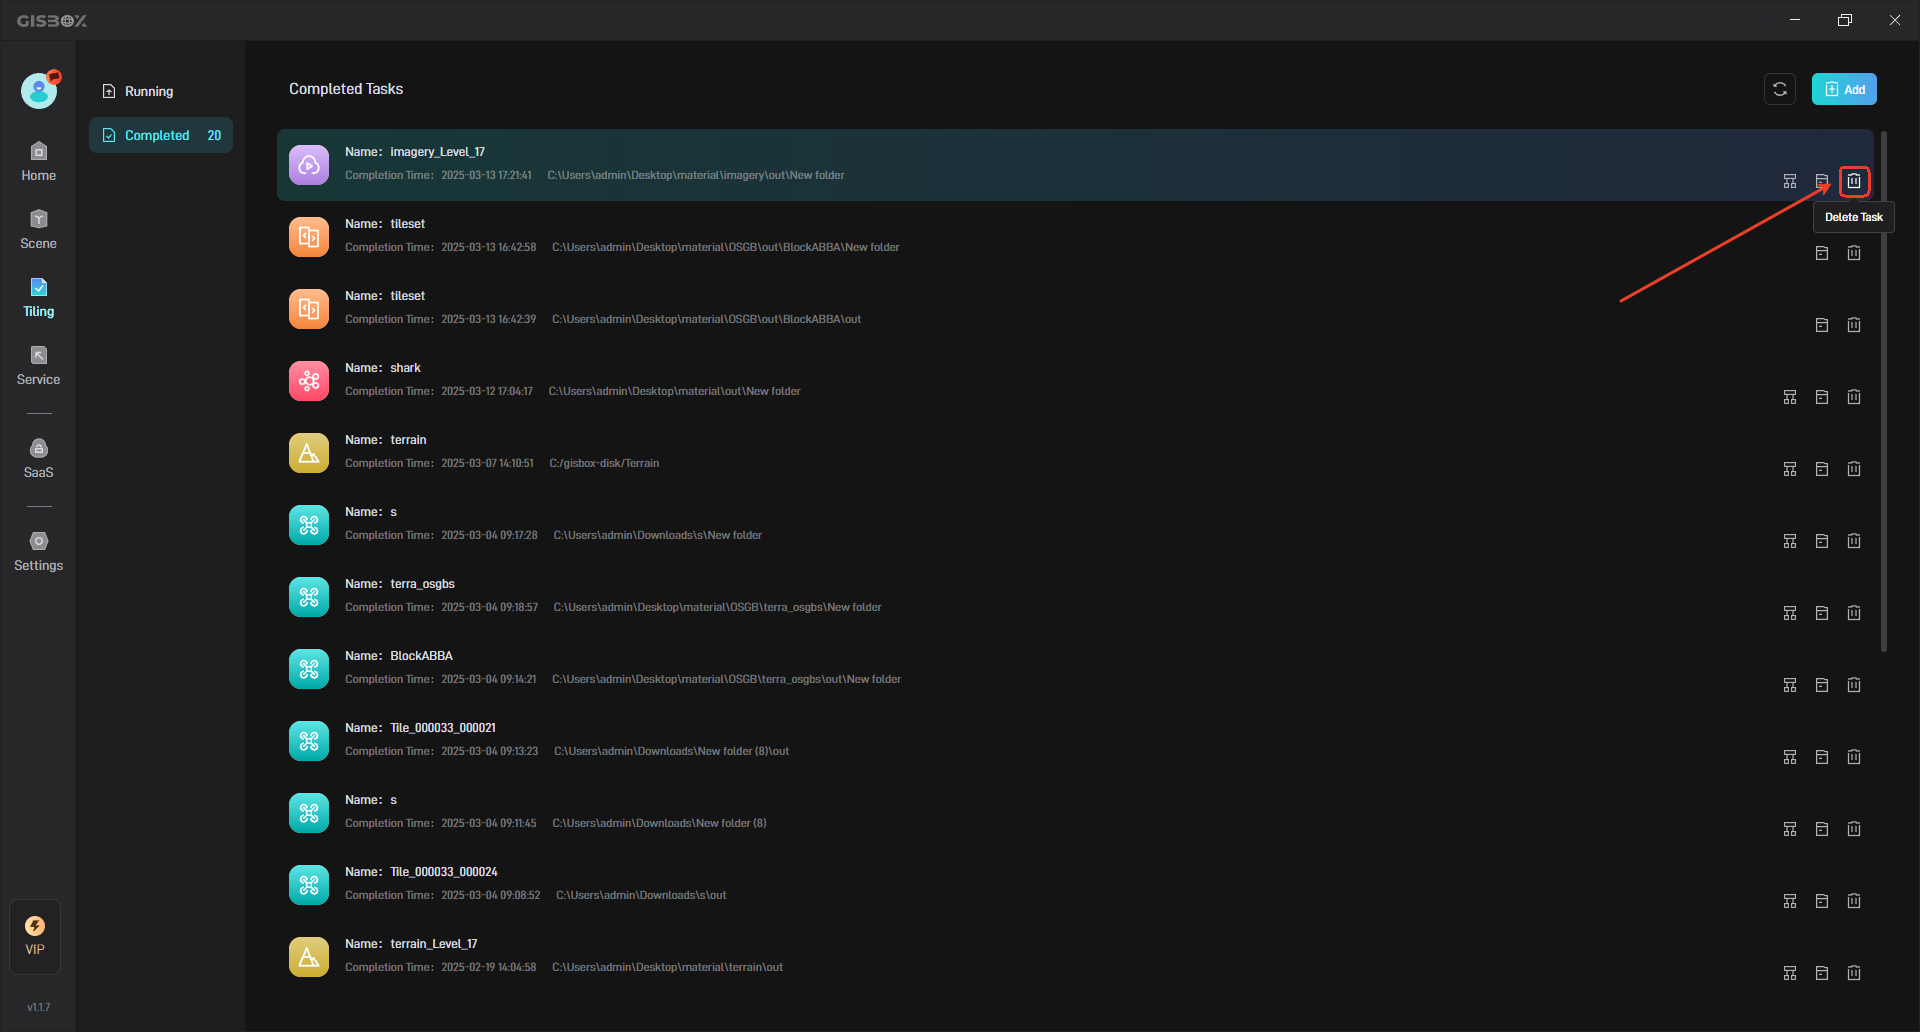
4.3 Delete Files
Click the “Delete” button on the right to delete the converted files.
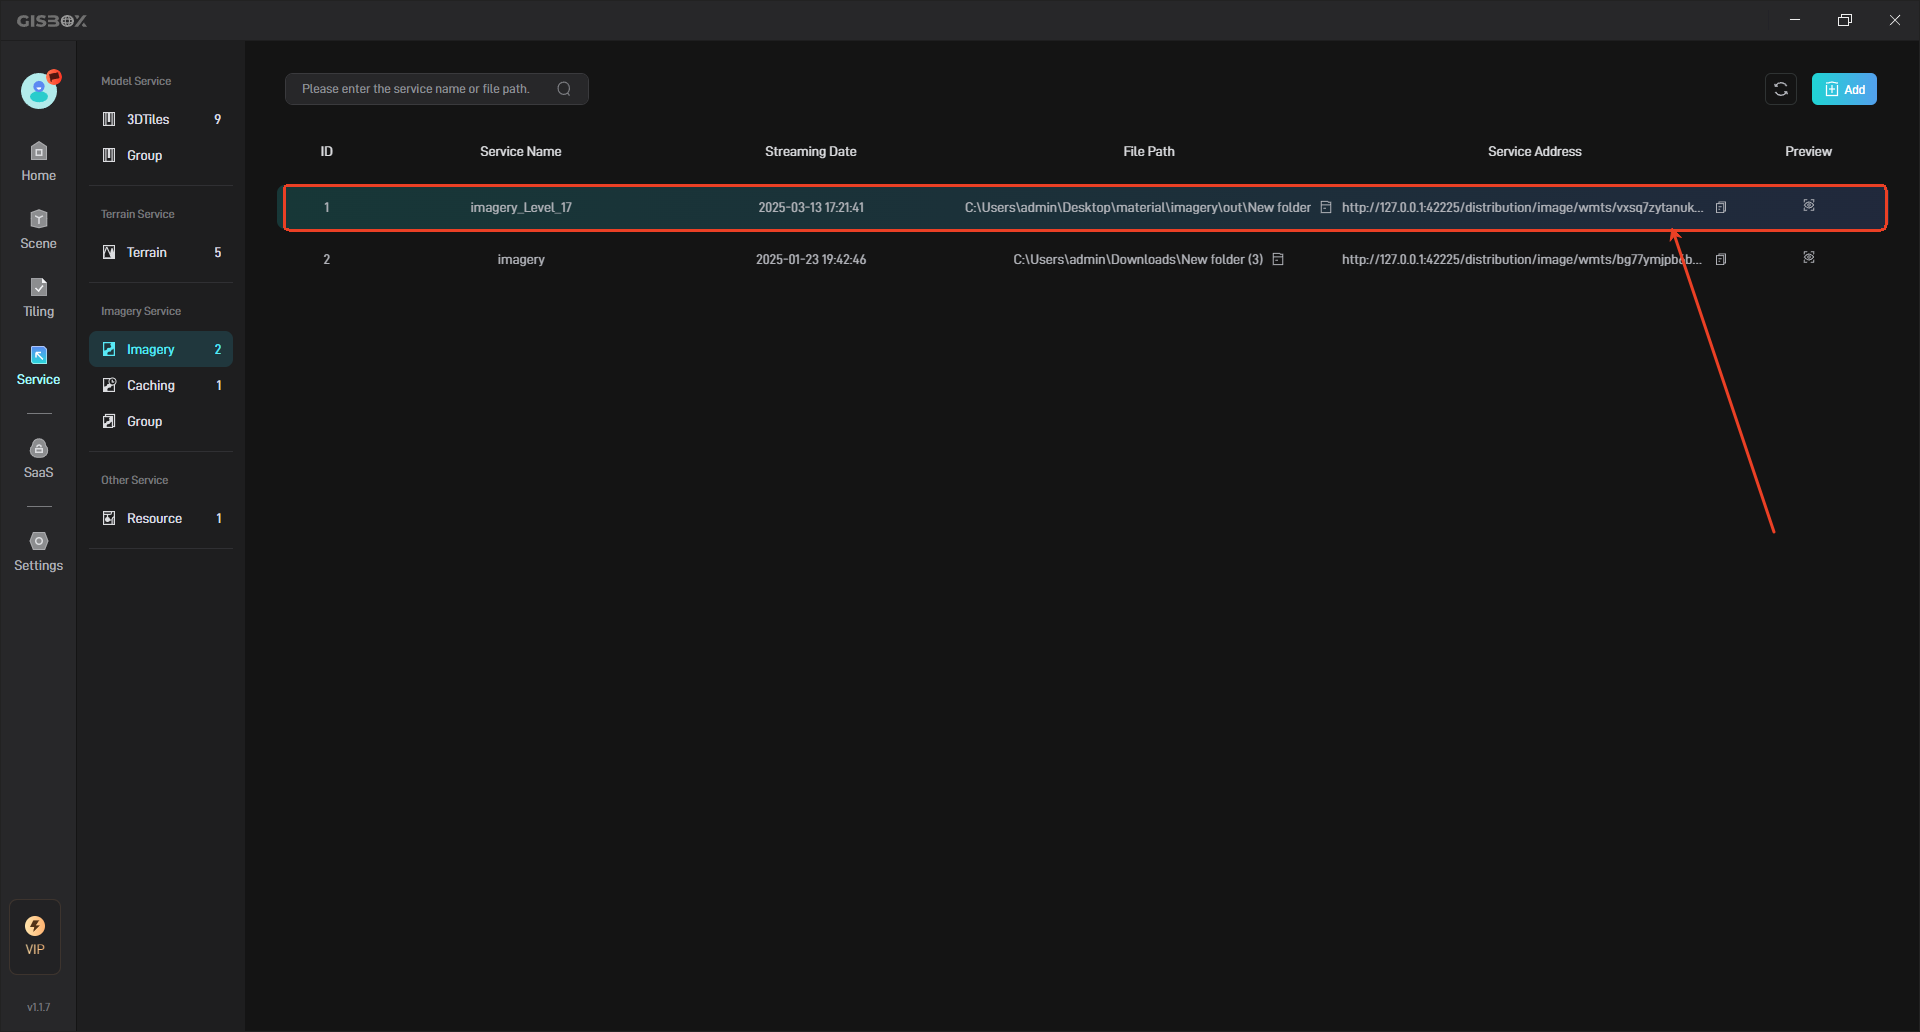
5. Use Service Address
If you check “Stream as Service” in the settings of the tiling task, the model will be automatically distributed after tiling is successful (the corresponding service address will be generated). We can click to open the corresponding service list, as shown in the figure below: (For more details, please refer to the tutorial: Model Service)
The generated service address can be applied to GIS platforms such as Cesium, and can also be applied to some digital twin project building platforms, such as Wings Engine.