
User Management
SaaS feature of GISBox supports role-based permission management, supports multiple people uploading files to the network drive at the same time, supports online creation of scene projects, slice projects and services, and improves team collaboration efficiency.
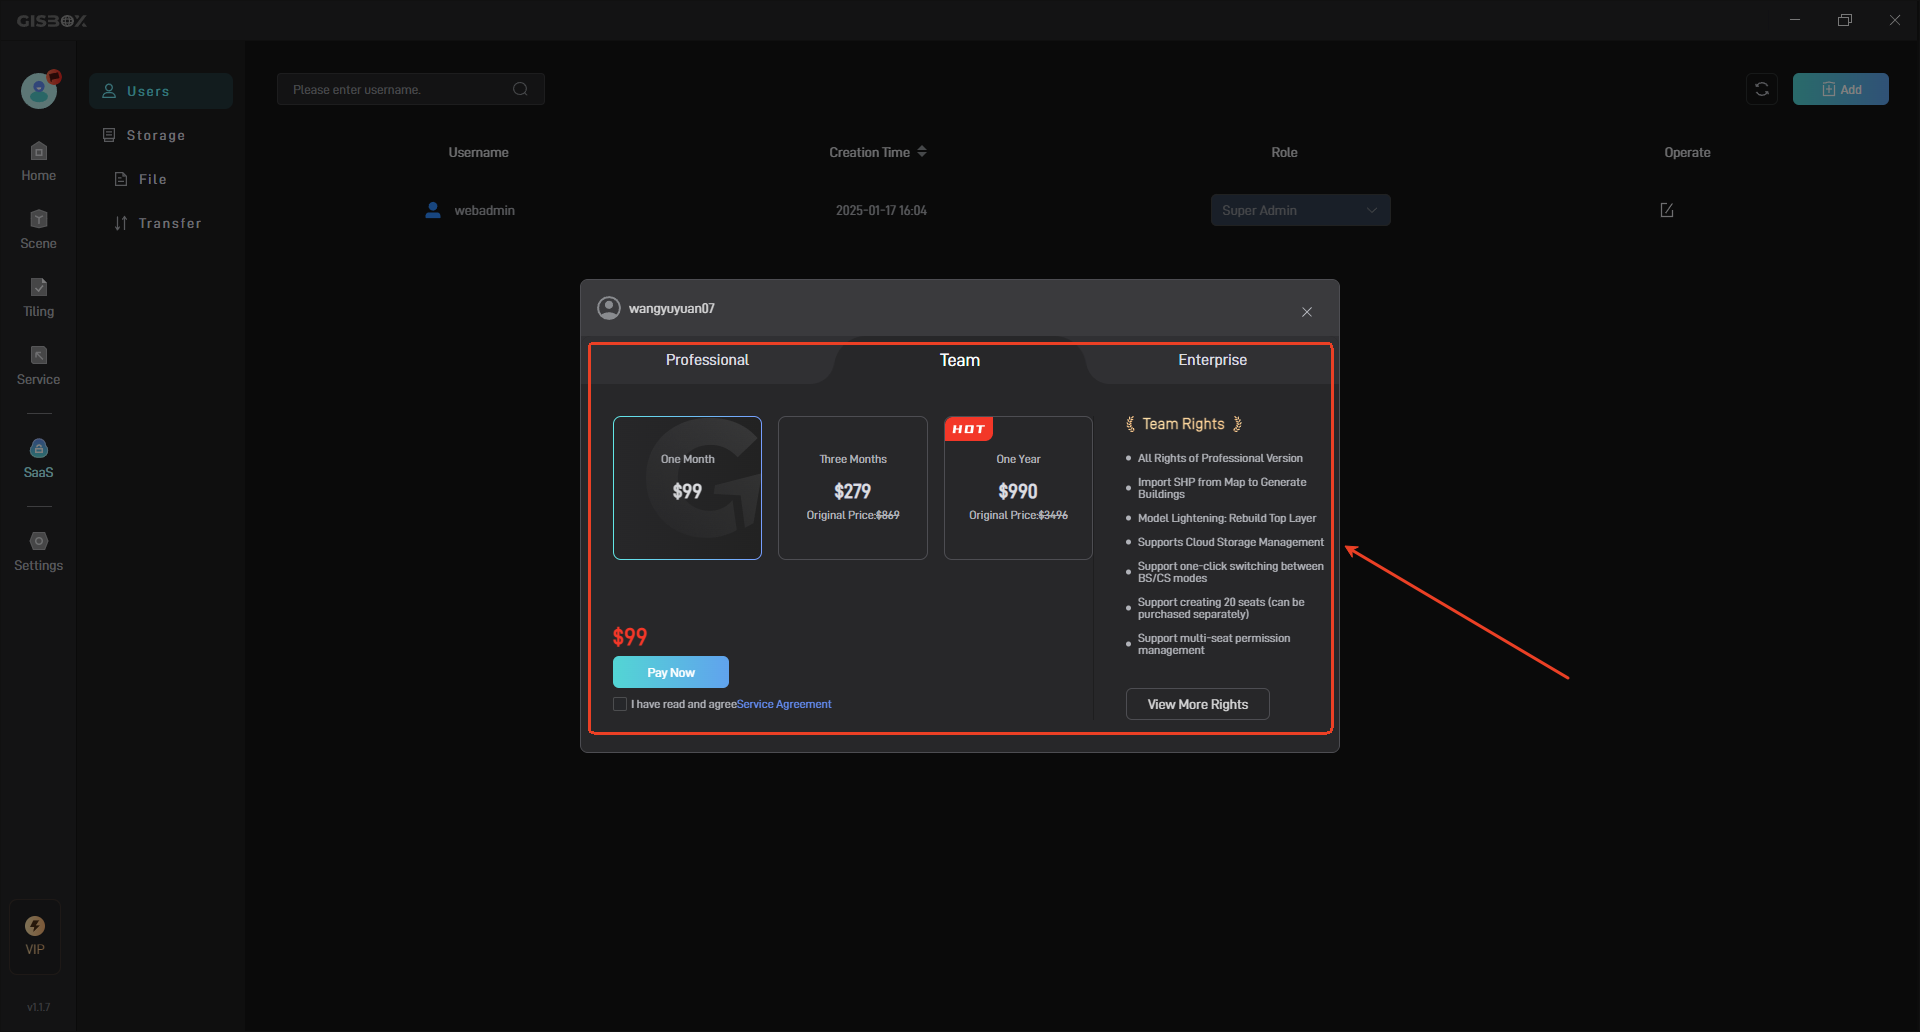
[Tips] The SaaS feature of GSIBox requires the Team Plan to use. Click here to view the “Product Price”.
The following are the steps to use SaaS:
1. Open GISBox
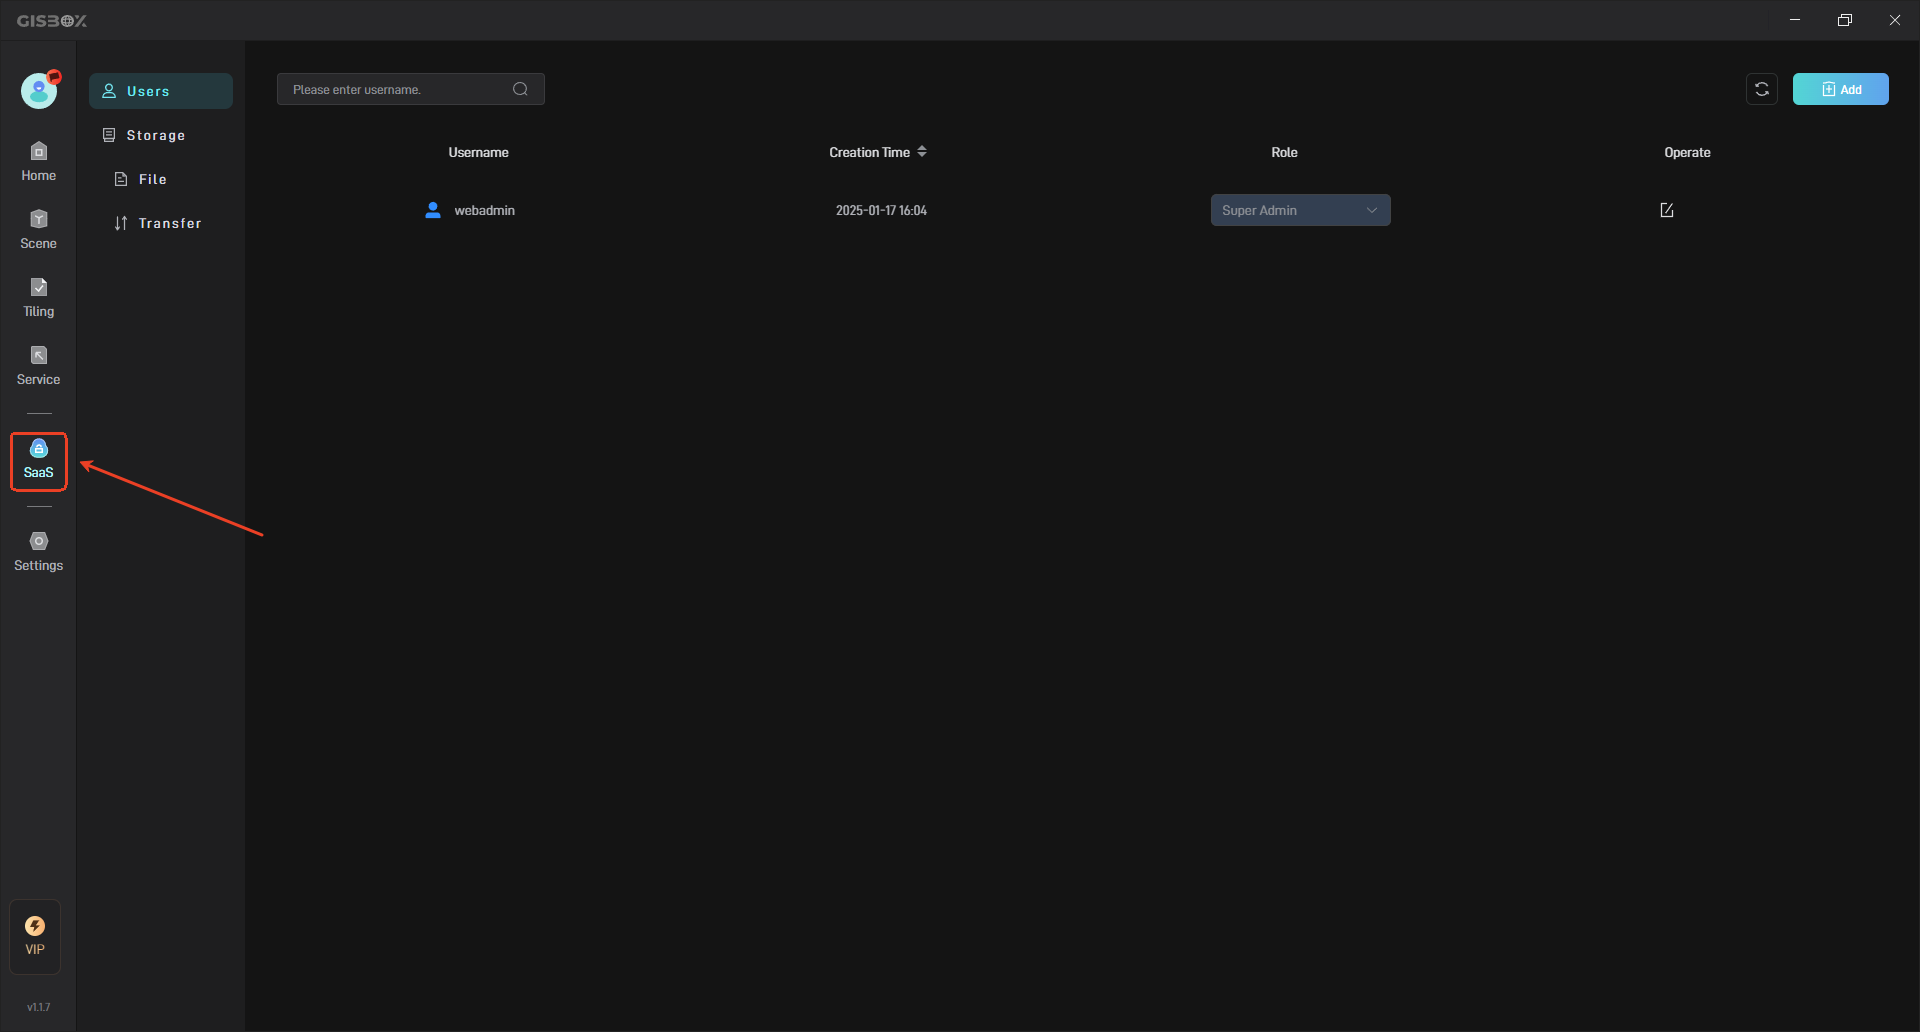
First, we open the GISBox software on the machine where we need to enable the “SaaS” feature.
Then, click the “SaaS” button in the left toolbar to see the relevant settings of “SaaS”, as shown in the figure below:
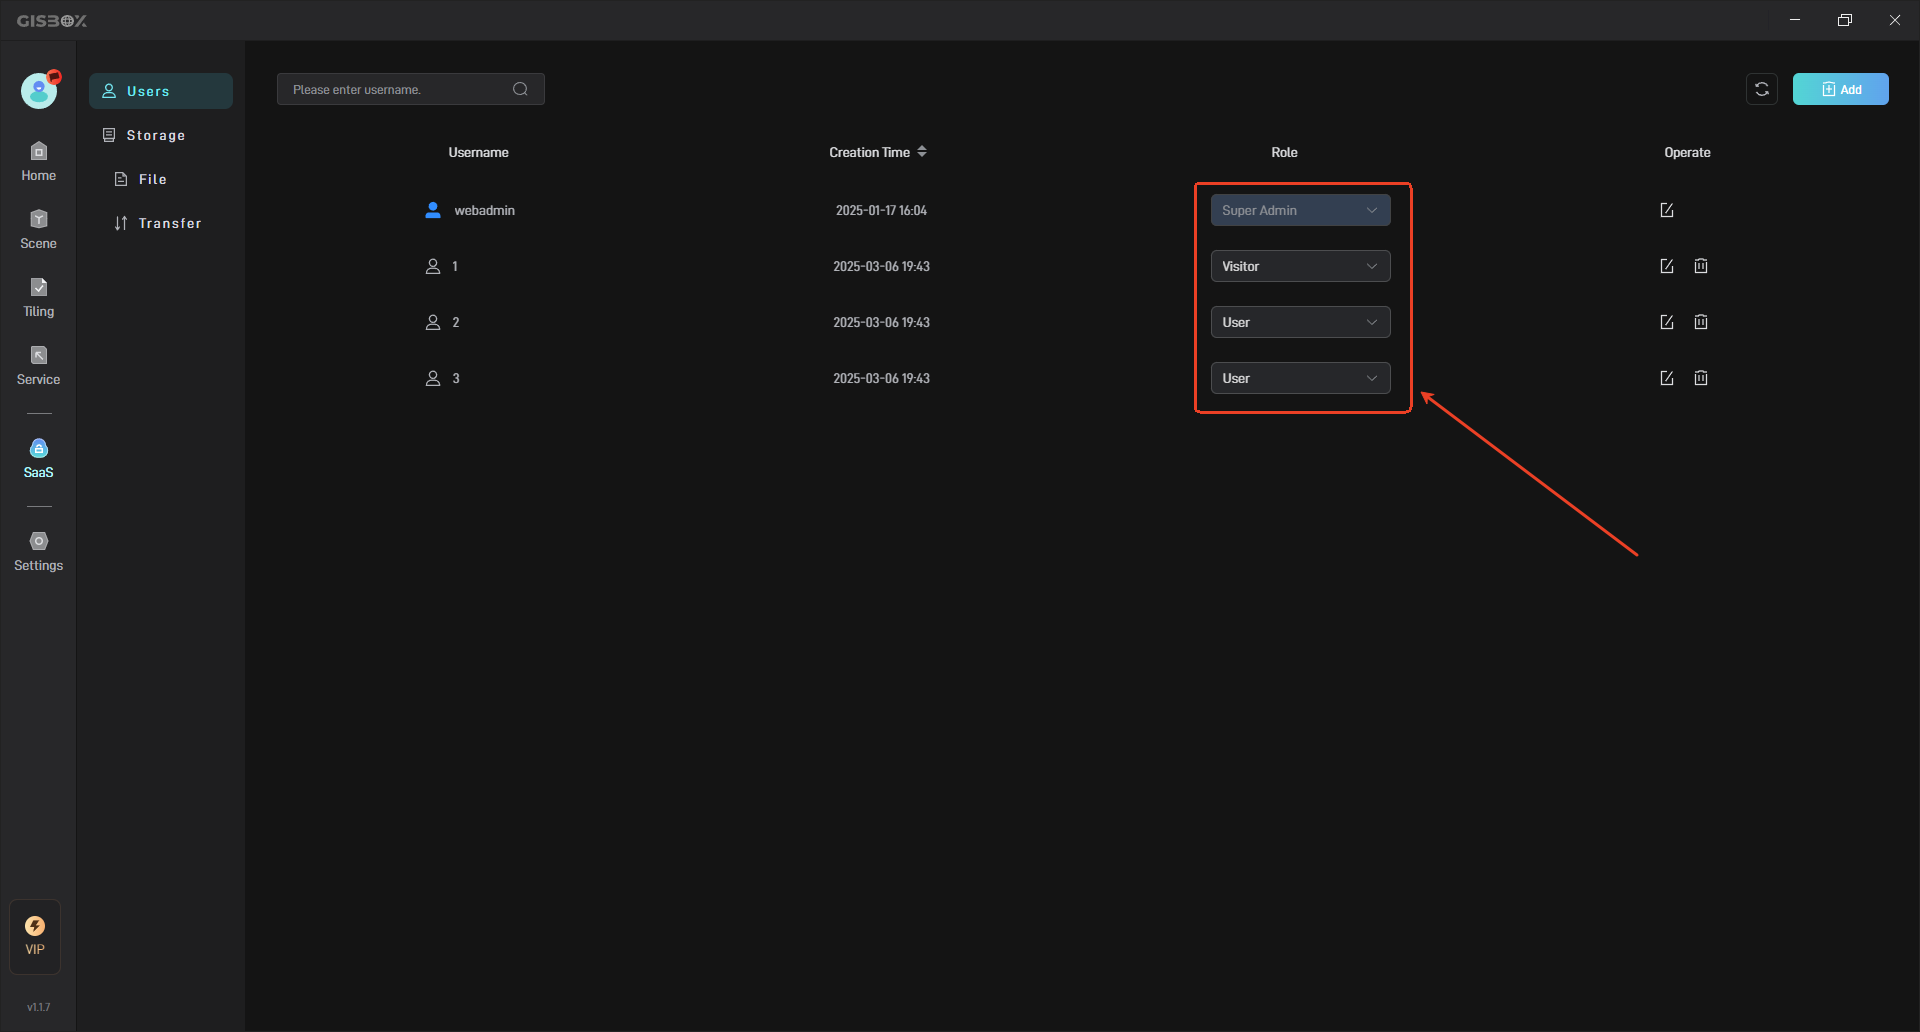
2. User Management
In the “Users” interface, you can set the main and sub-accounts of GISBox’s SaaS service. The main account is automatically created by the software and has a blue logo on its left. You can view all created user information, including “Username”, “Creation Time” and “Role”, and you can also perform editing operations, including “Add User”, “Change Role”, “Change Username/Password”, etc.
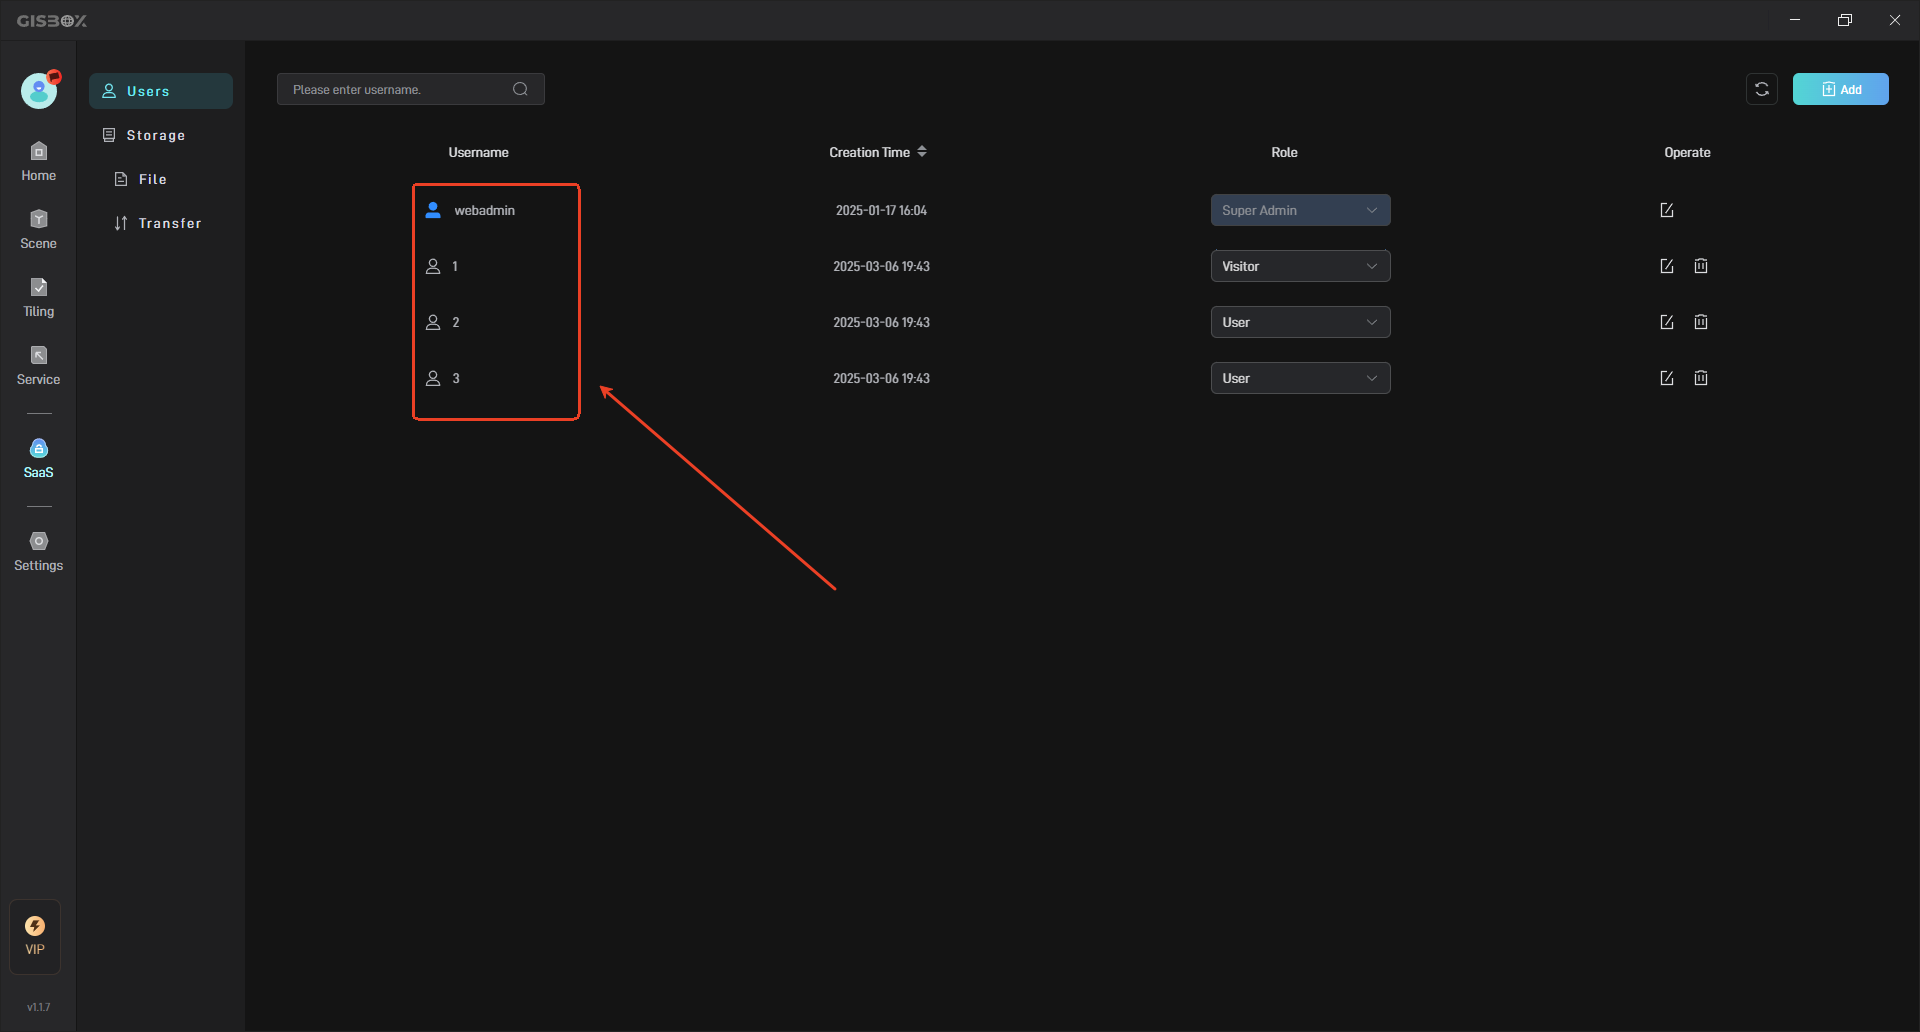
Accounts with different roles have different file access permissions. For example, a “Visitor” account cannot directly view and use tile files uploaded by a “User” account unless the file access permissions are modified.
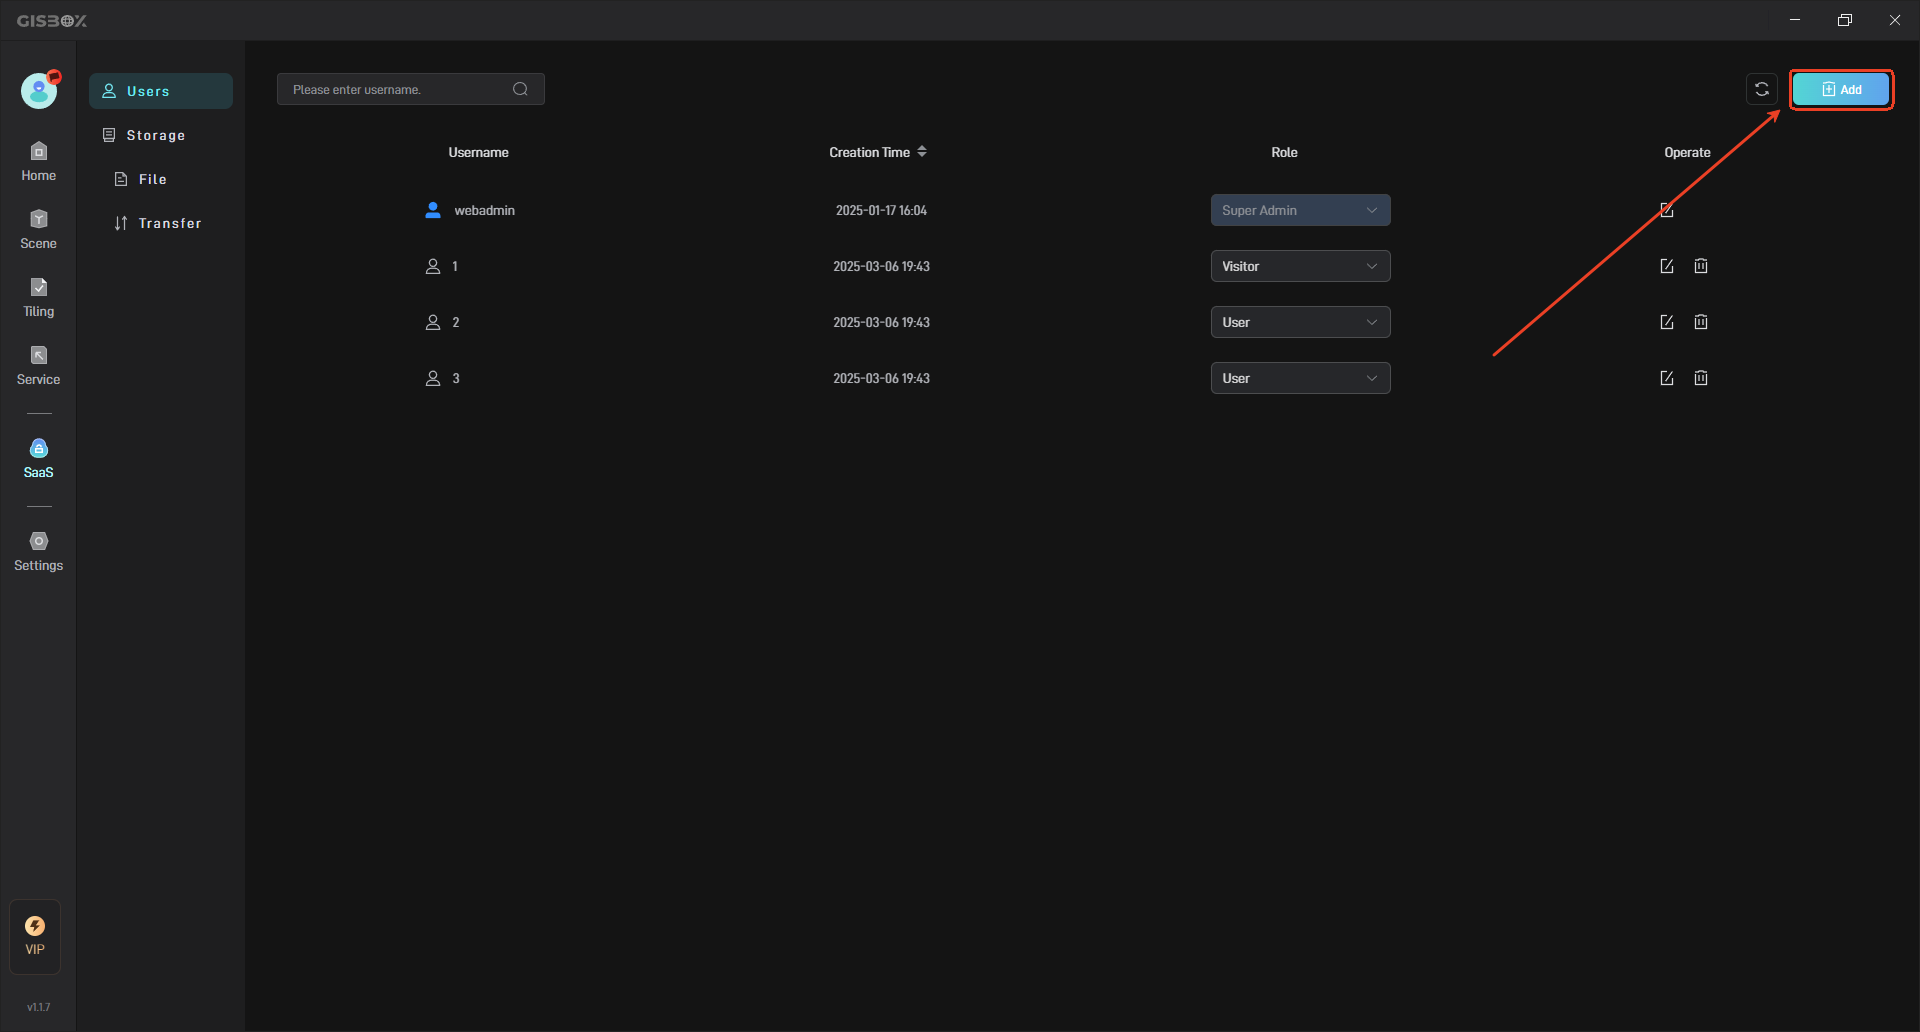
2.1 Add User
Click the “Add” button in the upper right corner to create a new user, as shown below:
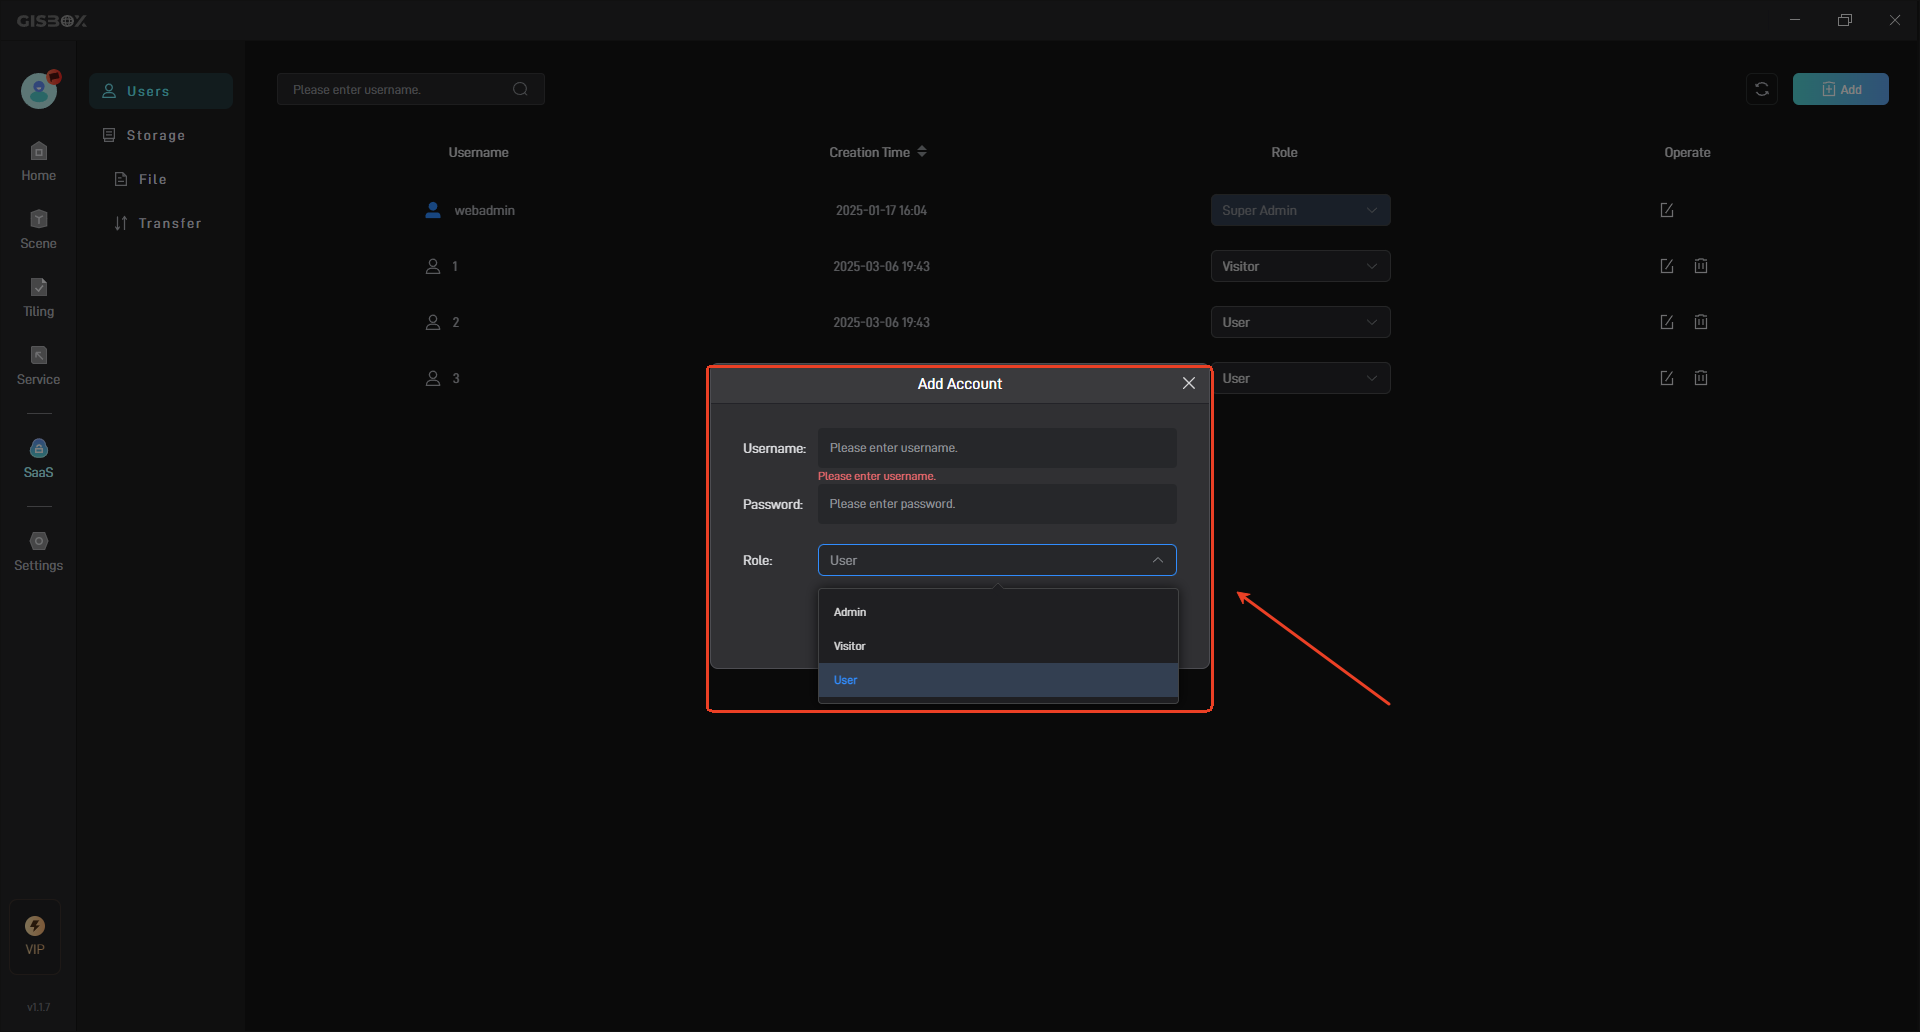
In the pop-up “Add Account” window, fill in the account and password, and select the user role as needed: “Admin”, “Visitor”, “User”, as shown in the following figure:
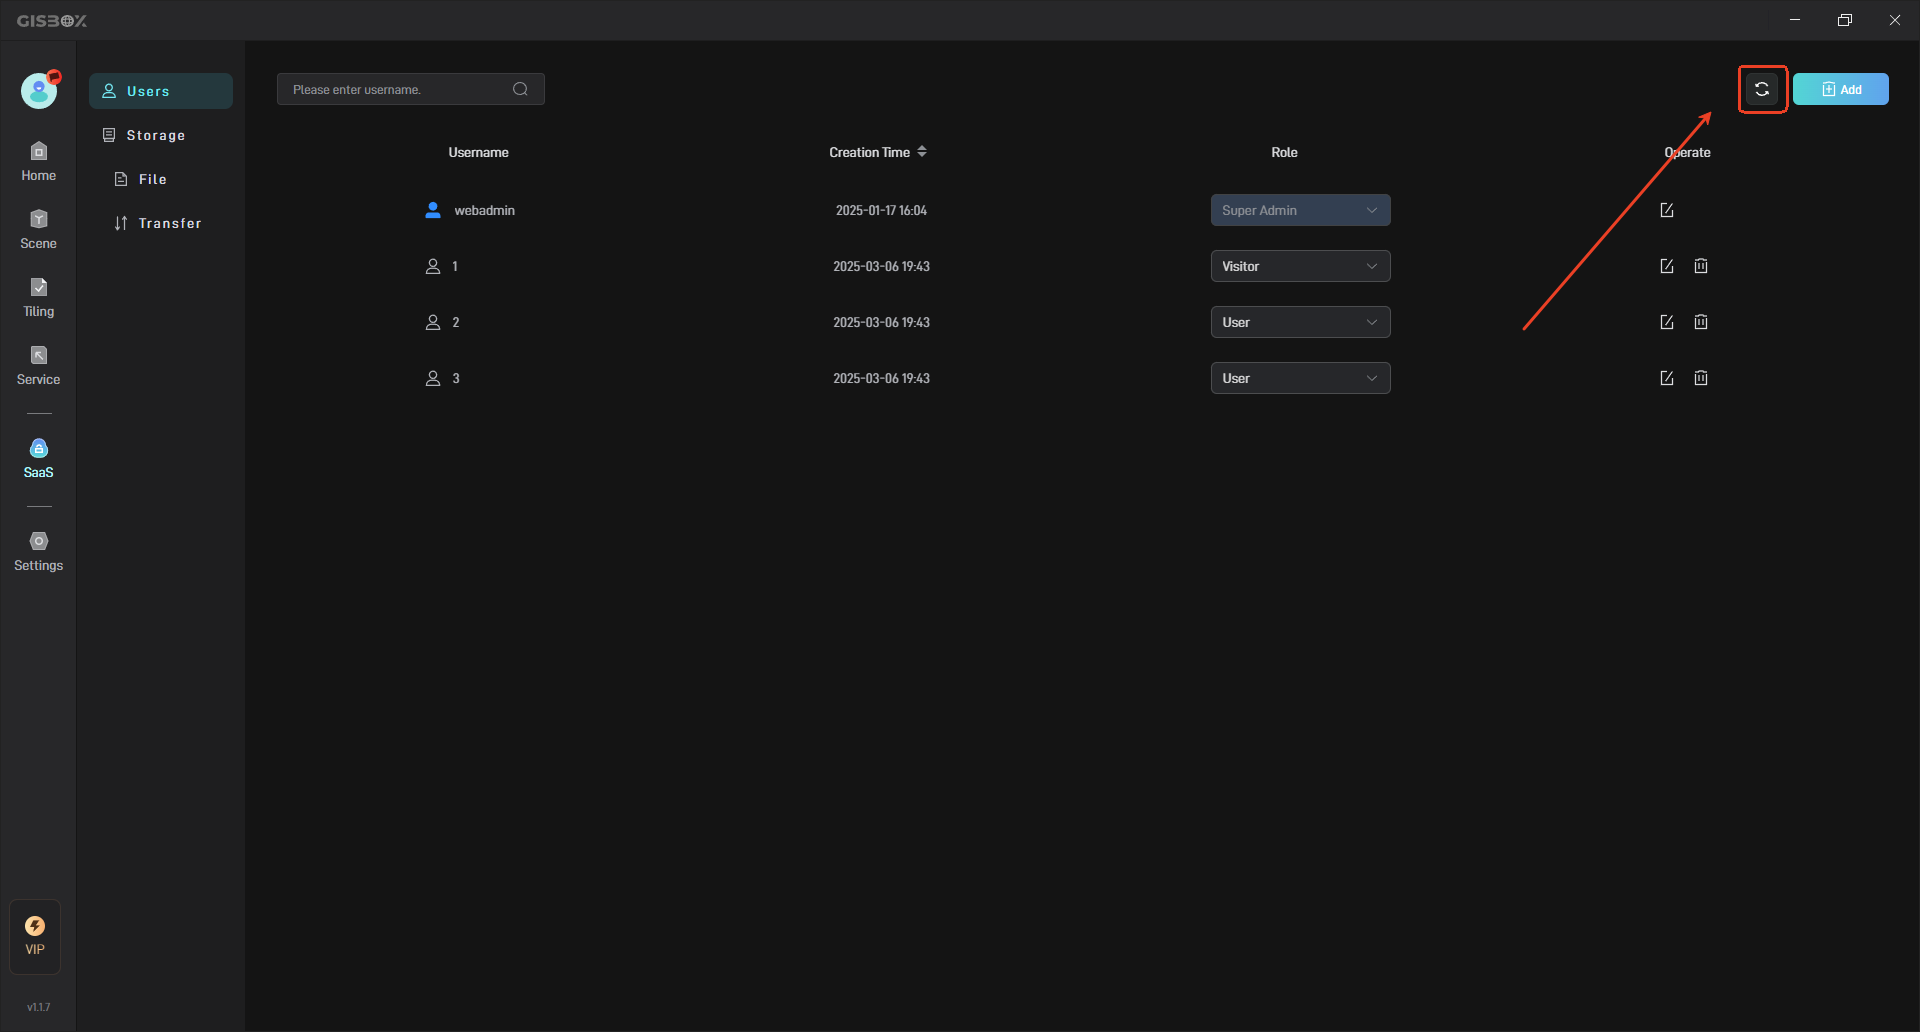
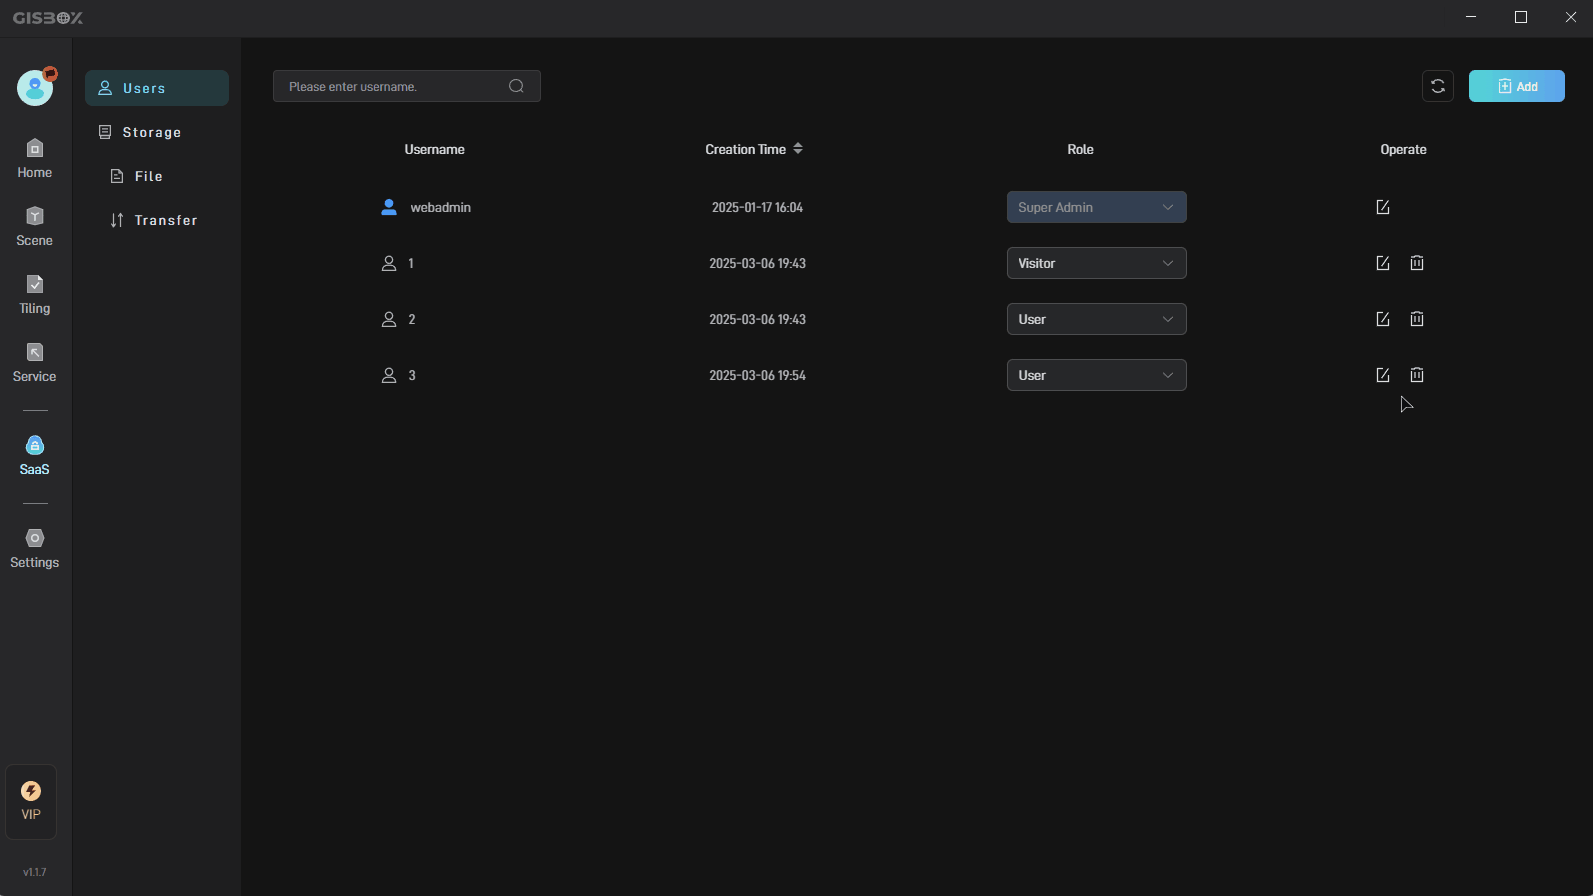
When a new user is added but is not displayed in the “Users” interface, you can click the “Refresh” button in the upper right corner to load the newly added user, as shown in the following figure:
2.2 Change User’s Role
In the “Role” column, you can change the user’s role type: “Admin”, “Visitor”, “User”, as shown in the following figure:

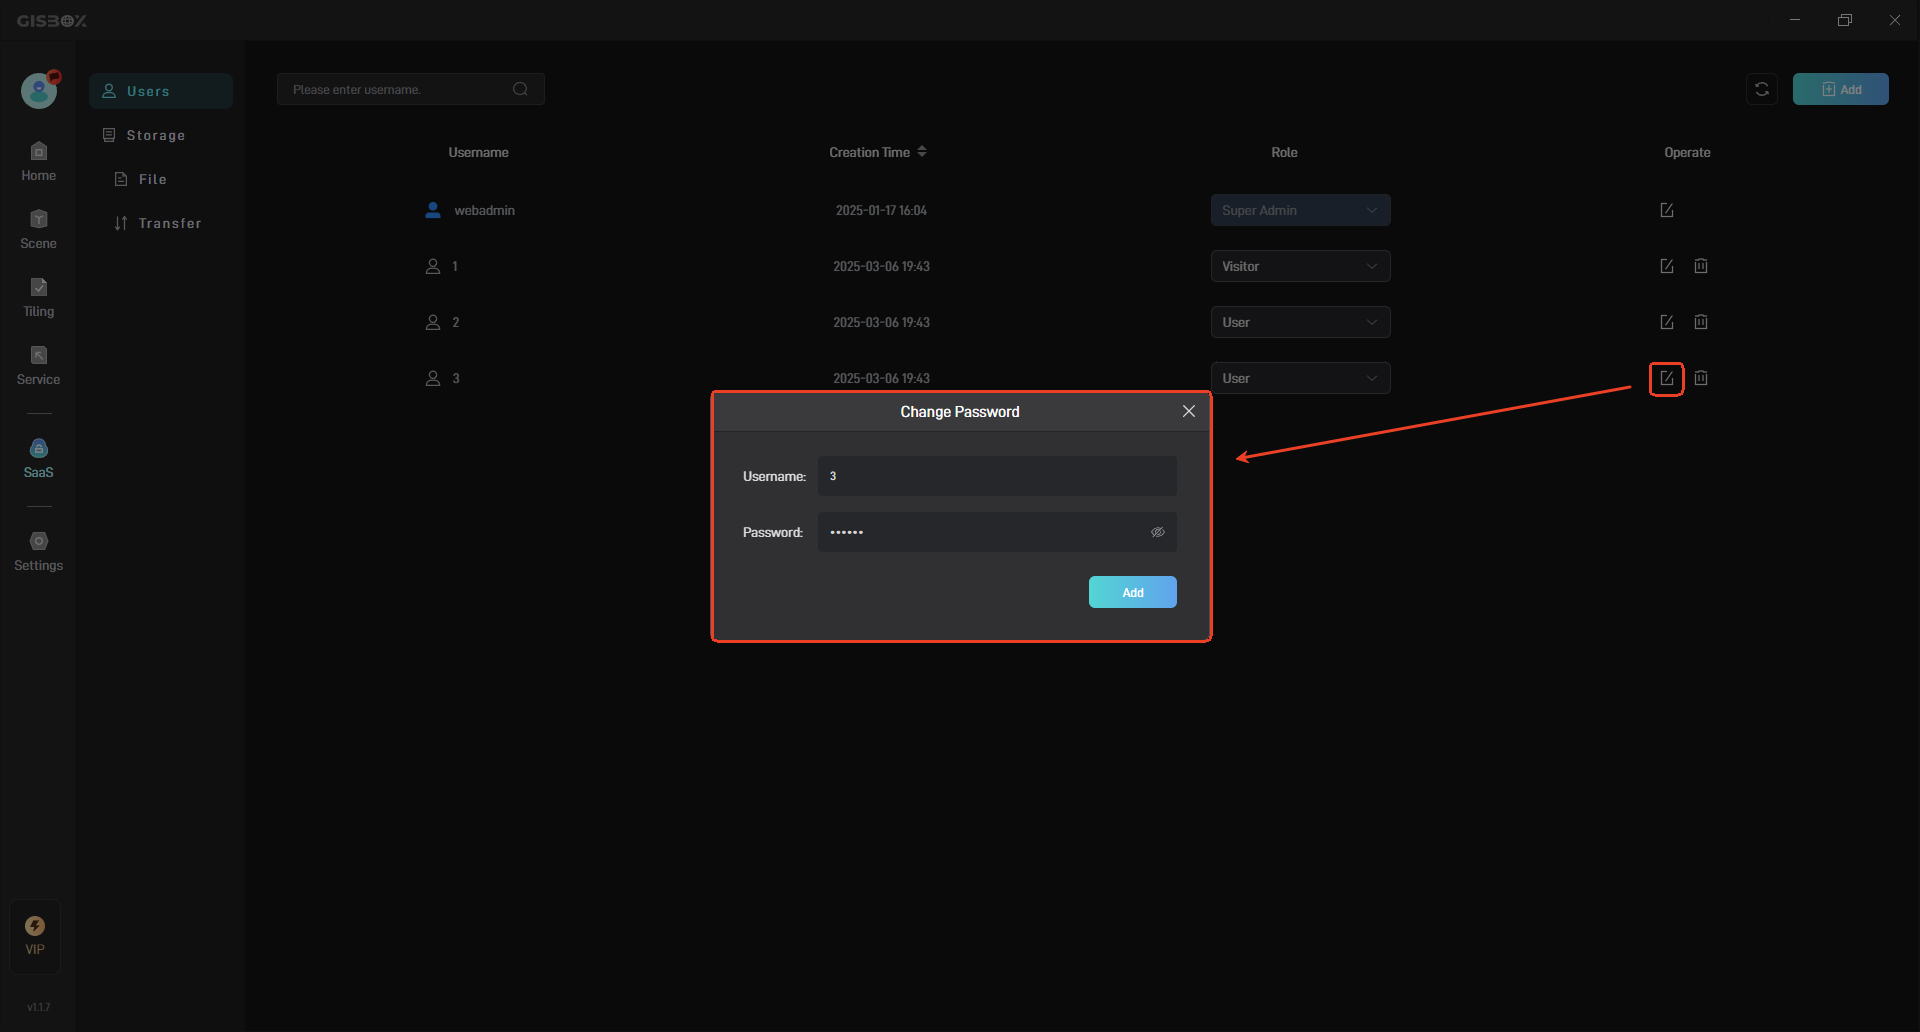
2.3 Change user account/password
Click the “Edit” button to change the username/password, as shown below:
2.4 Delete Users
Click the “Delete” button to delete the selected user, as shown below:
2.5 Search Users
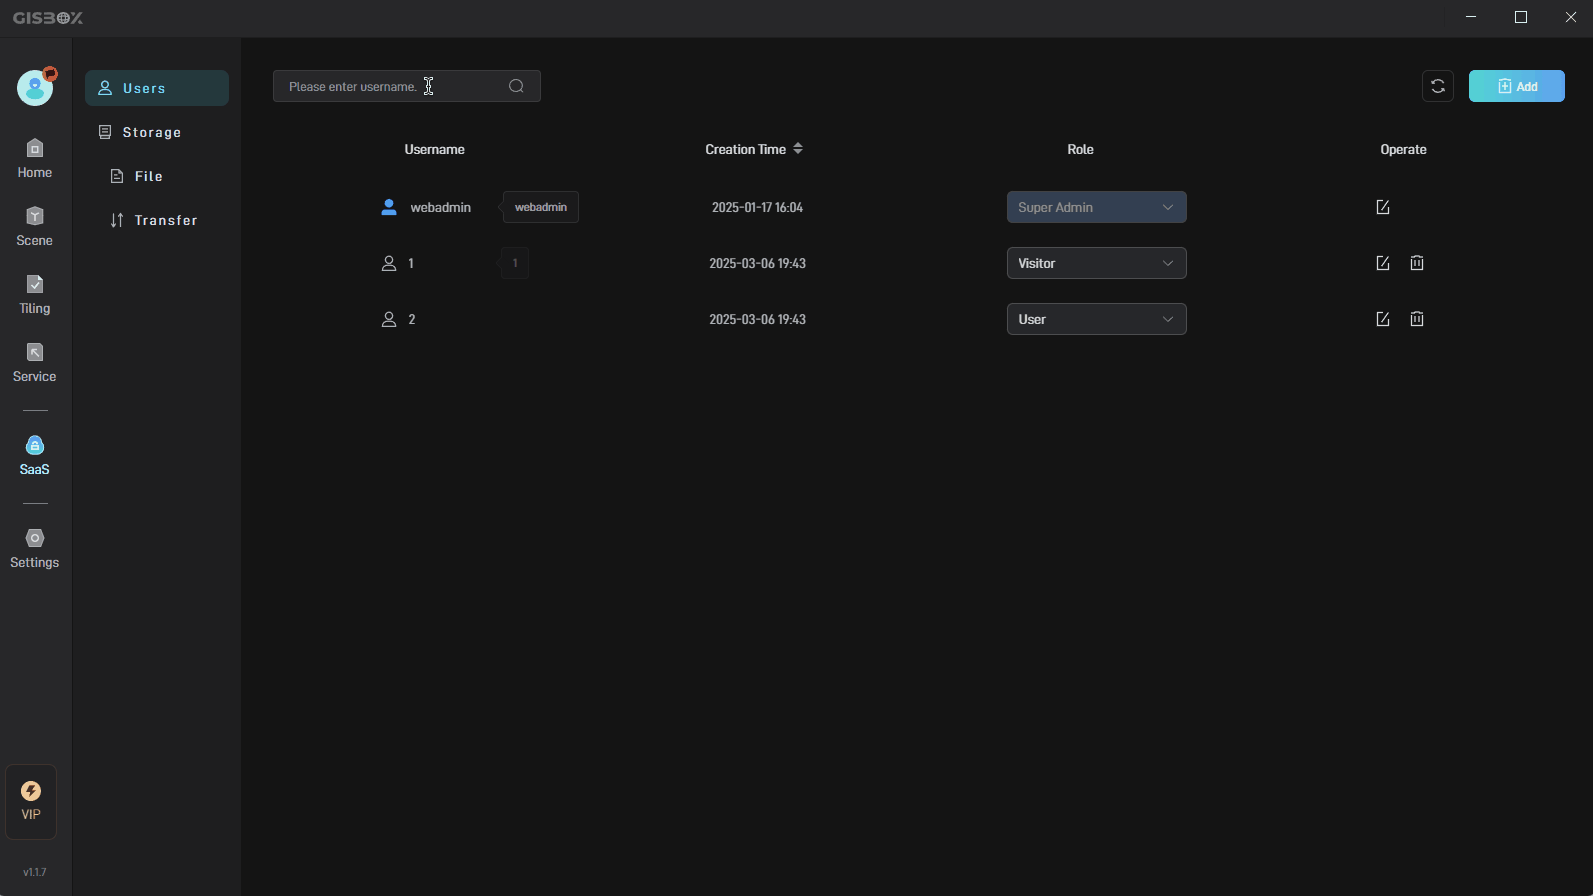
In the search bar on the upper left, you can enter the user name to search, as shown below:
3. Storage Management
Next we need to configure storage management, where we can modify the cloud drive path, that is, modify the file storage path.
[Tips] The cloud drive is a designated hard drive space on the machine where the GISBox is located after the “SaaS” feature is enabled.
3.1 Create New Folder
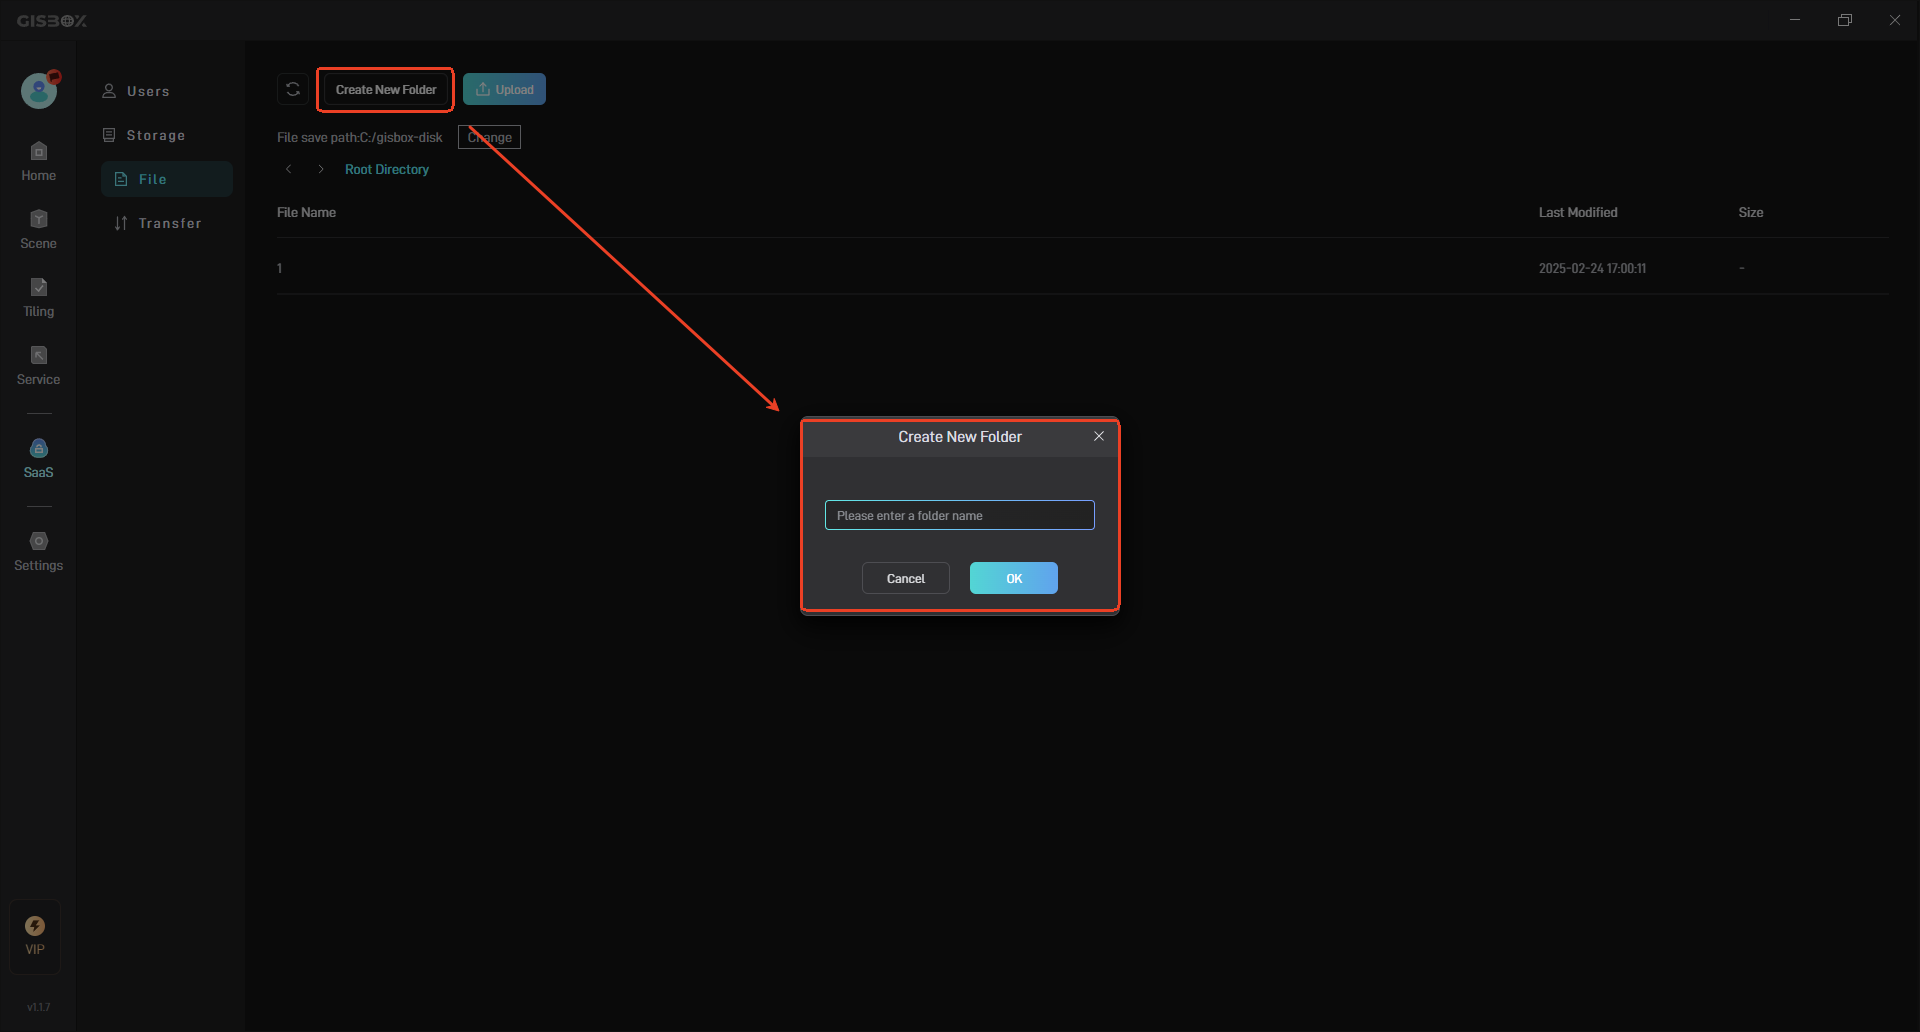
Open the “File” interface and click the “Create New Folder” button above to create a new folder, which can be used to save projects for easy collaboration, as shown in the following figure:
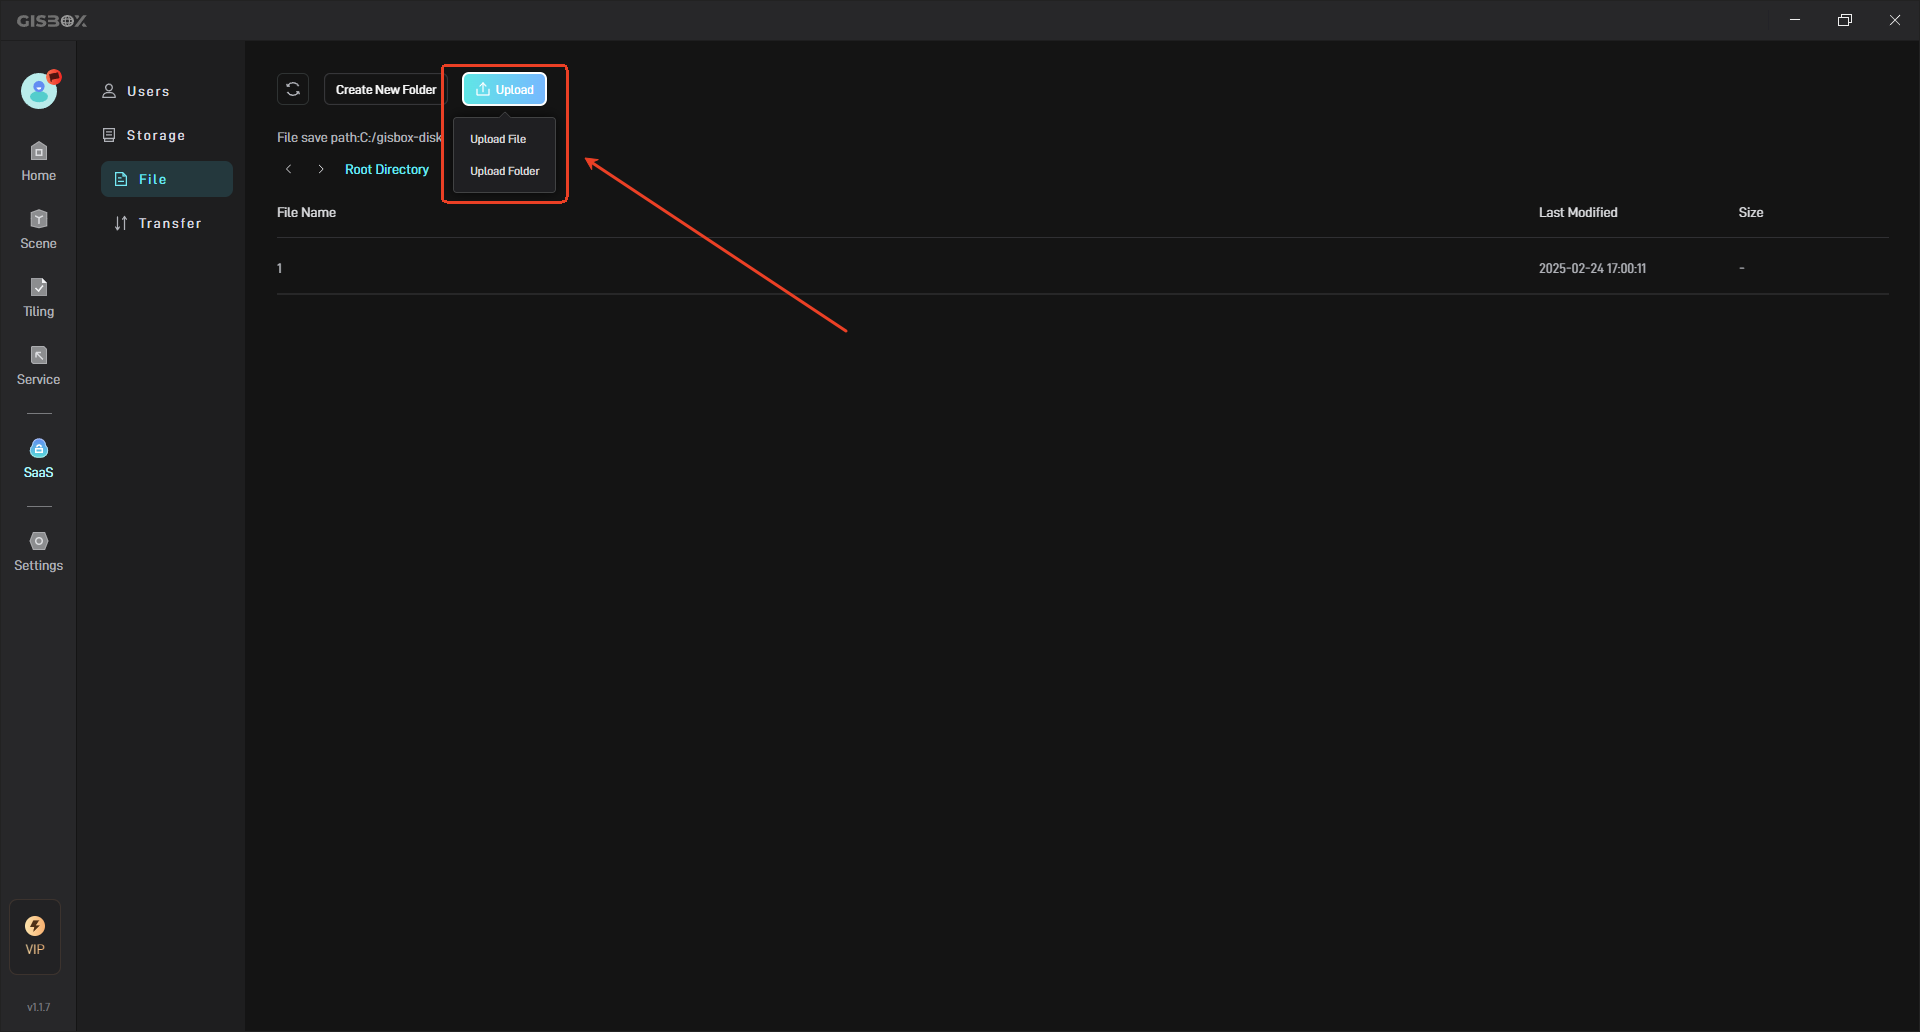
3.2 Upload Files/Folders
Click the “Upload” button to upload local project files or the entire folder, as shown in the following figure:
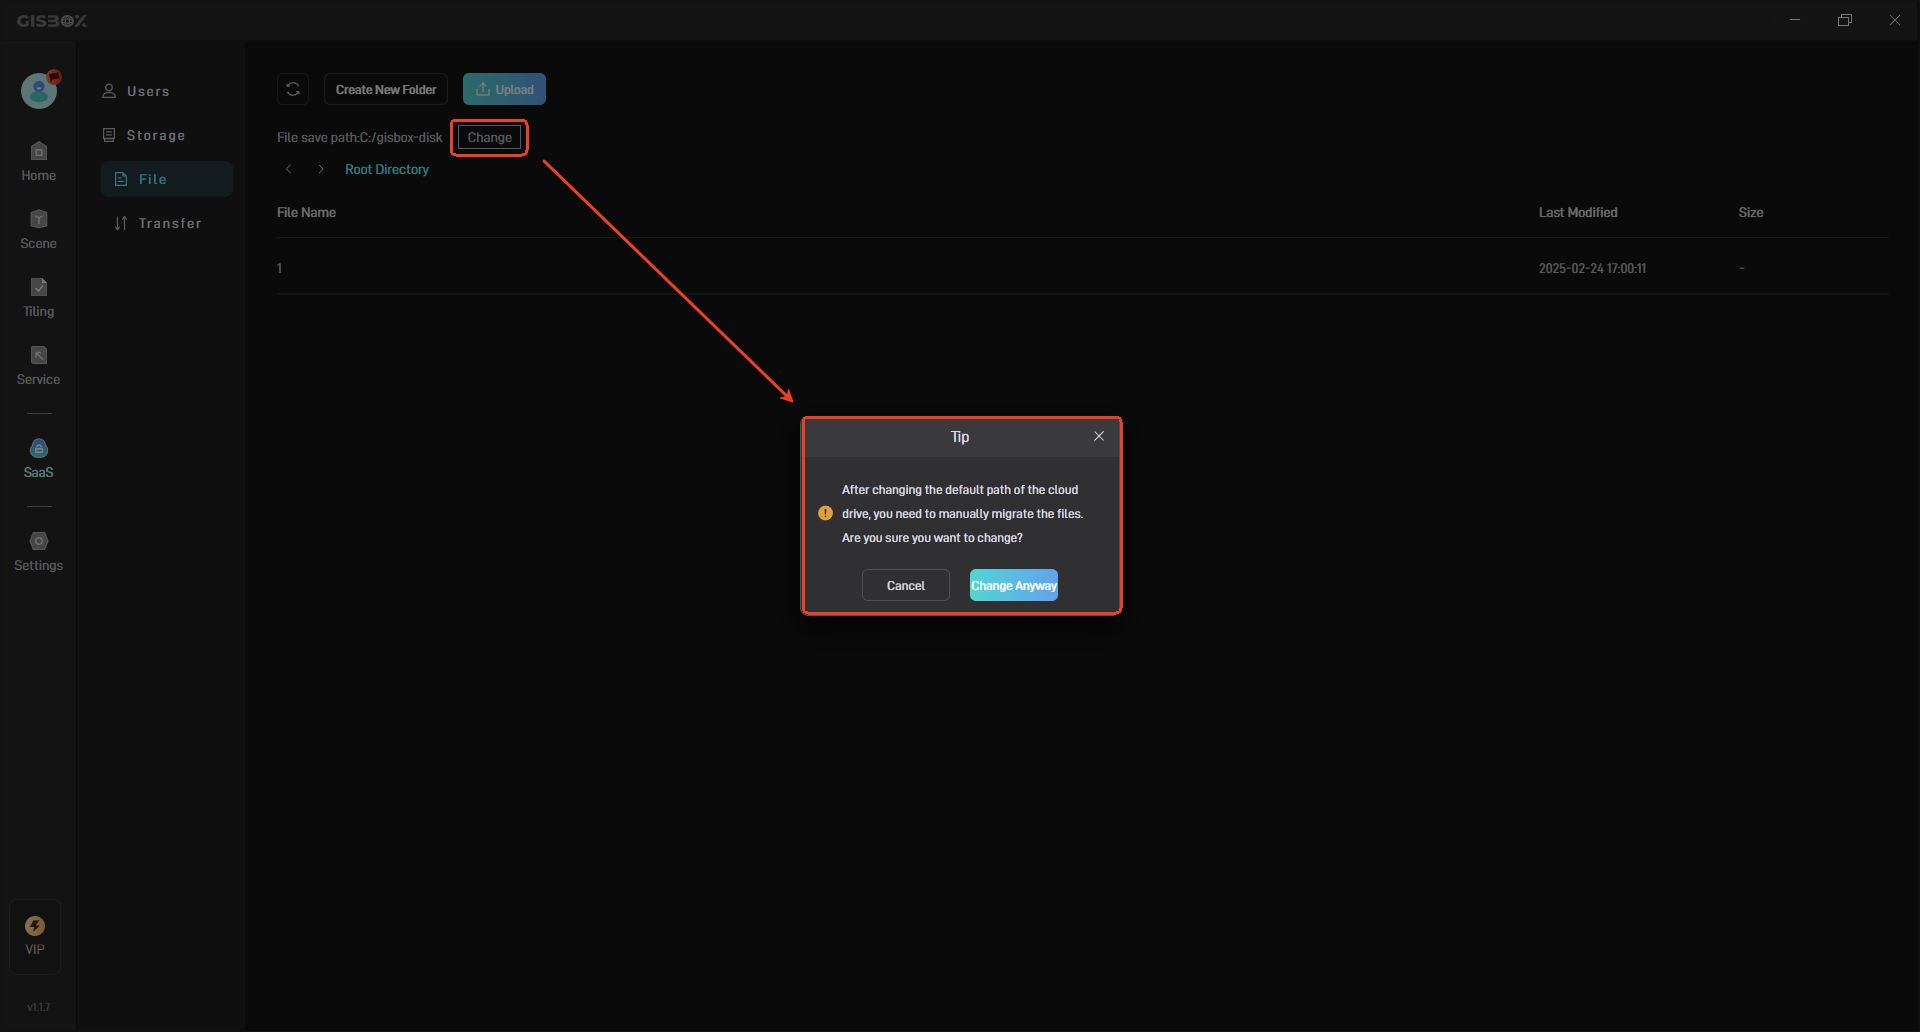
3.3 Change File Save Path
Click the “Change” button to change the file save path. A prompt will pop up saying “After changing the default path of the cloud drive, you need to manually migrate the files. Are you sure you want to change?” It is recommended to choose according to actual needs, as shown in the figure below:
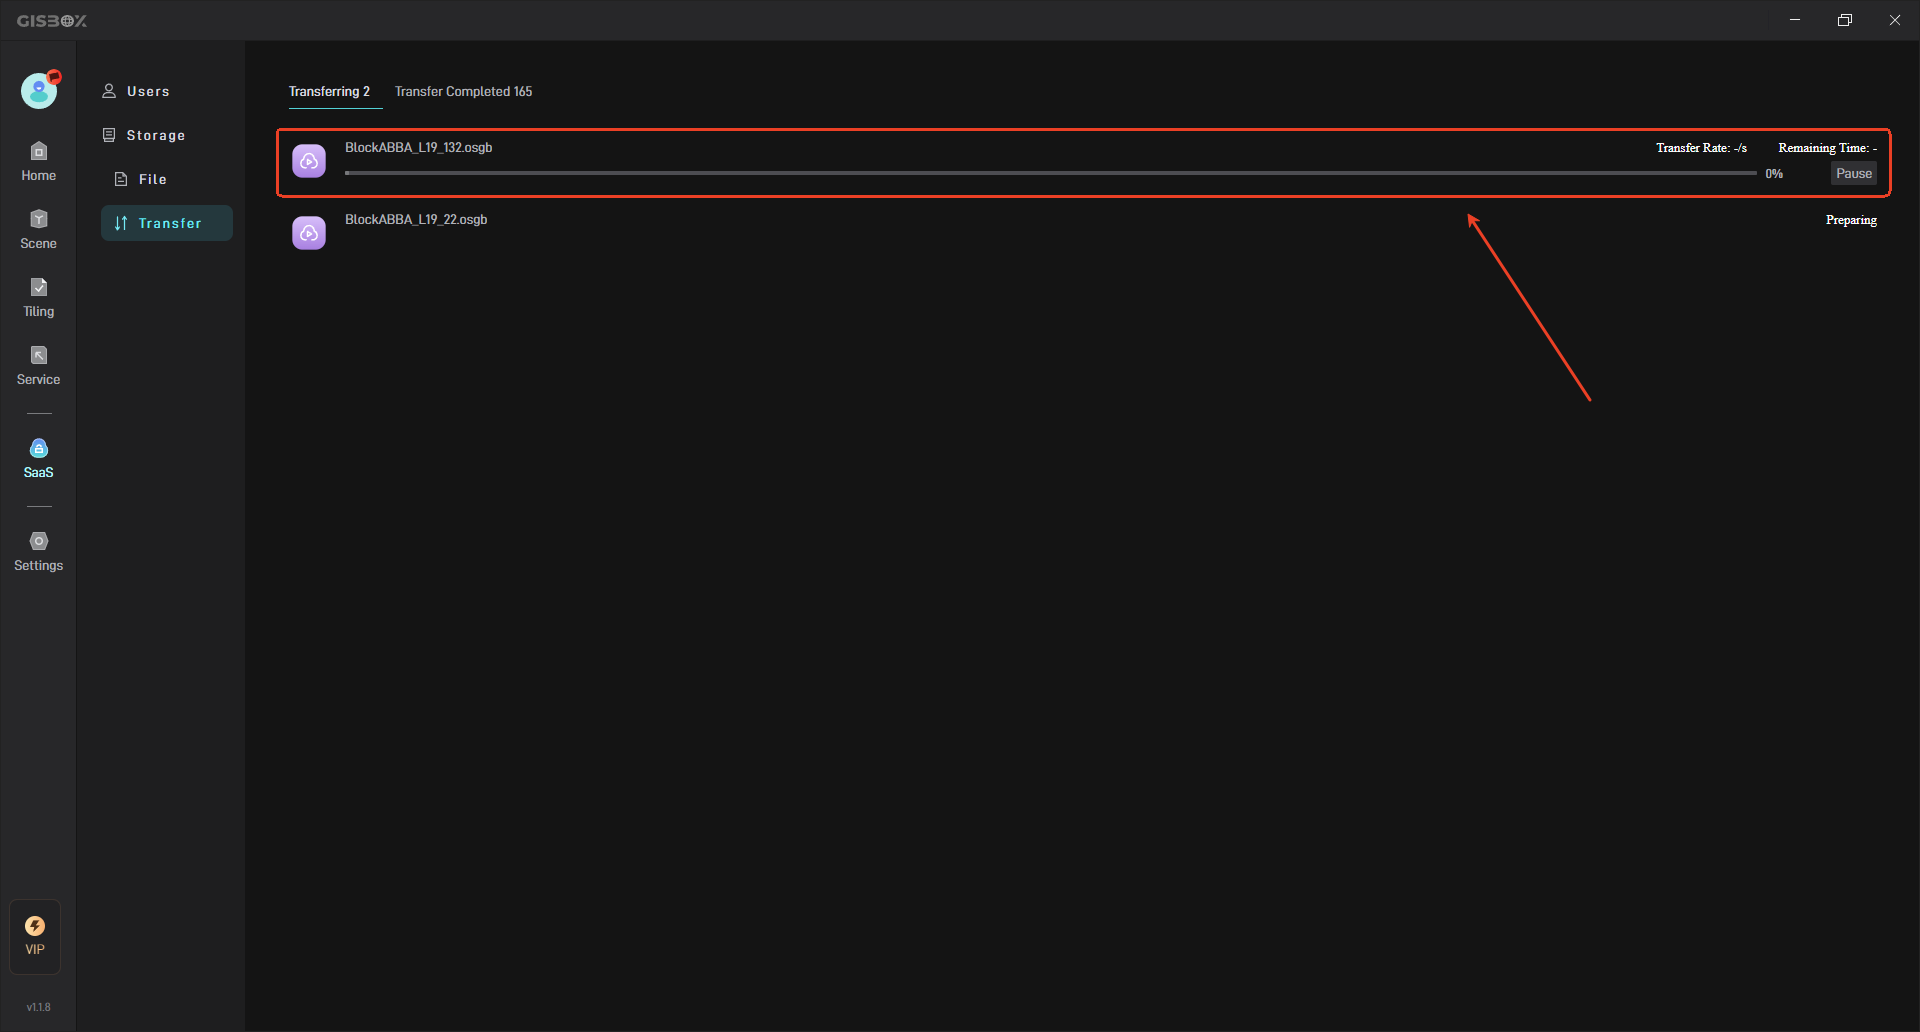
3.4 Check Transfer Status
When you start uploading files/folders, you can switch to the “Transfer” interface to view the transfer speed and real-time progress, as shown in the following figure:
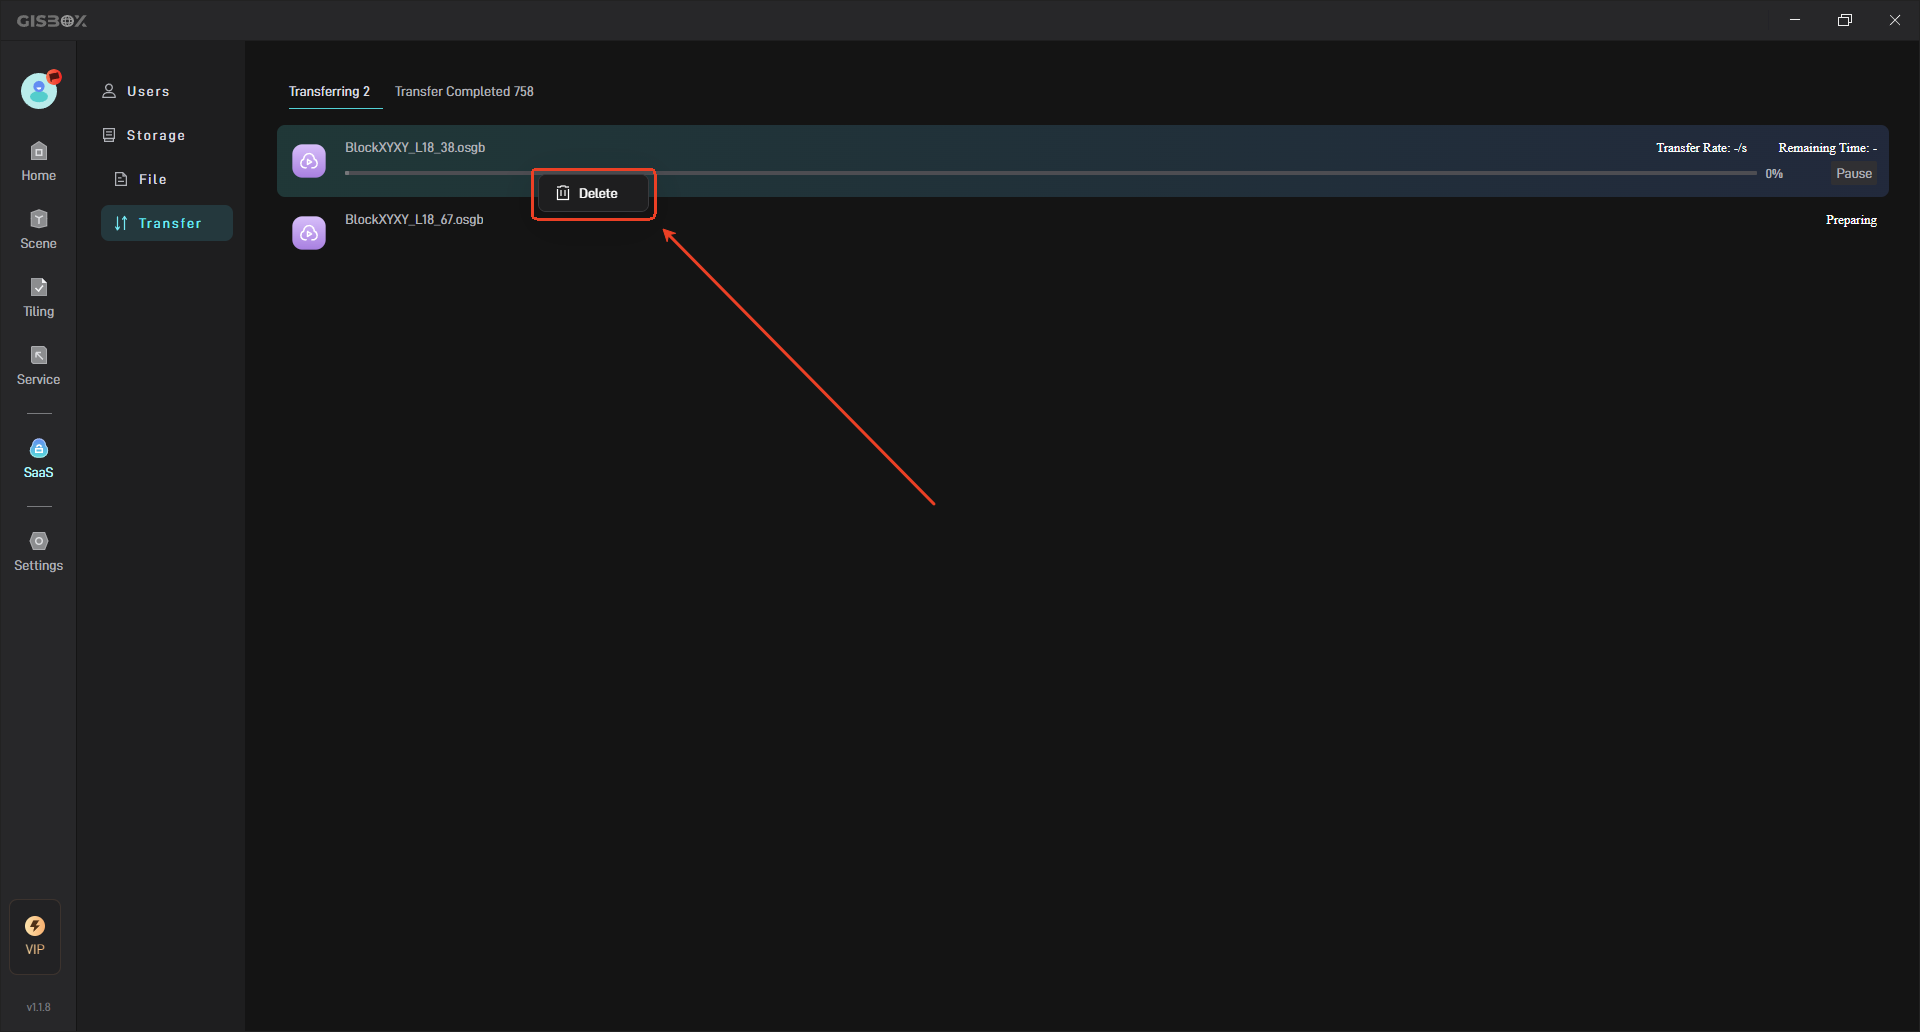
Click to select a transfer task and right-click to delete the transfer task, as shown in the following figure:
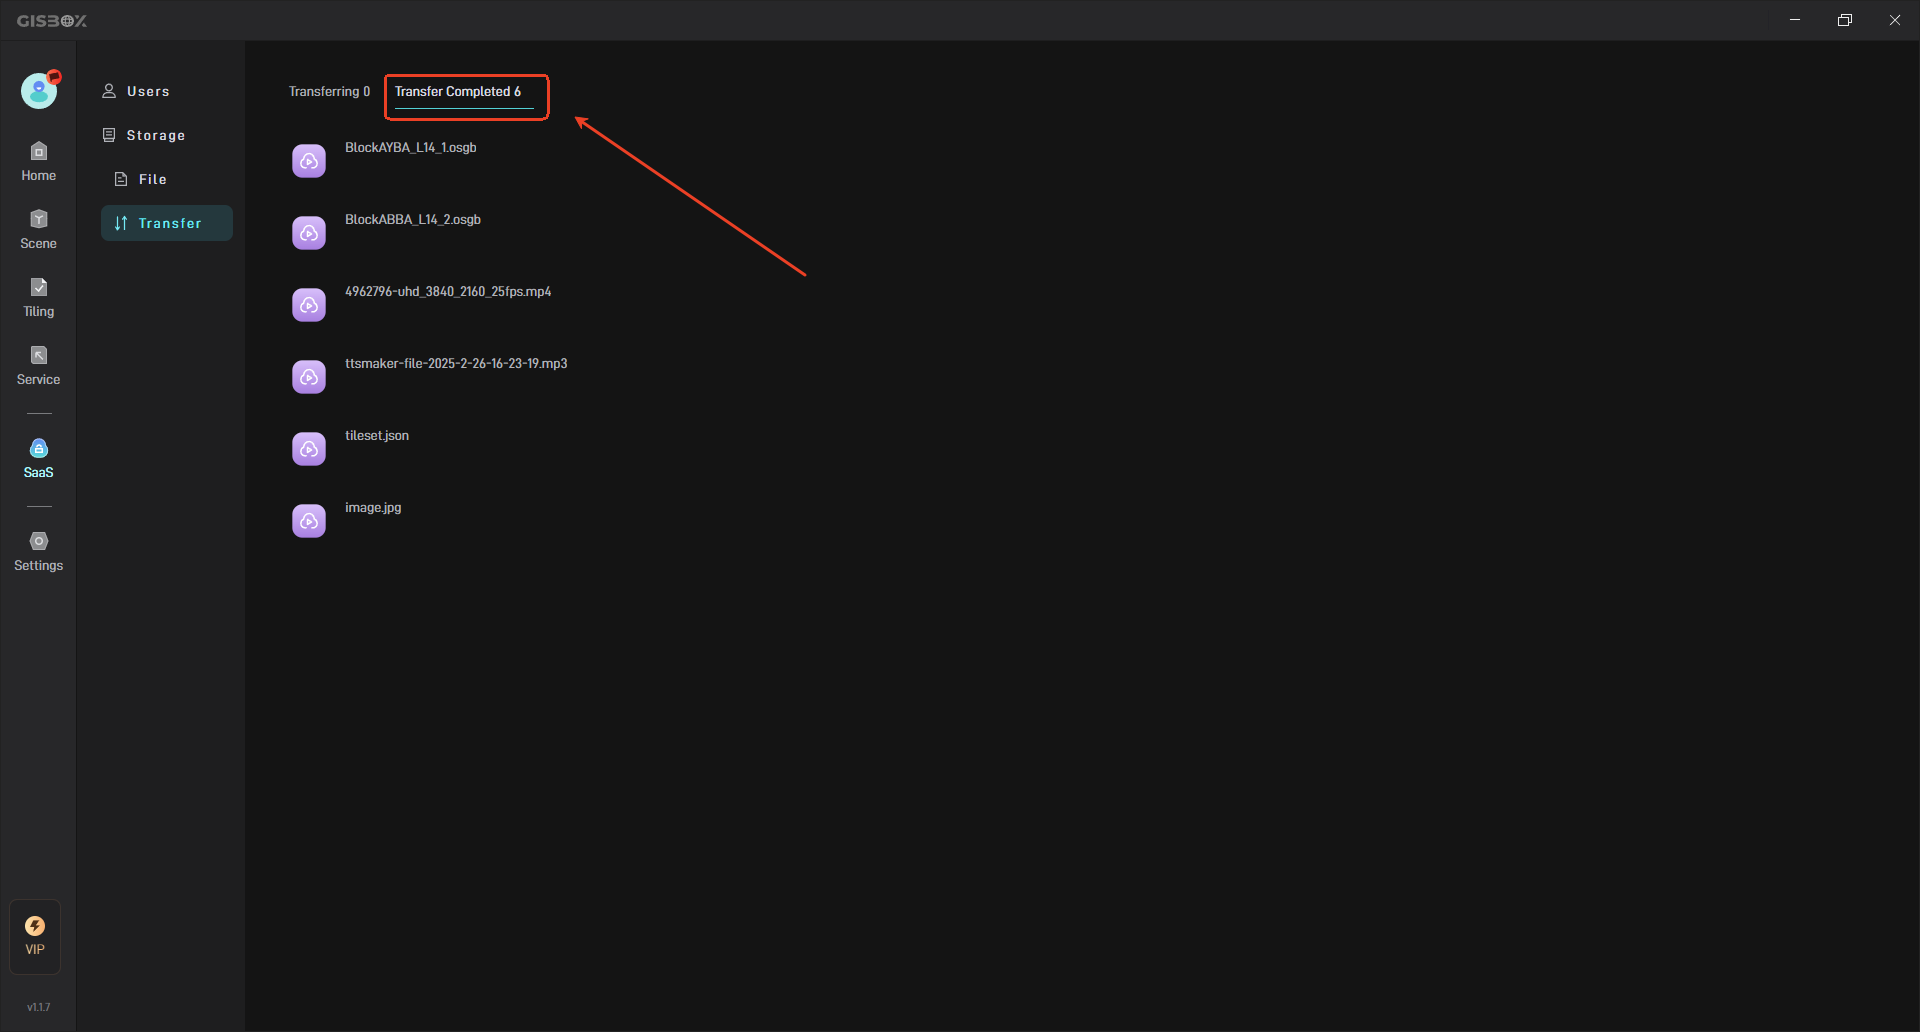
Click the “Tranfer Completed” button above to view the files/folders that have been transferred, as shown below:
3.5 View Files
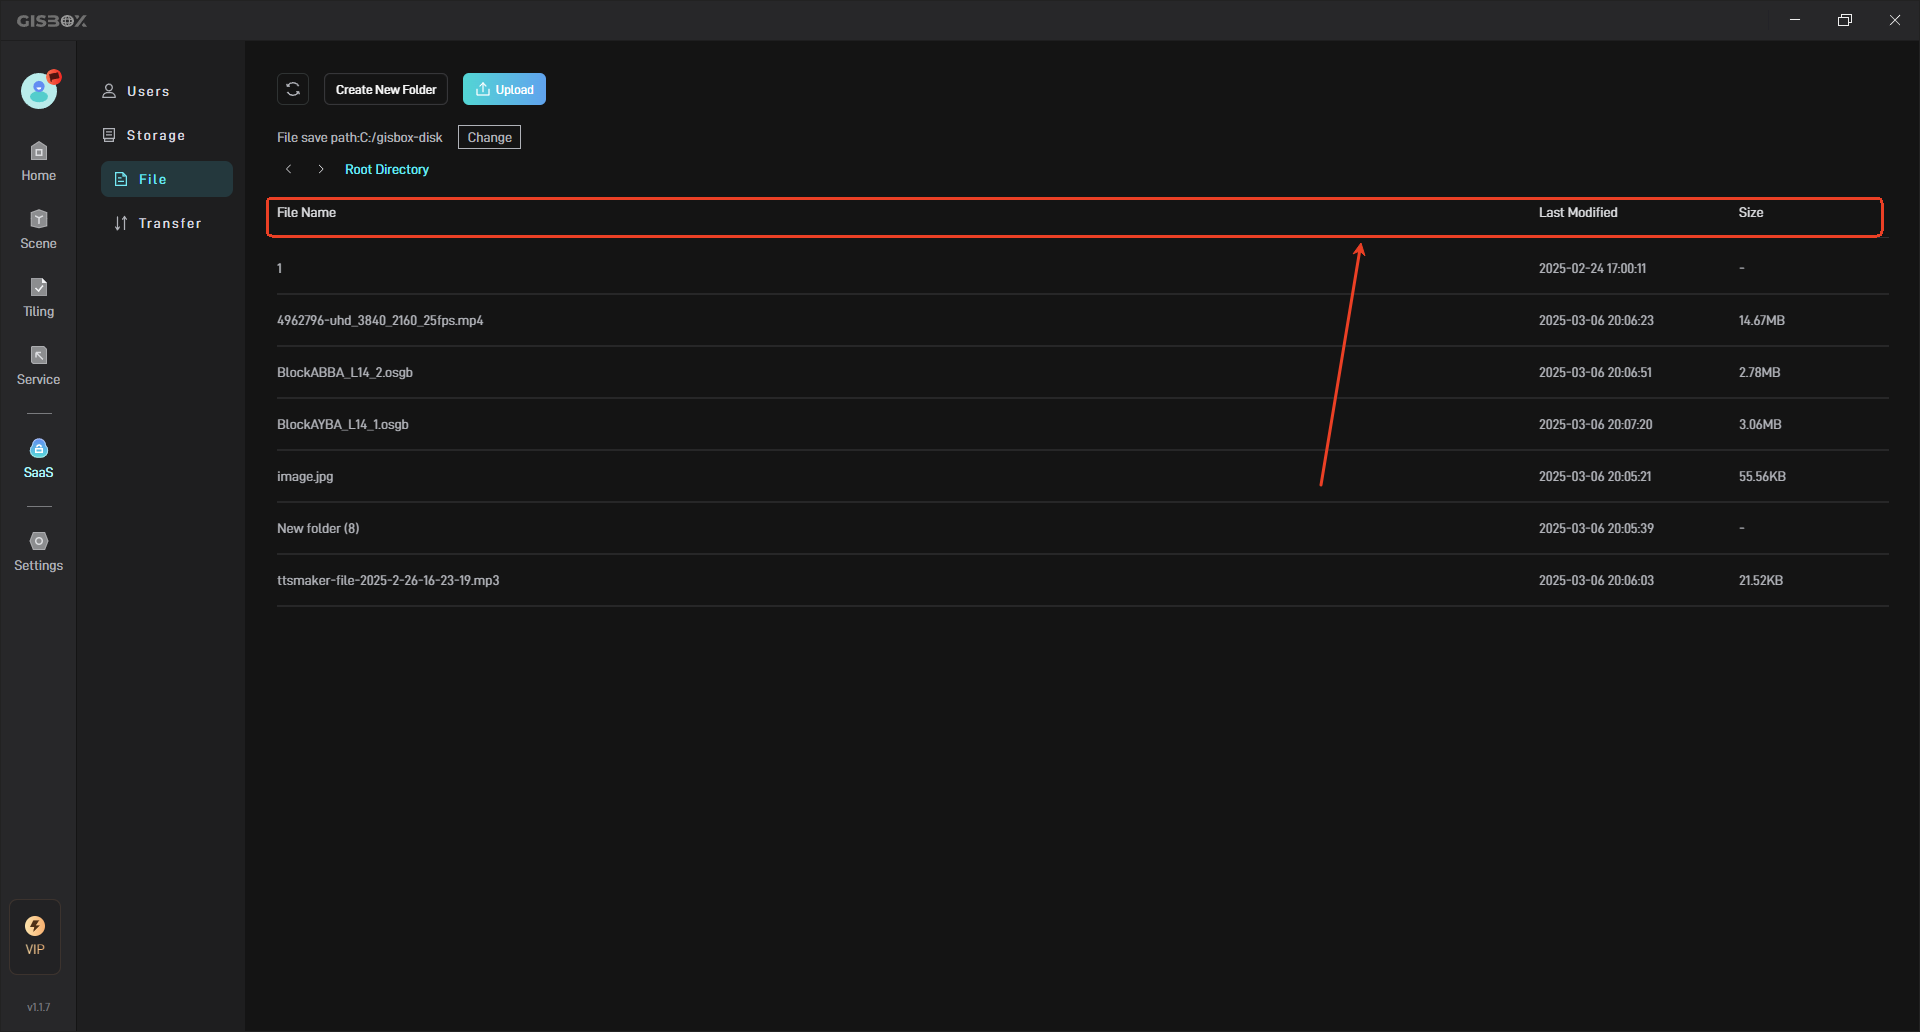
Click to switch back to the “File” interface to view all uploaded files, including: “File name”, “Last Modified”, and file “Size”, as shown below:
4. Configure SaaS Visit Address
After configuring the user role and file storage path, you need to configure the SaaS visit address (click here to view the “Network Setting Tutorial”). You can view the “SaaS Visit Address” in the “Network” of the “Settings” interface in the software, as shown in the figure below:

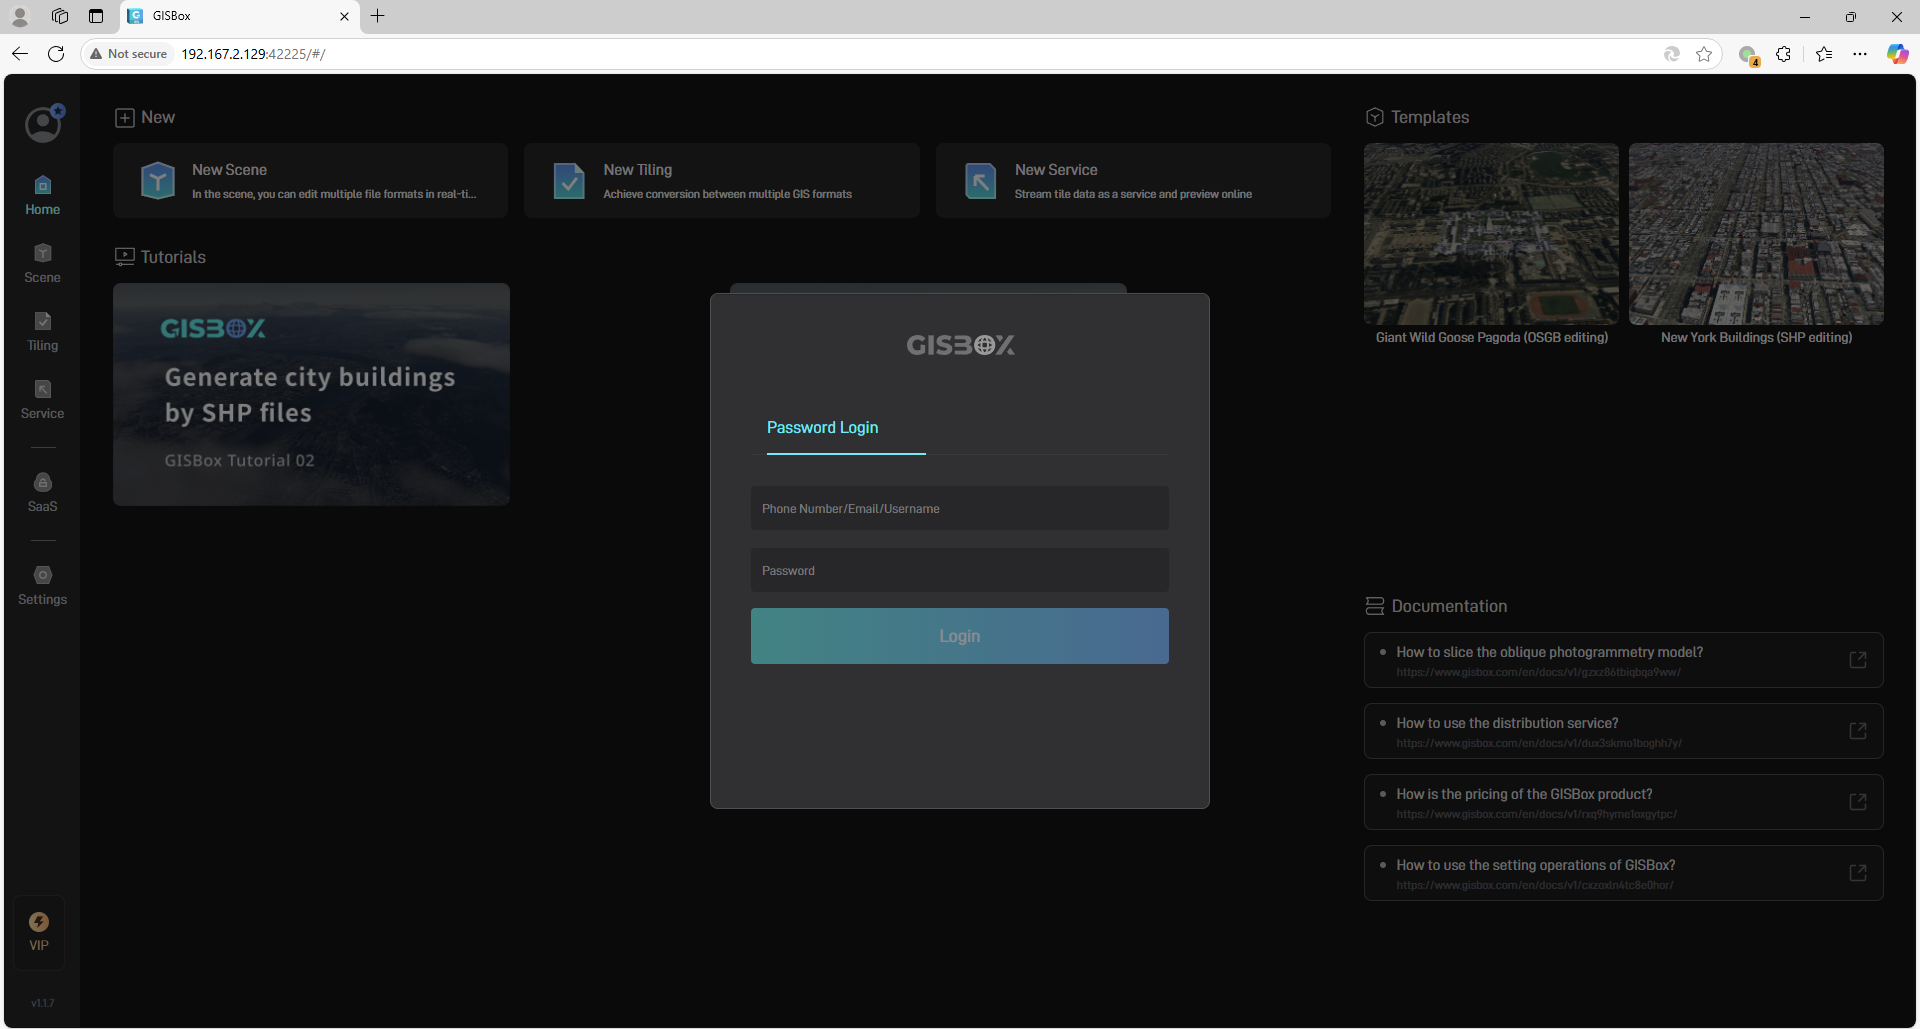
After clicking to copy the “SaaS Visit Address”, you can open the system through a third-party browser and log in to different role accounts.
5. Create Projects
After logging in to the character account on the browser, we can create scene projects, slice projects and distribution services. The following introduces them one by one:
[Tips] Before creating a project, please be sure to upload the files to be processed to the cloud drive in advance. Click here to view the operation tutorial.
5.1 Create a scene
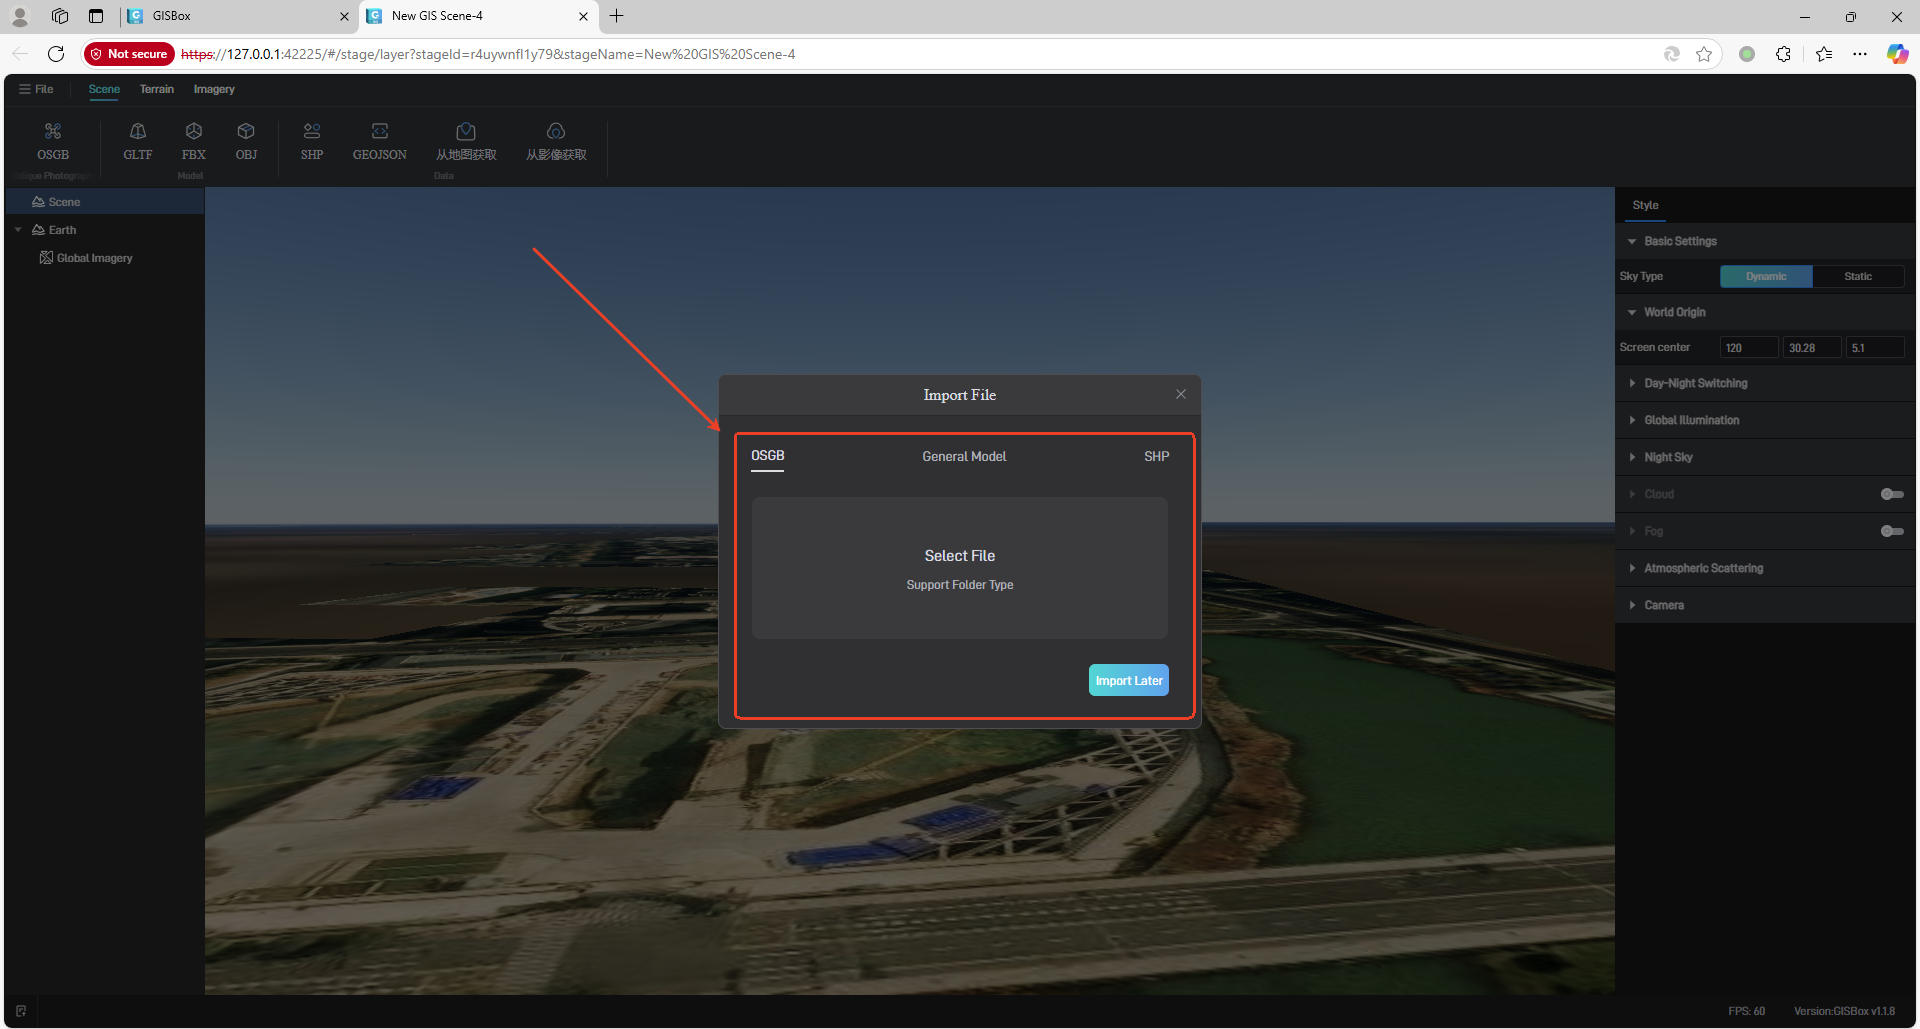
Click on the “Scene” column in the left menu bar, create a new scene and open it. At this time, the software will prompt us to import OSGB/General Model/SHP files, as shown below:
Click the corresponding type of file to import, and select the file to be imported from the cloud drive. Here we use the OSGB file in the cloud drive for demonstration, as shown in the following figure:
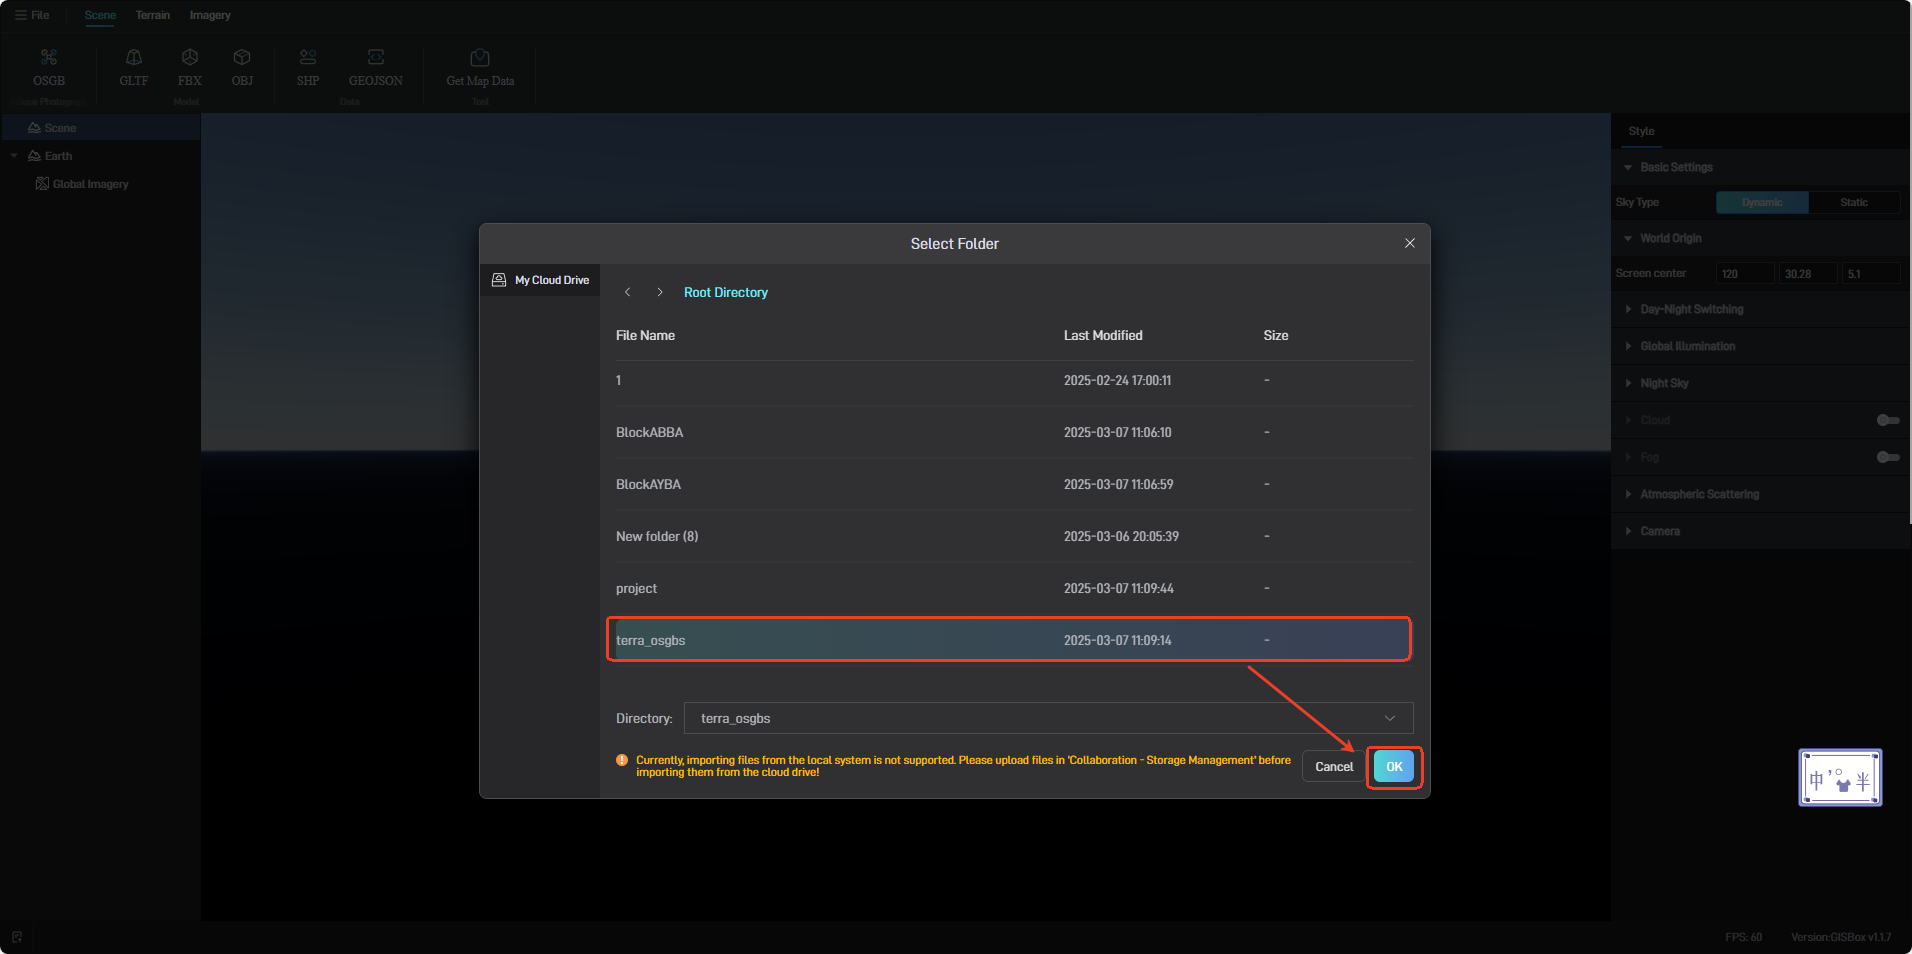
Click the “Import” button to successfully import the OSGB file. You can select and edit the OSGB layer in the left layer.
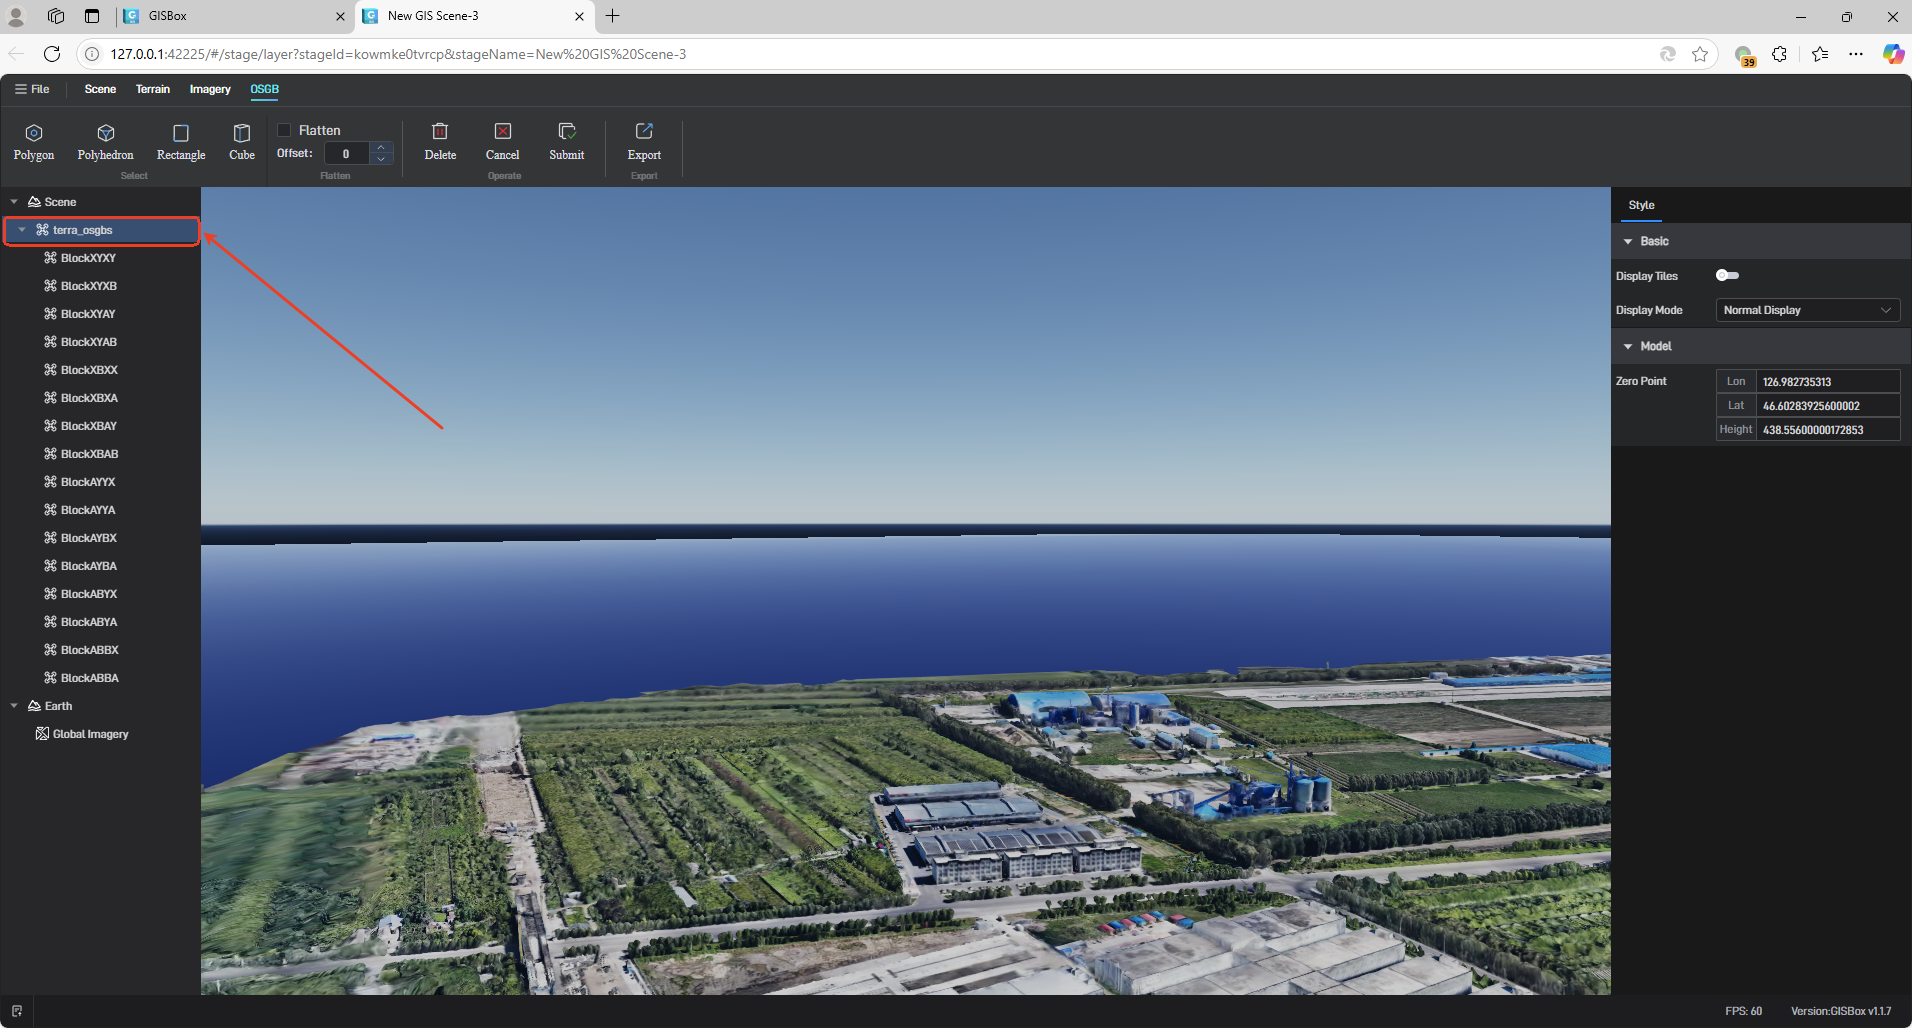
After completing the OSGB file editing, you can export the file to the cloud drive, as shown in the following figure:
For tutorials on tiling and service, please refer to: How to convert OSGB (oblique photography) files into 3DTiles files?
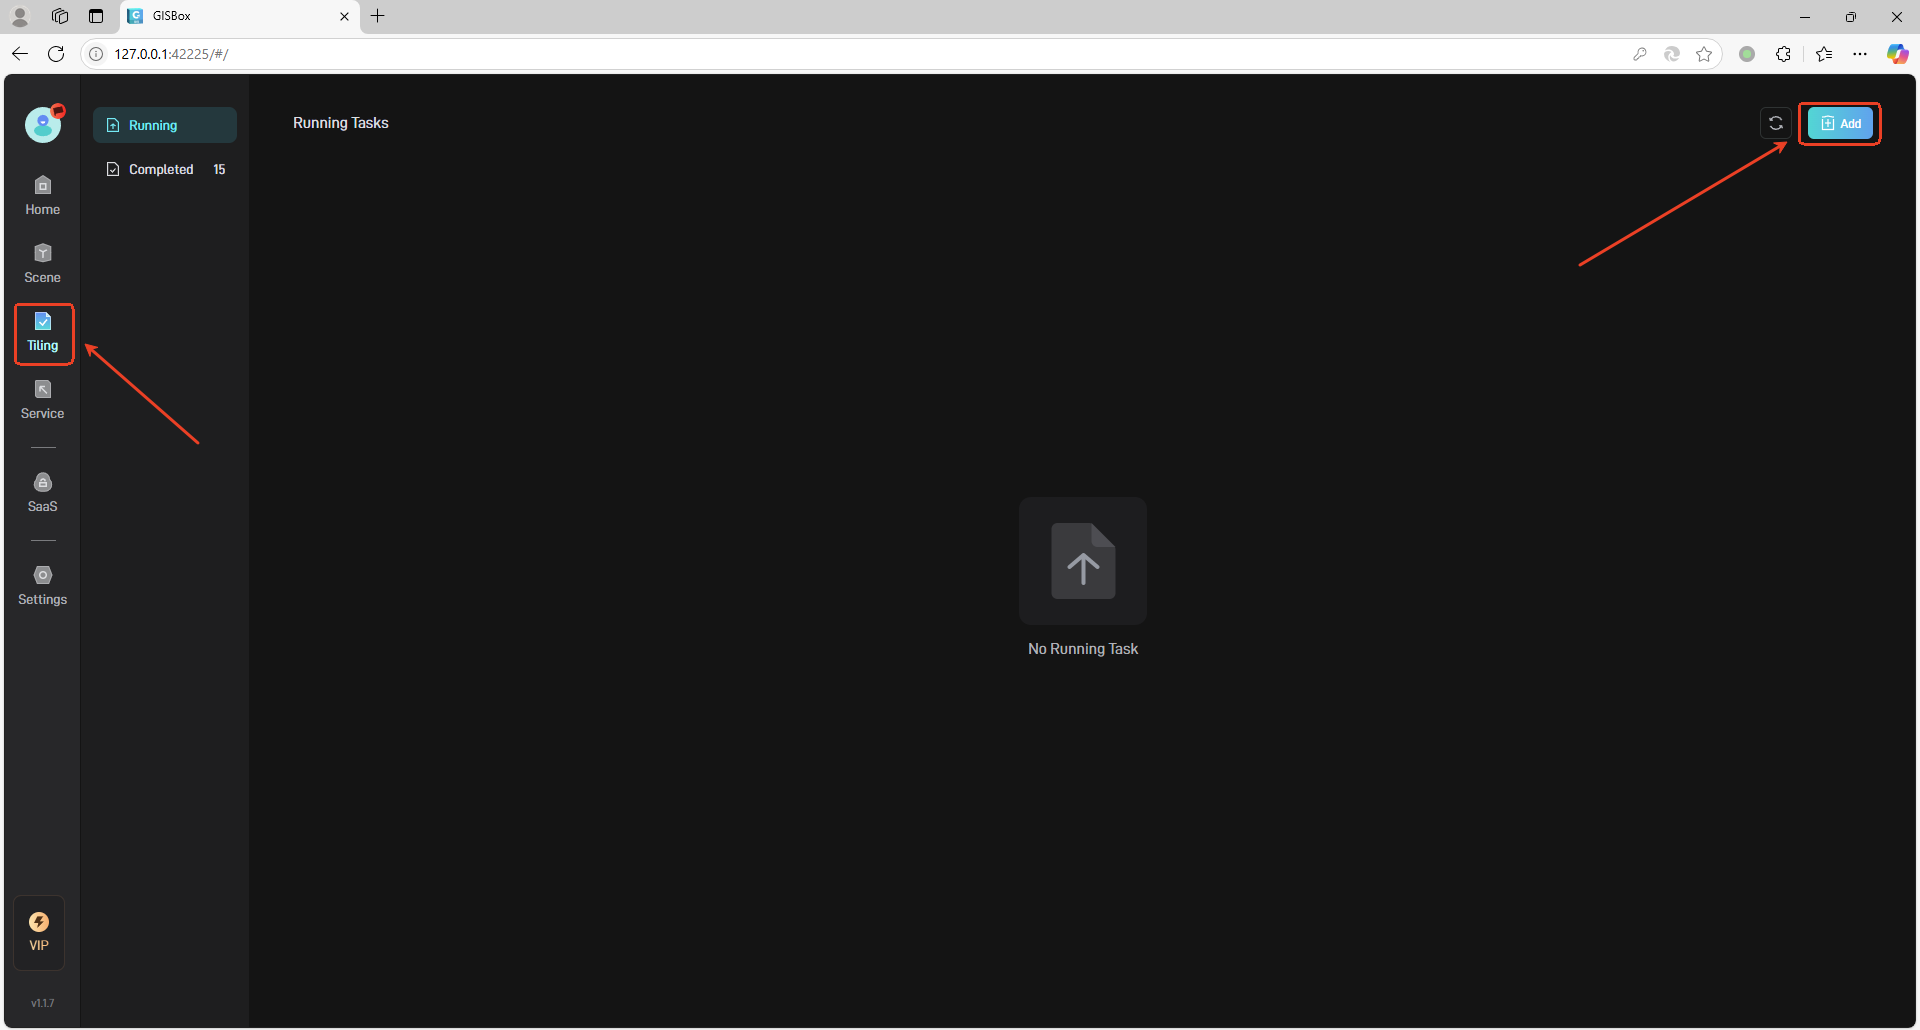
5.2 Create a Tile
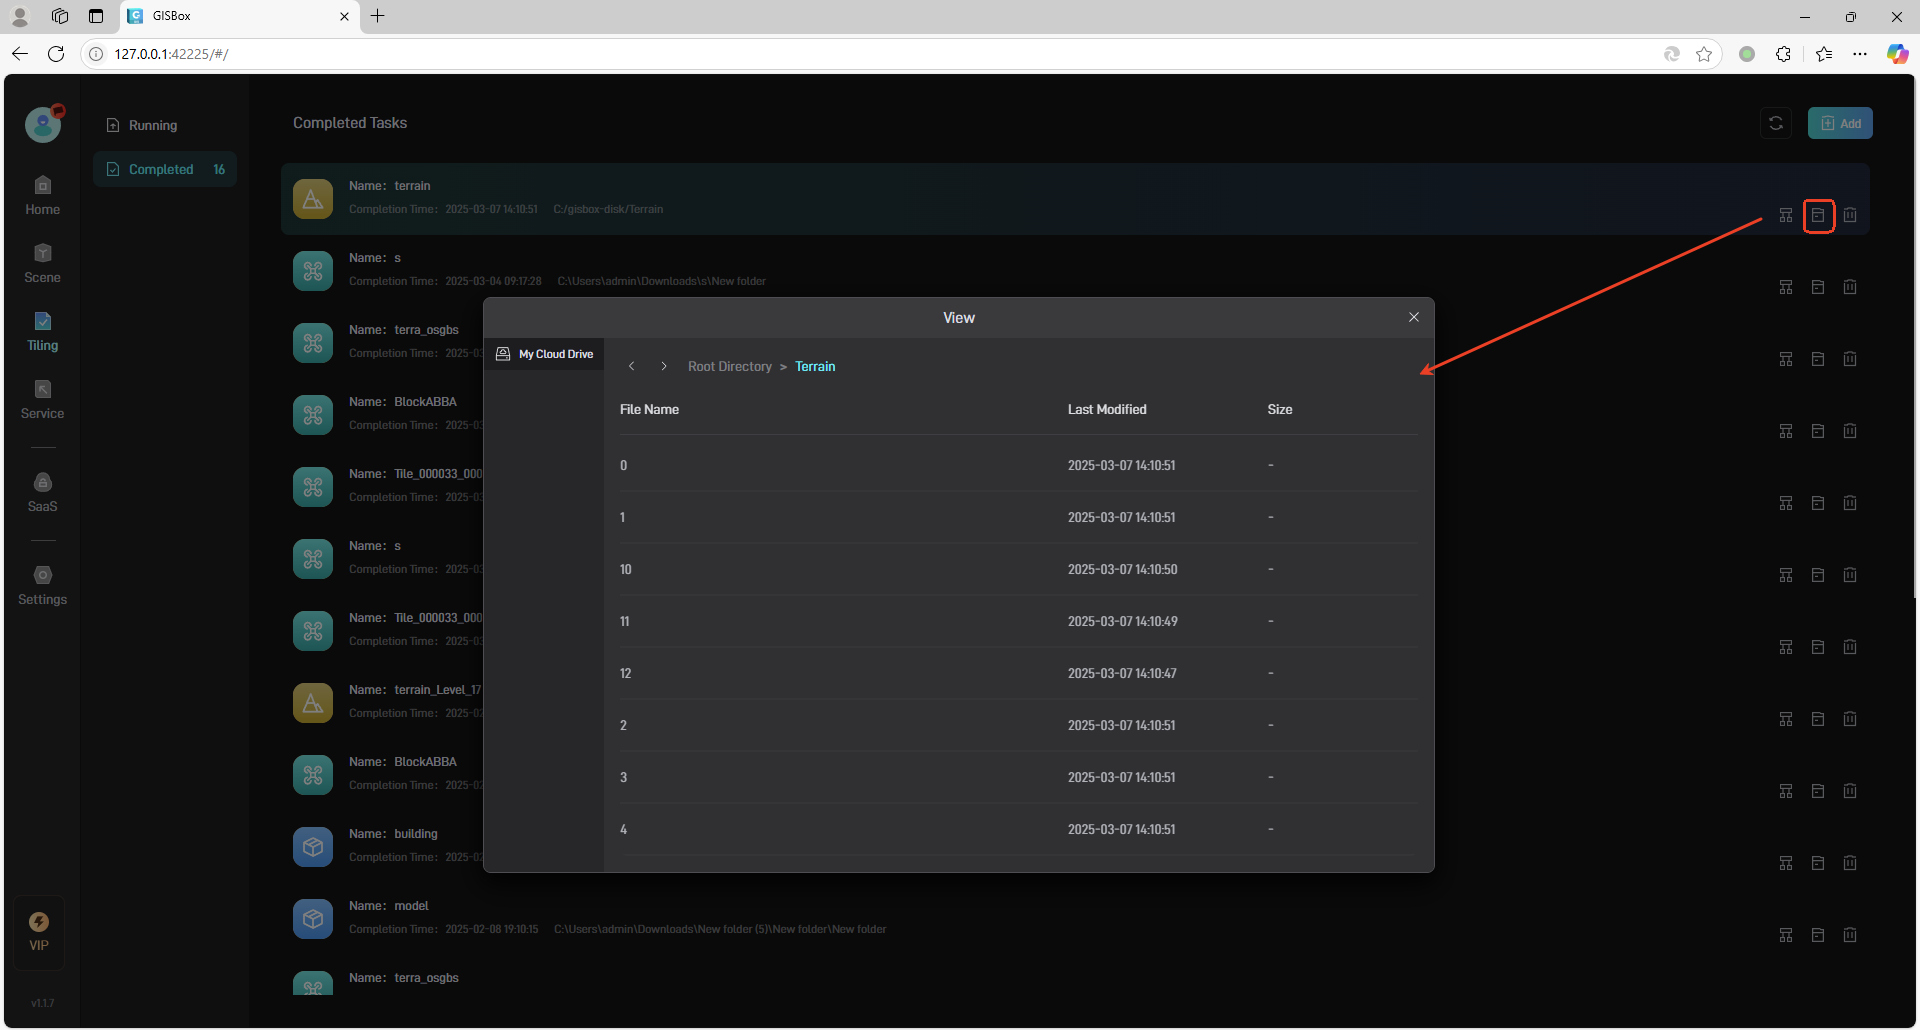
Click to switch to the “Tiling” column in the left menu bar, and click the “Add” button in the upper right corner, as shown below:
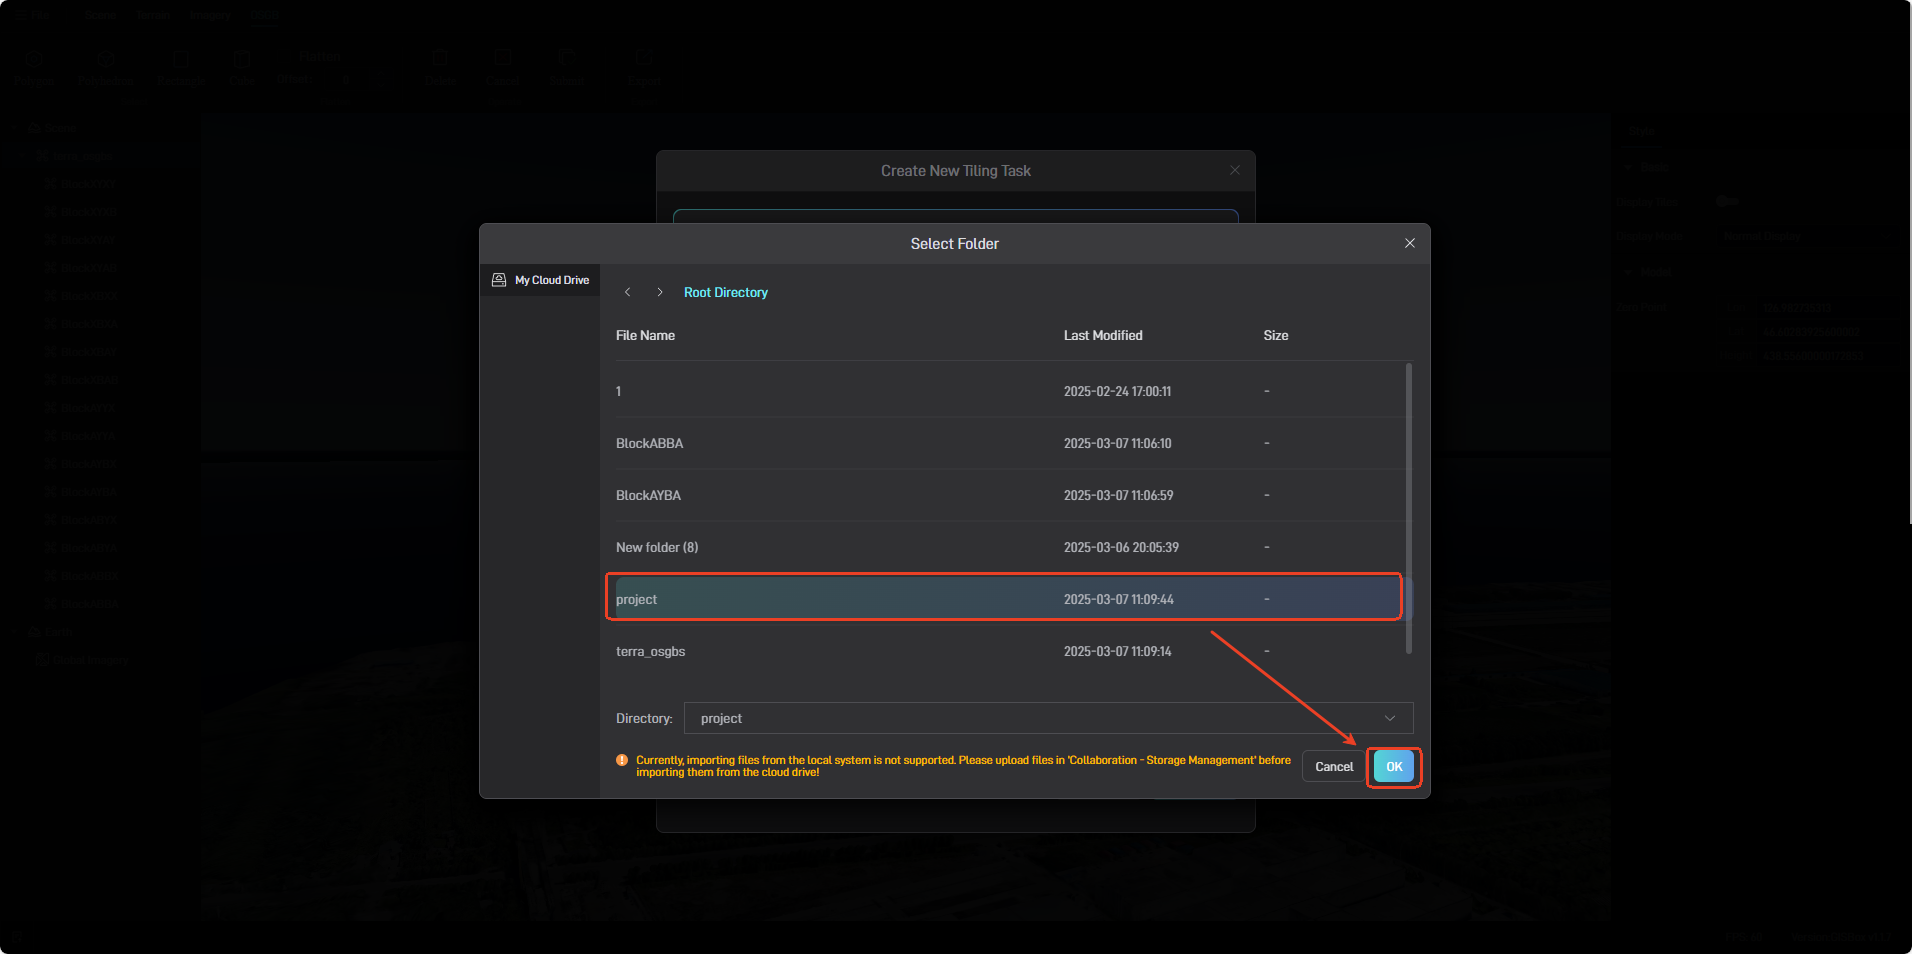
Here we use terrain tiles for demonstration. Select the file we need to import from the cloud drive. Click the folder icon on the right to set the path for file export. We need to save it in the cloud drive, as shown below:
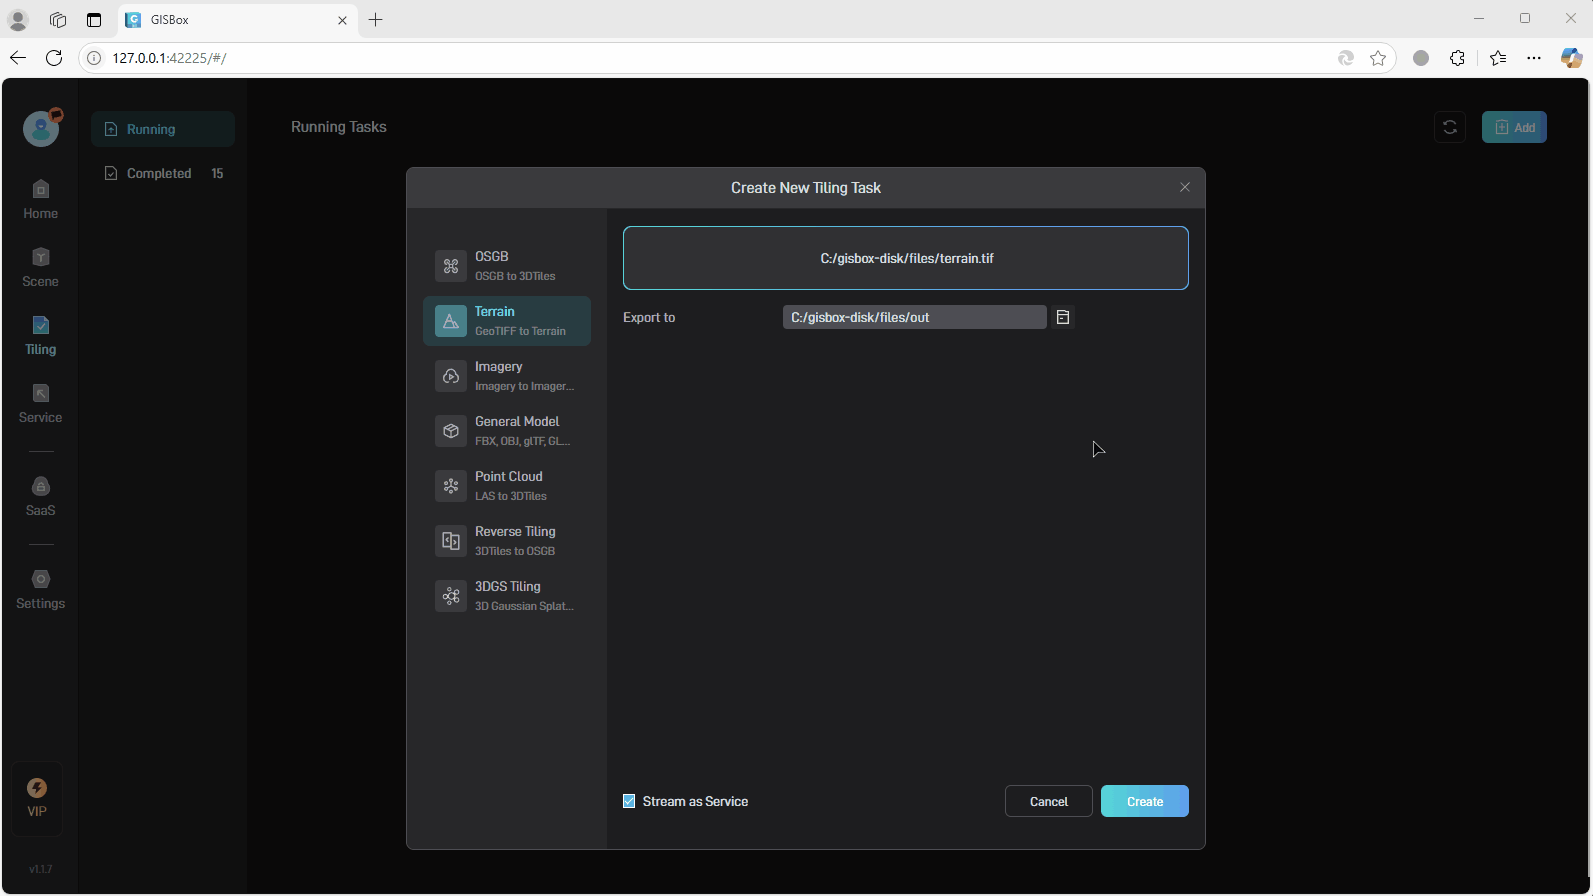
After the settings are completed, click the “Create” button to start the tiling task, as shown in the following figure:
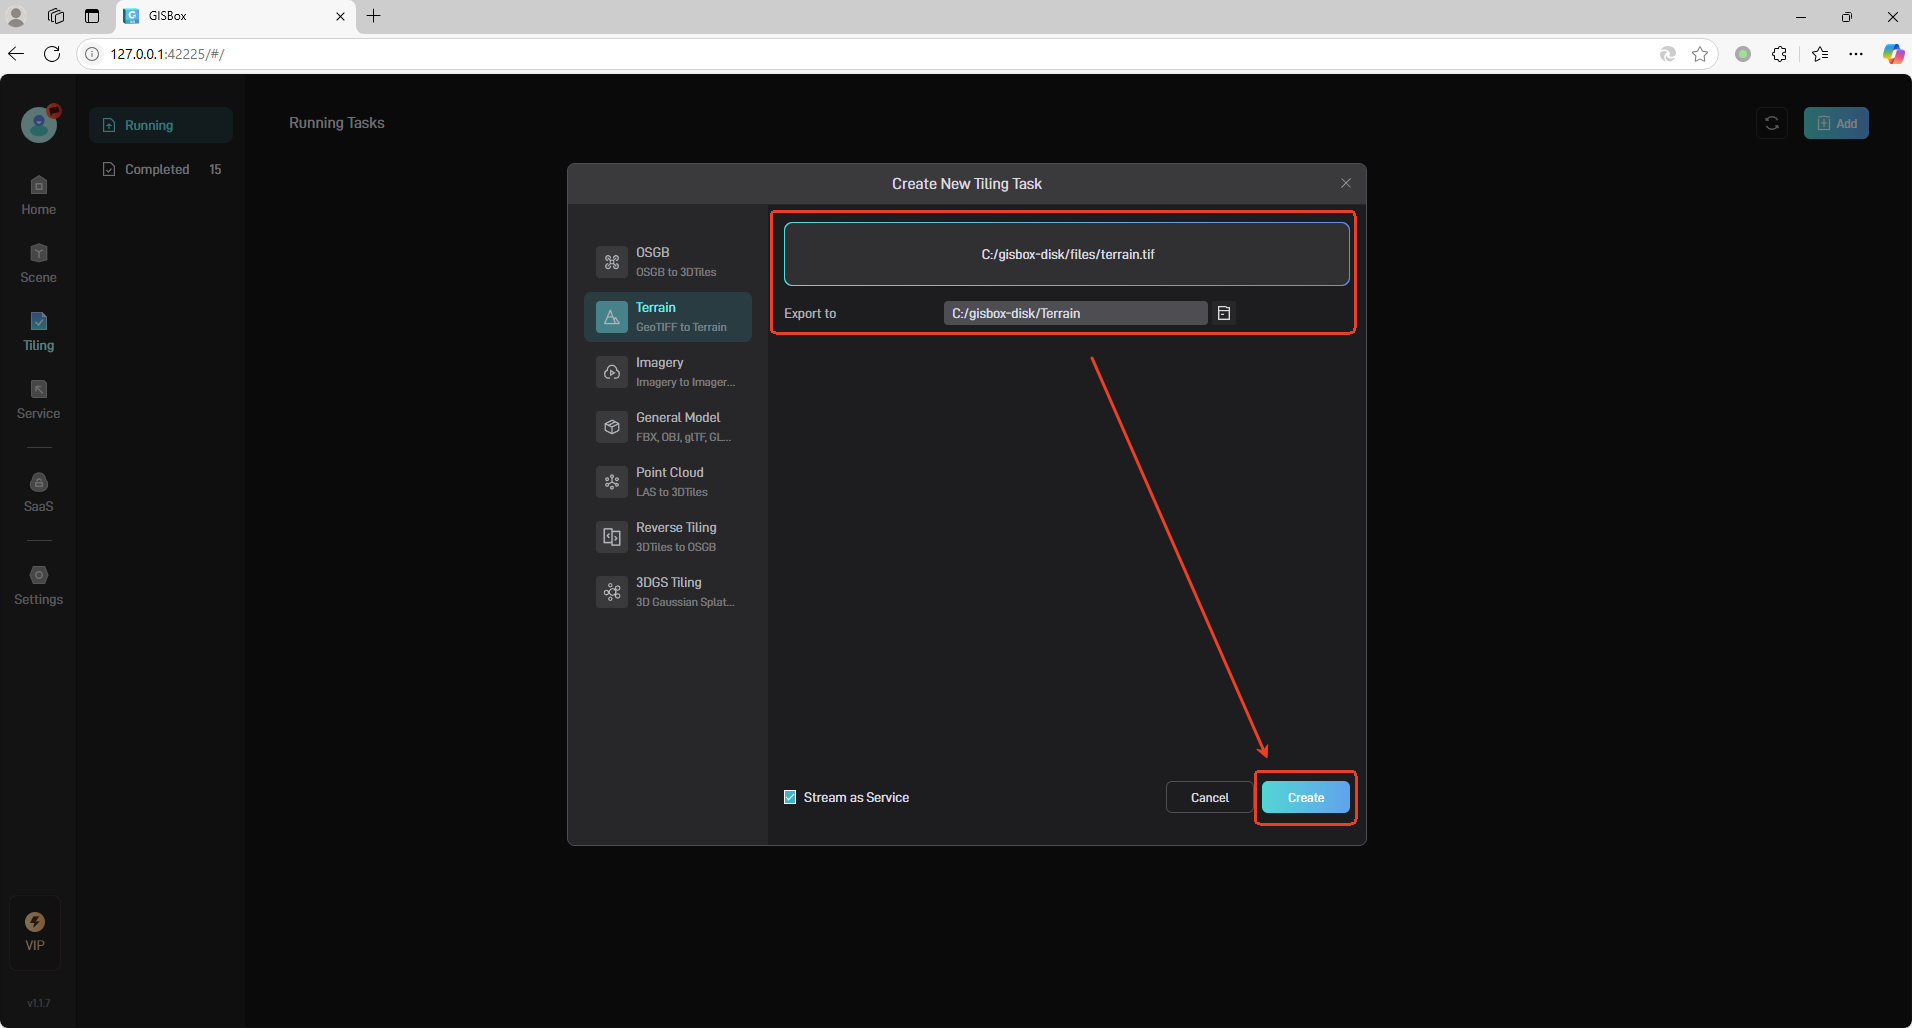
After the tiling task is completed, click the “Open Folder” button on the right to view the converted file, as shown in the following figure:
For a tutorial on tiling, please refer to: How to convert GeoTIFF format to Cesium’s Terrain format? (Terrain Tiling)
5.3 Create a Service
We use manually added services to demonstrate service creation. When tiling terrain files, if the “Stream as Service” setting is not checked, you need to manually add regular terrain data and then generate the corresponding terrain service.
In the left menu bar, click to switch to the “Service” column. In the “Terrain” interface, click the “Add” button in the upper right corner, as shown below:
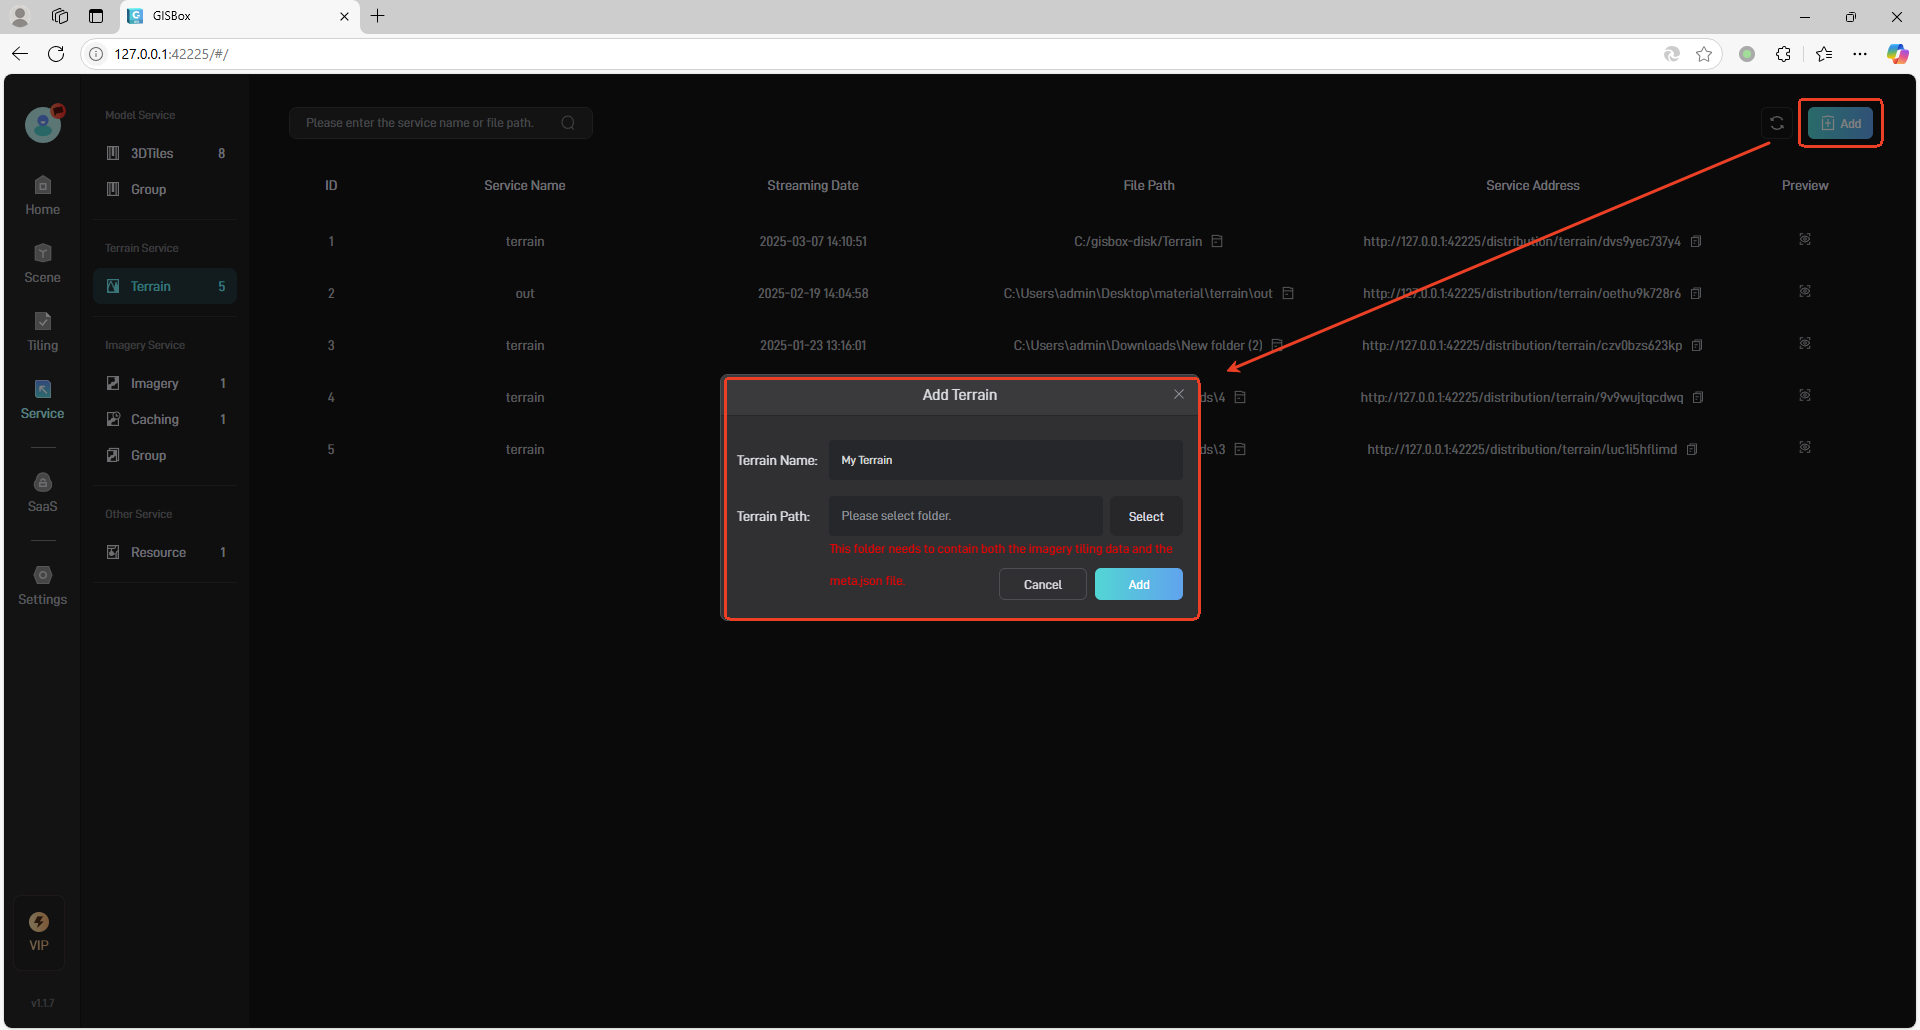
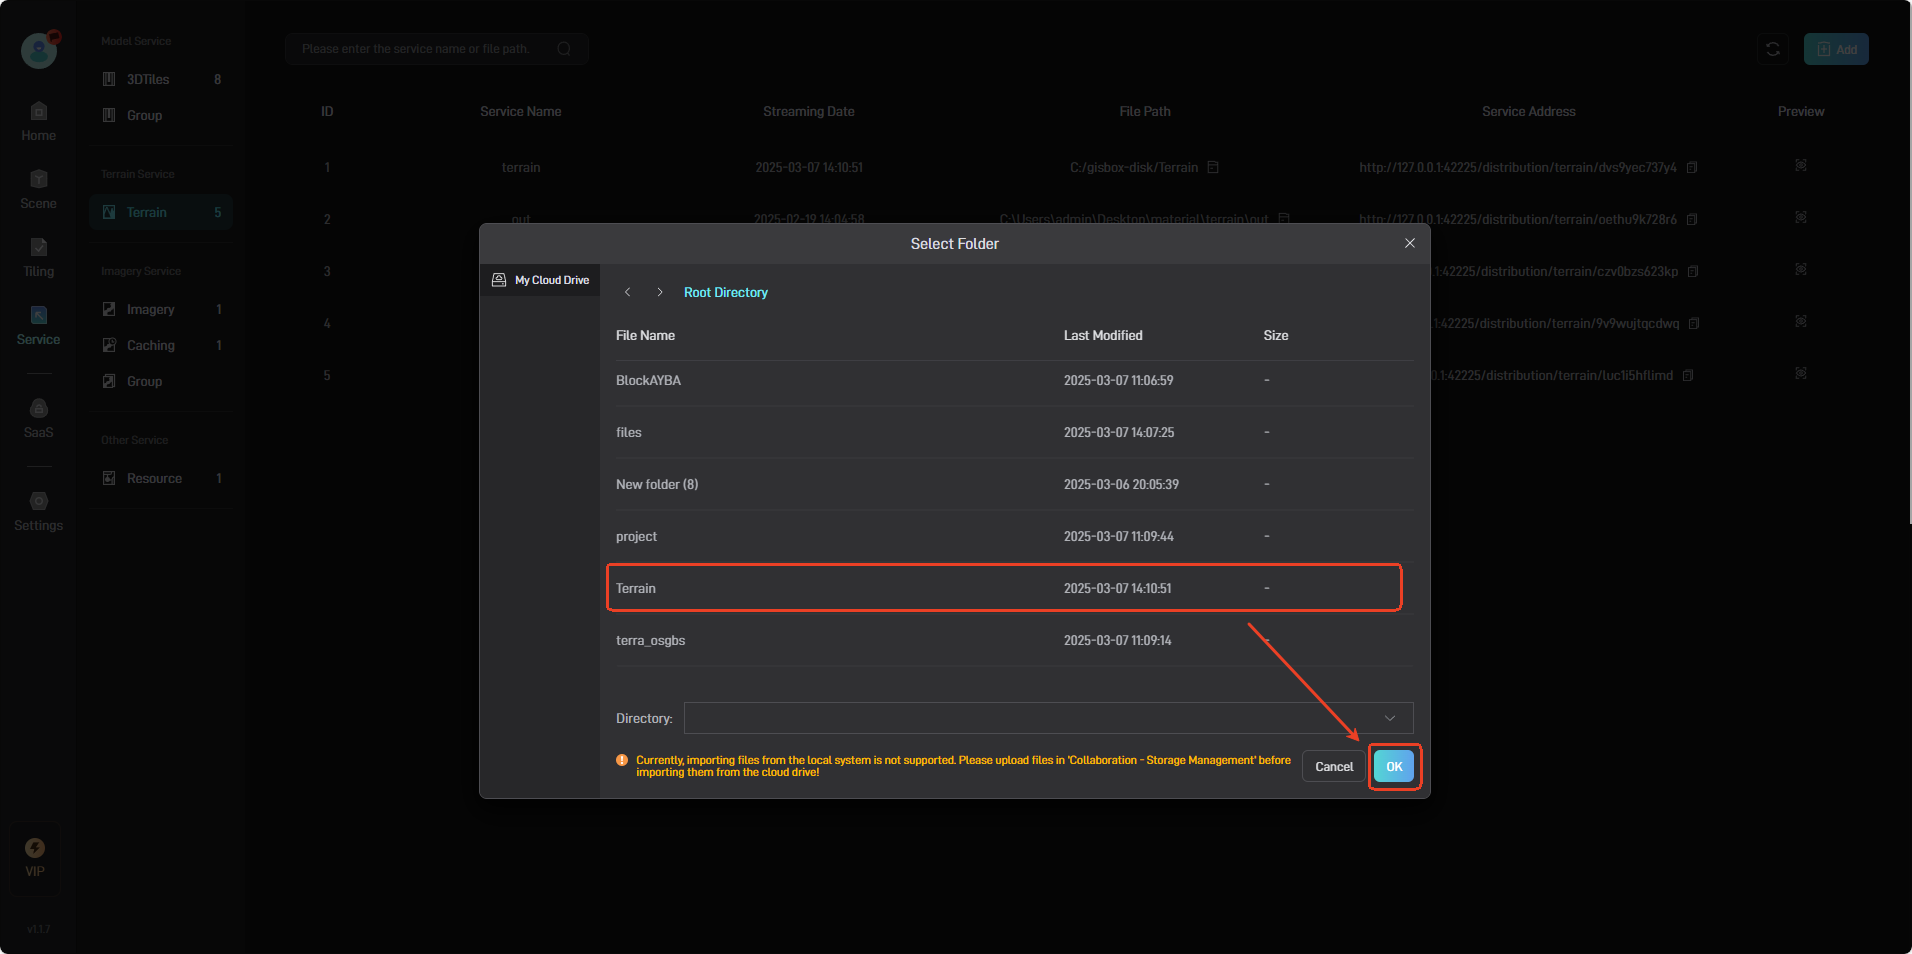
In the pop-up “Add Terrain”, select the terrain data file in the cloud drive, as shown in the figure below:
For the operation tutorial of the service, please refer to: General Terrain